Laugavegur Trail Iceland
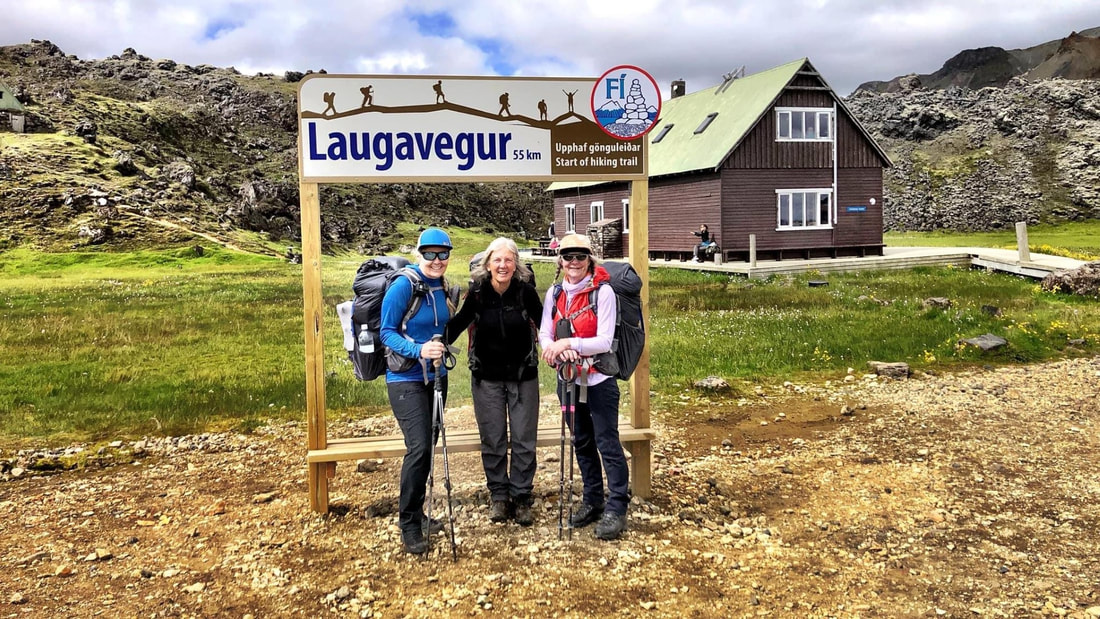
The Laugavegur trail is a 55km backpacking trail in Iceland that can be hiked hut-to-hut or by camping. Rated one of the top 20 trails in the world by National Geographic, it blew me away with it's constant 360 degree views and ever changing scenery and far exceeded my expectations. A must do! You can also choose to extend this trail 24km to Skogar if you want as well.
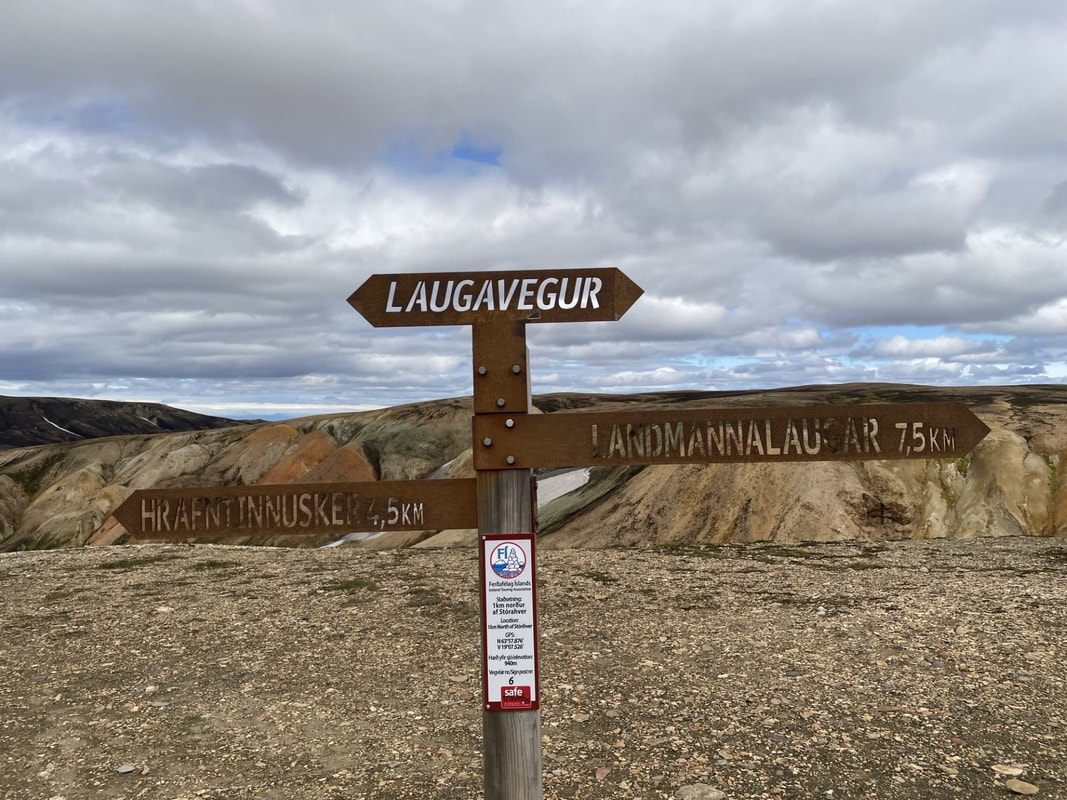
Day 1: Landmannlauger to Hrafntinnusker (July 13th, 2023)
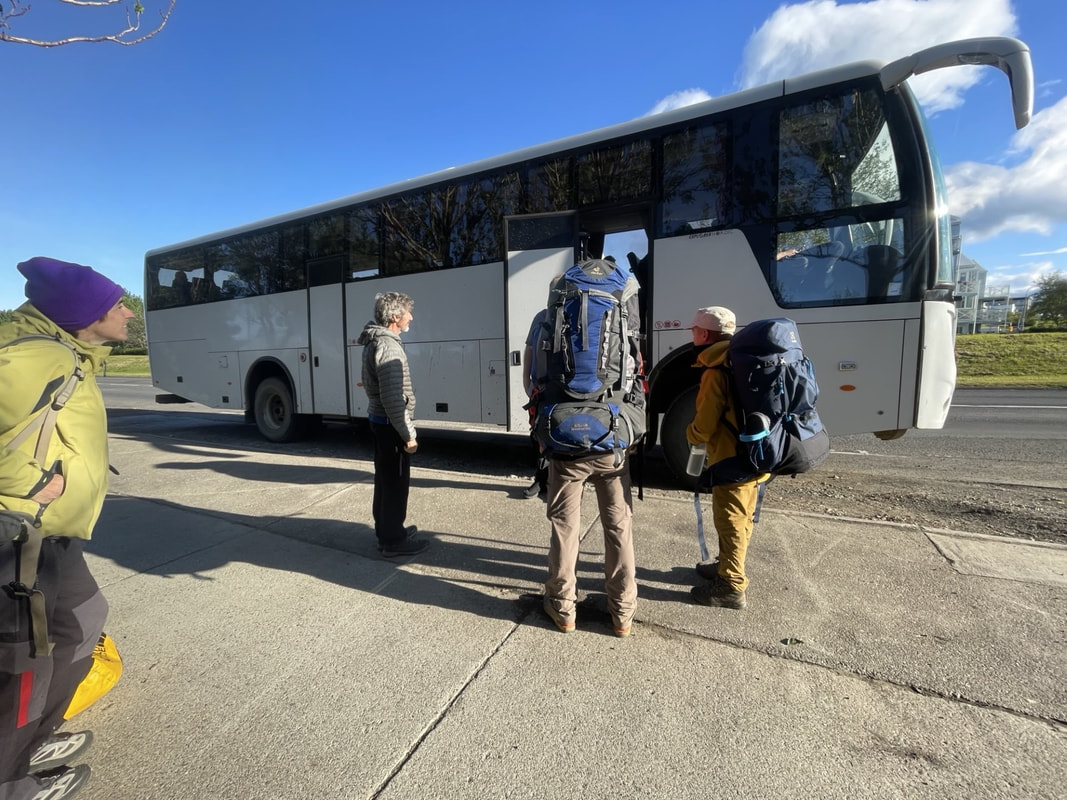
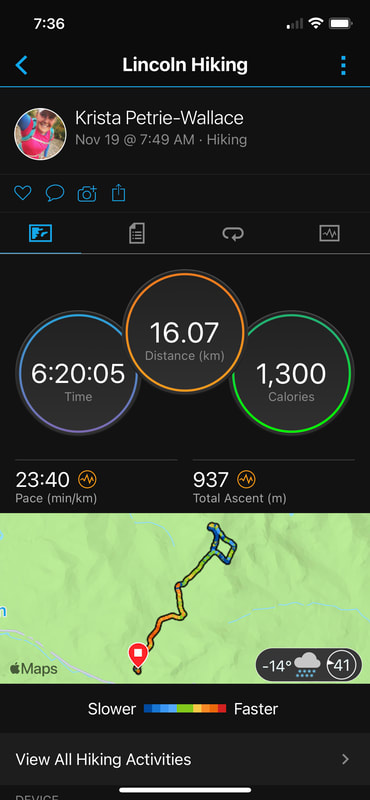
The day began at the Reykjavik campsite at the bus stop hoping to get on the 7:30AM Trex bus to Landmannlauger. This was a day later after we intended to head out due to some bad travel karma flying to Iceland from Canada. I had a 24 hour plane delay and a 36 hour baggage delay. The Trex bus pulled up and this was not any old coach bus; it was an off-road version, capable of driving on rough terrain and fording rivers. We hopped on and took the 4 hour journey to Landmannlauger. The last hour of this journey was on a bumpy gravel road that you could understand why they needed these off-road vehicles for. Even then, we arrived at Landmannlauger with the bumper hanging off!
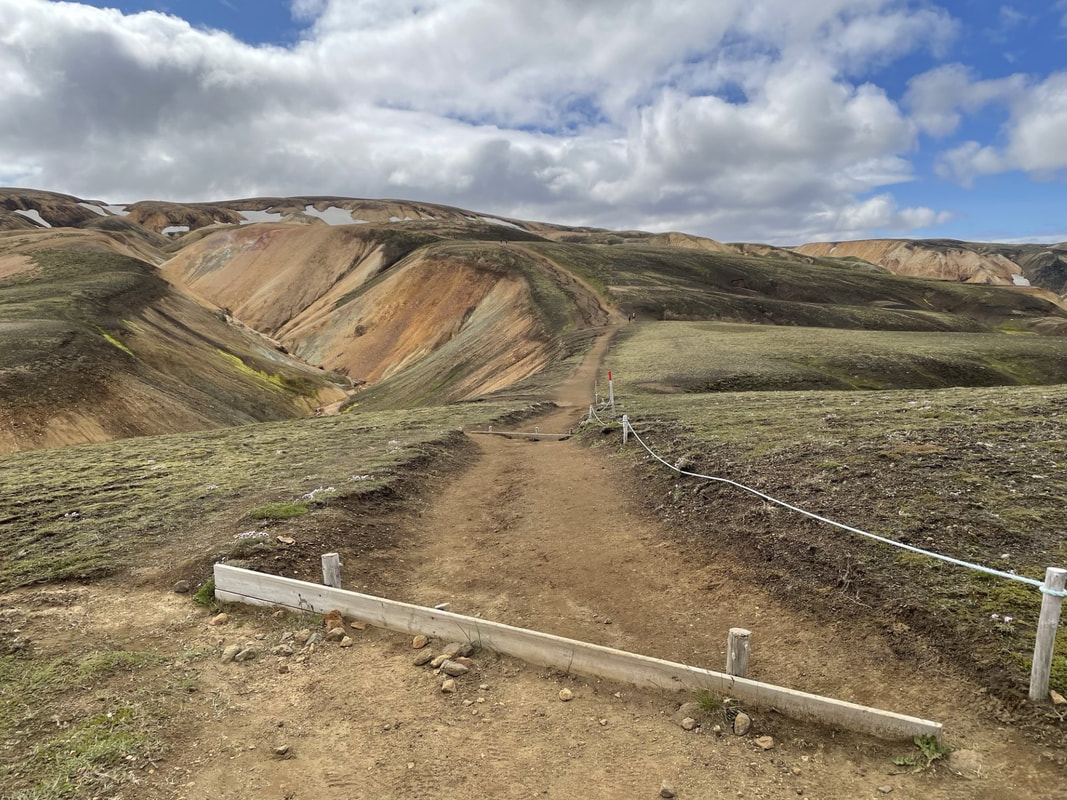
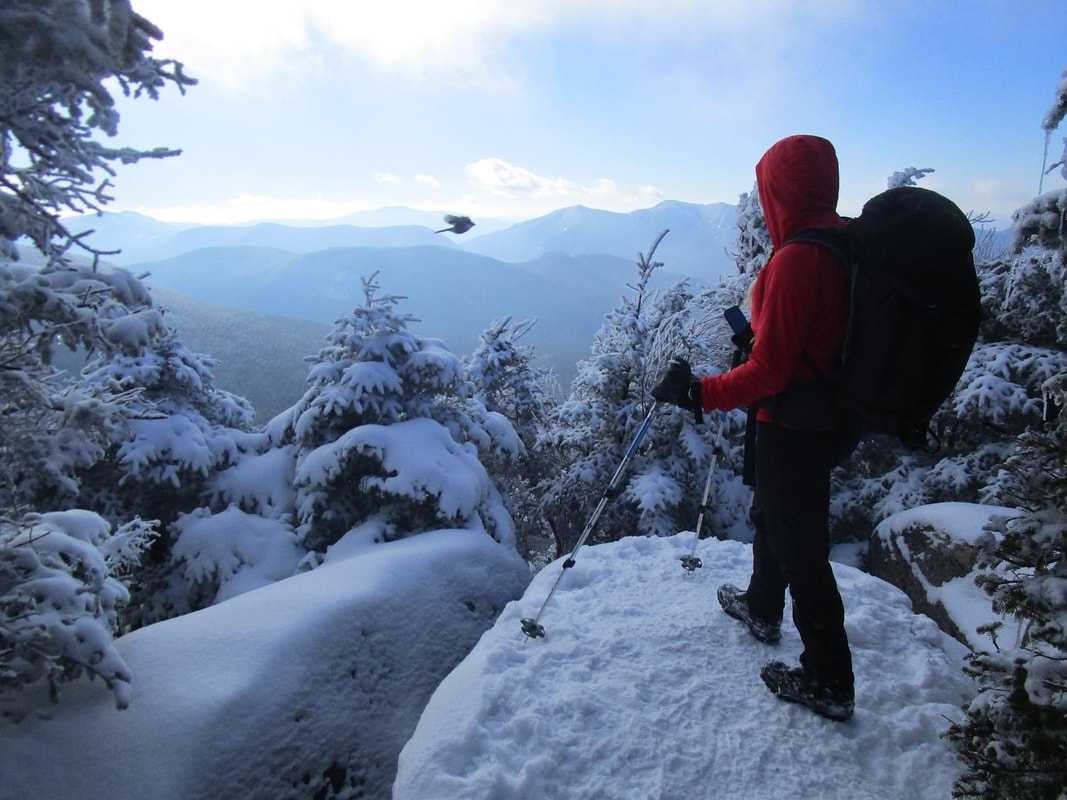
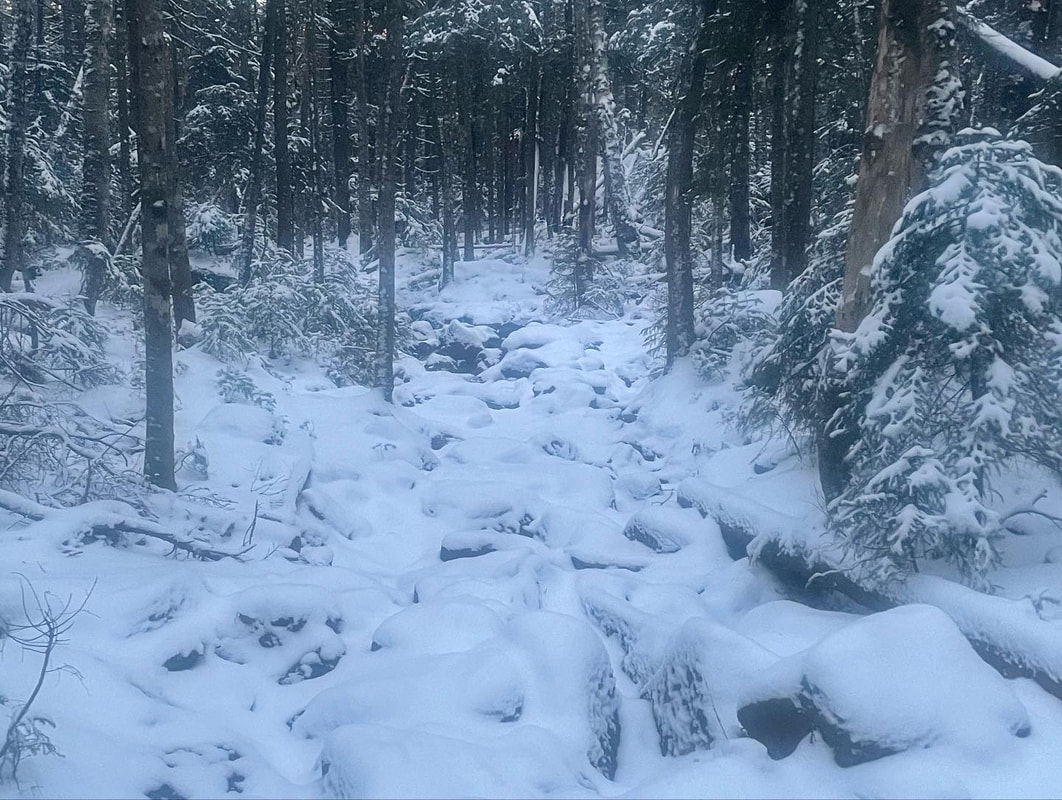
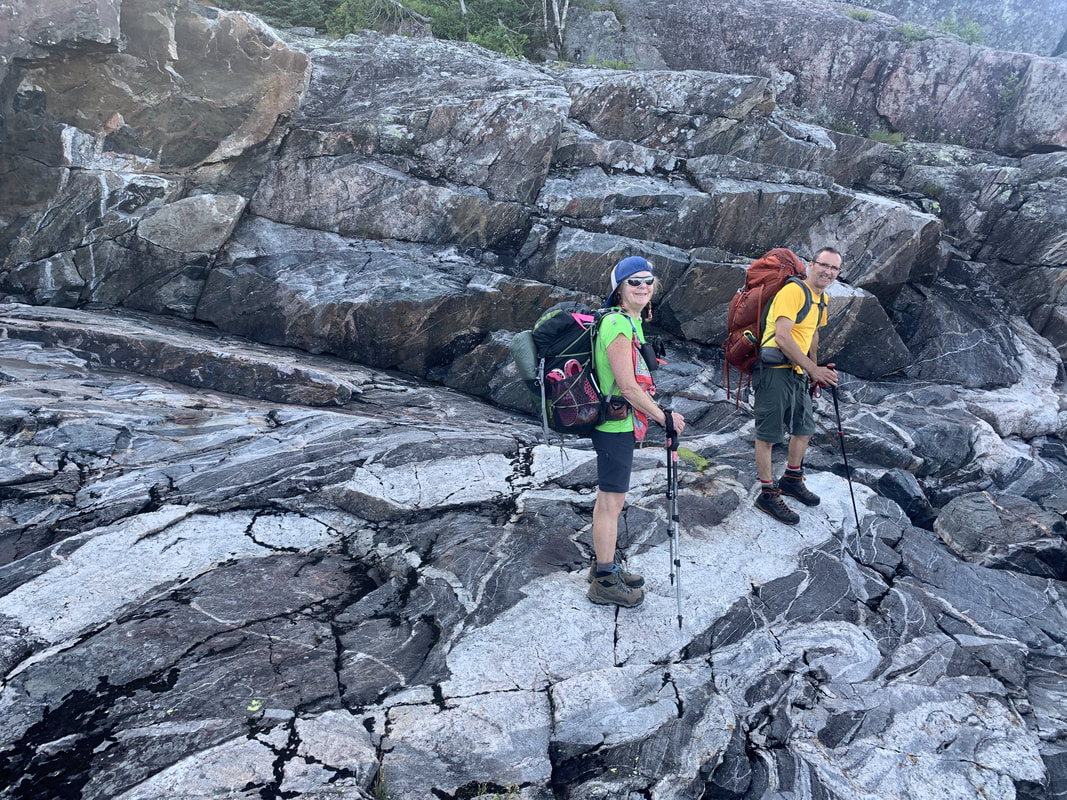
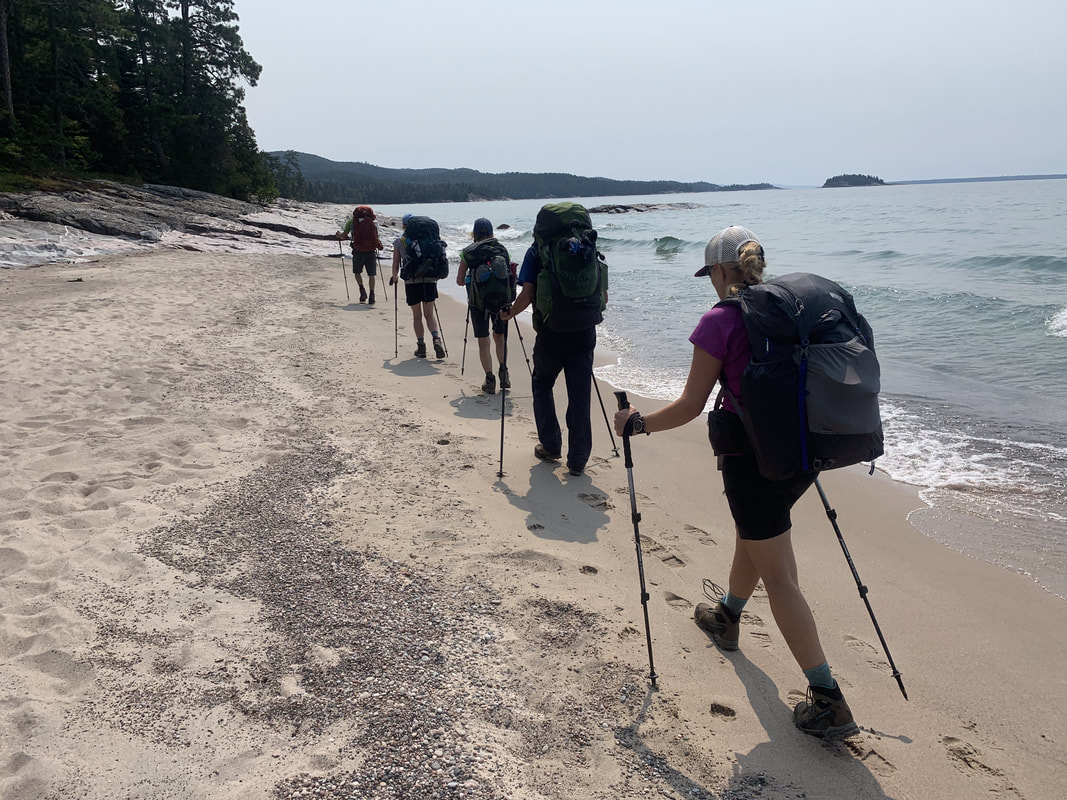
Here we met up with our travel companions whose travel karma was much better than ours. After a brief walk around the hut and hot spring area and a quick bite to eat, we took off around 12:30PM. The trails were initially quite busy with many day hikers exploring the trails in the vicinity of Landmannaluger. It wasn't too long before we were on the Laugavegur trail proper with much less people. Already the scenery was stunning and we were stopping often to take photos. We climbed for much of the first hour or so, and then the trail flattened out. The trail was fairly wide in most places and was mainly a dirt gravel path like you would see in the alpine zone in most mountain ranges.
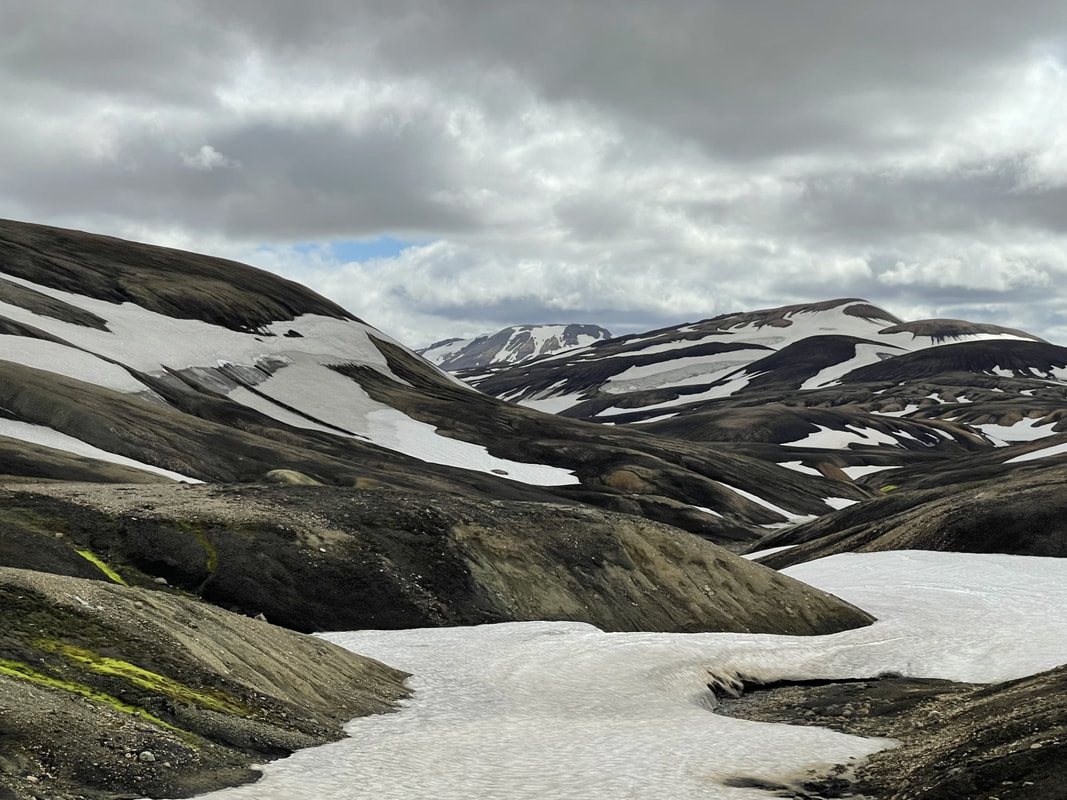
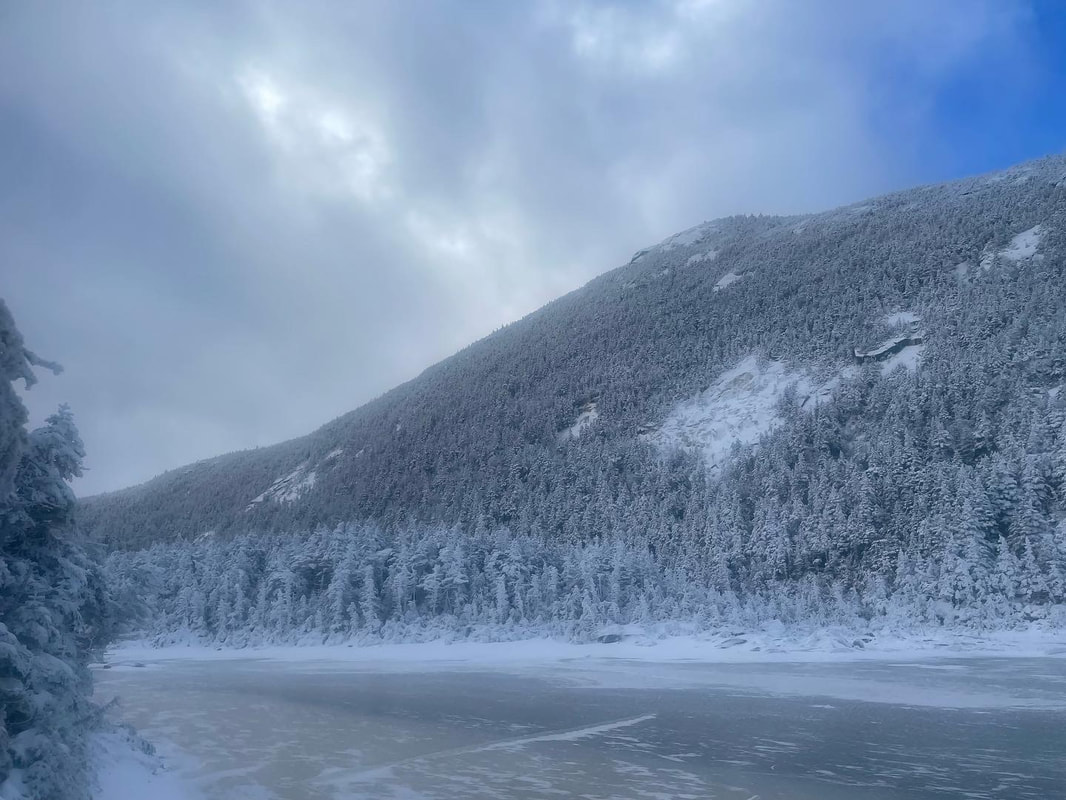
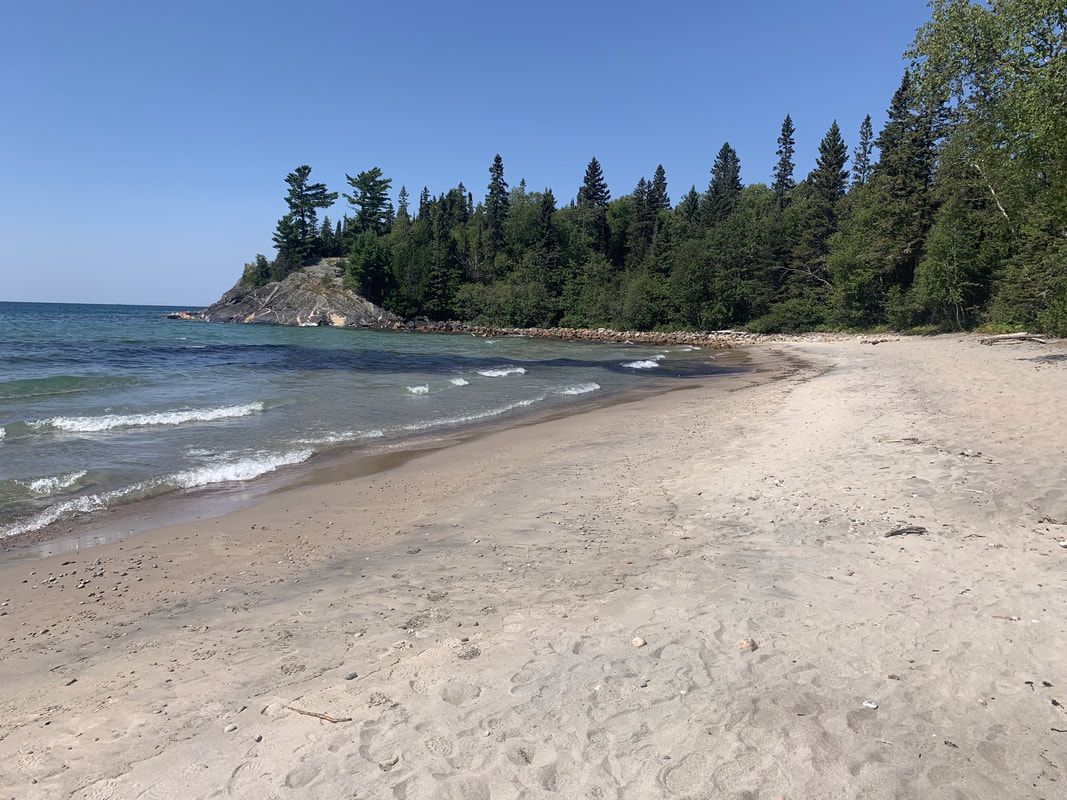
The distance to our first campsite was 11km and was composed of mainly rolling rhyolite hills with snow patches and small lava fields. Some hiker choose to blow through this hike with long distances per day (doable) but we chose to soak in all the non-stop 360 degree views and spend time taking photos and enjoying our time. It took us 3 hours to get to Hrafntinnusker even though the average time is 4-5 hours. At 63 degrees latitude in July, there is no time pressure to get from hut to hut as it never gets dark!
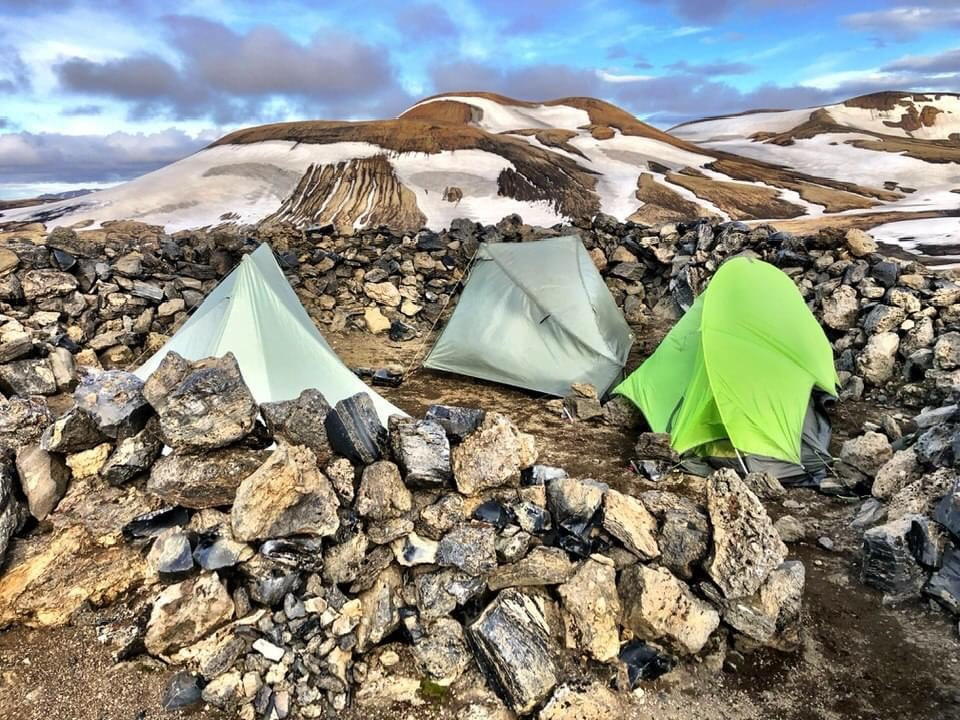
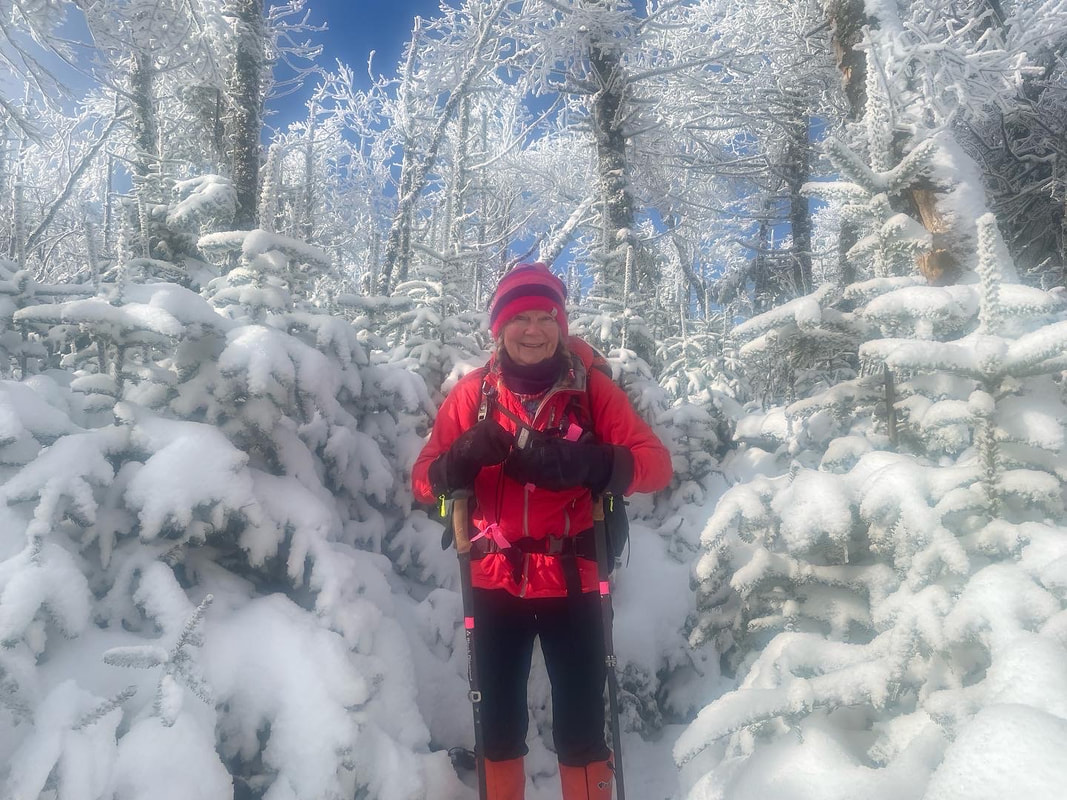
We arrived at the Hrafntinnusker hut area and paid our camping fees by VISA in the Information hut. Note: I never used cash once my entire trip in Iceland. They take VISA everywhere! We set up our tents inside a rock ring to give us protection from the wind and then headed up to the camper shelter (under construction in 2023) to get out of the cold wind and eat our meals. Also note: every hut sells canned Pilsner beer (2.5%), and some snacks like Pringles or chocolate bars for sale.
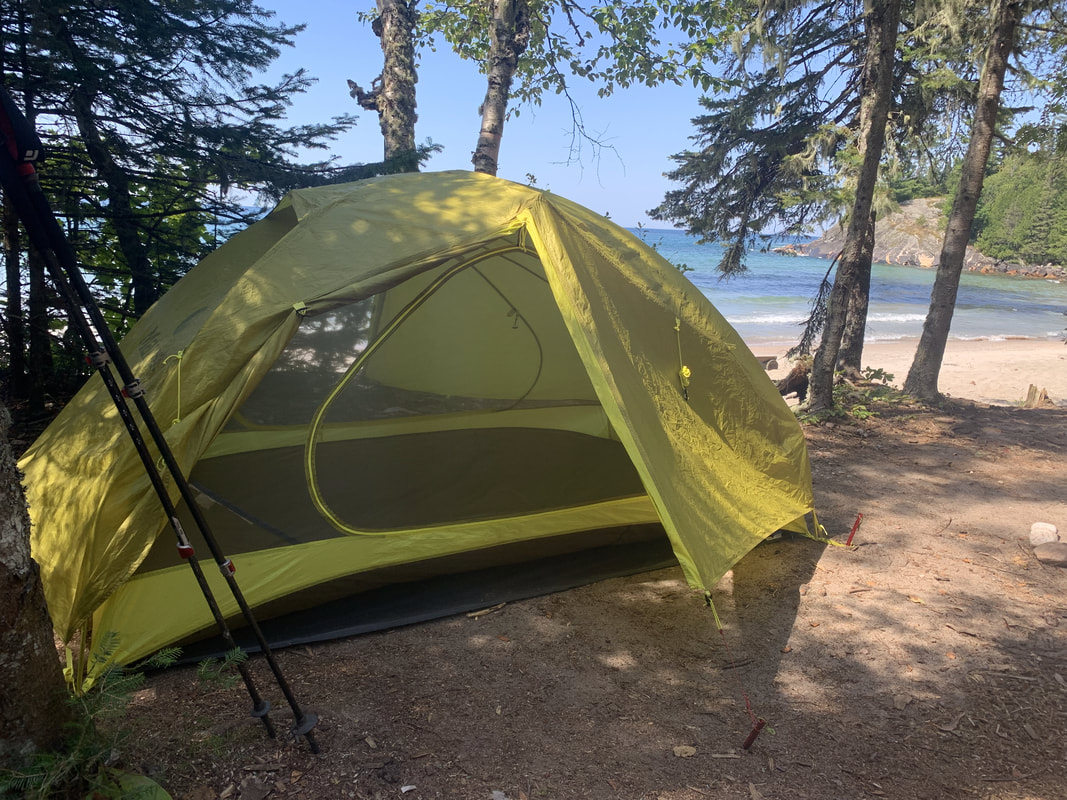
Daytime temperatures were around +10C and lows around +4C. This doesn't factor in the windchill which always seems to be present in these open areas and at this altitude of 3285ft. The windchill for the night I spent at Hrafntinnusker was -1C. July is part of the dry season, and we only had a bit of rain overnight the first night. I am pleased to report my lightweight trekking pole tent (Durston Xmid 1P) withstood the violent gusts of wind throughout the night. Check out my video below!
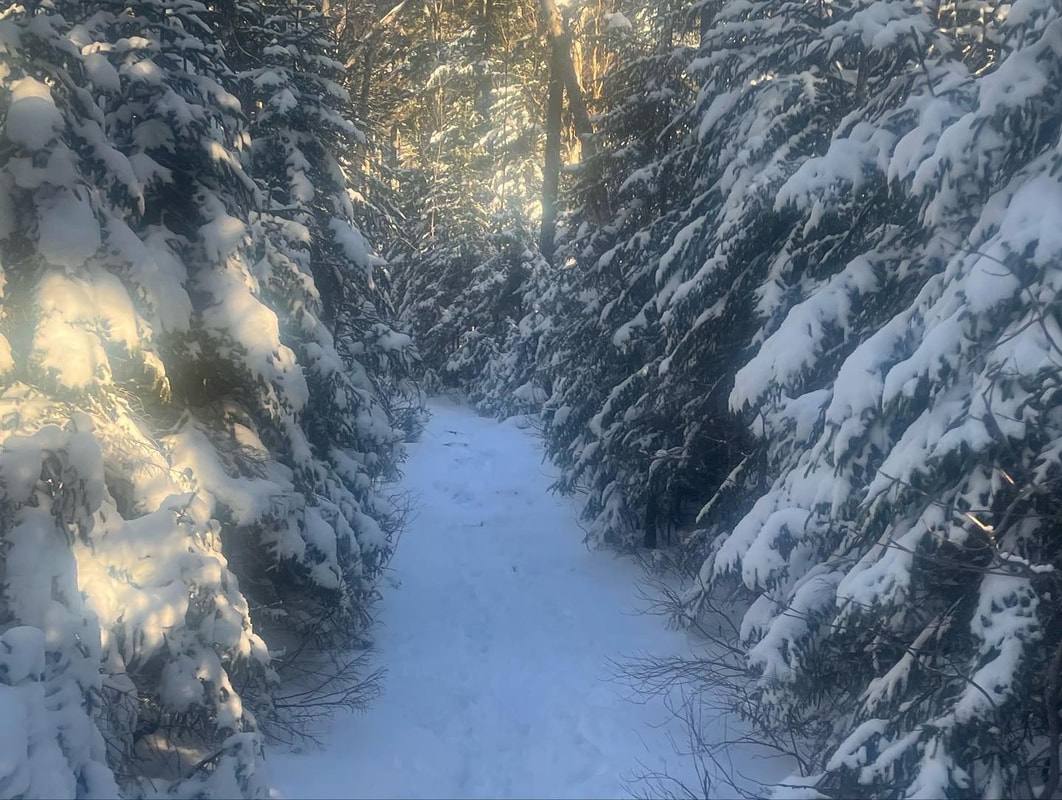
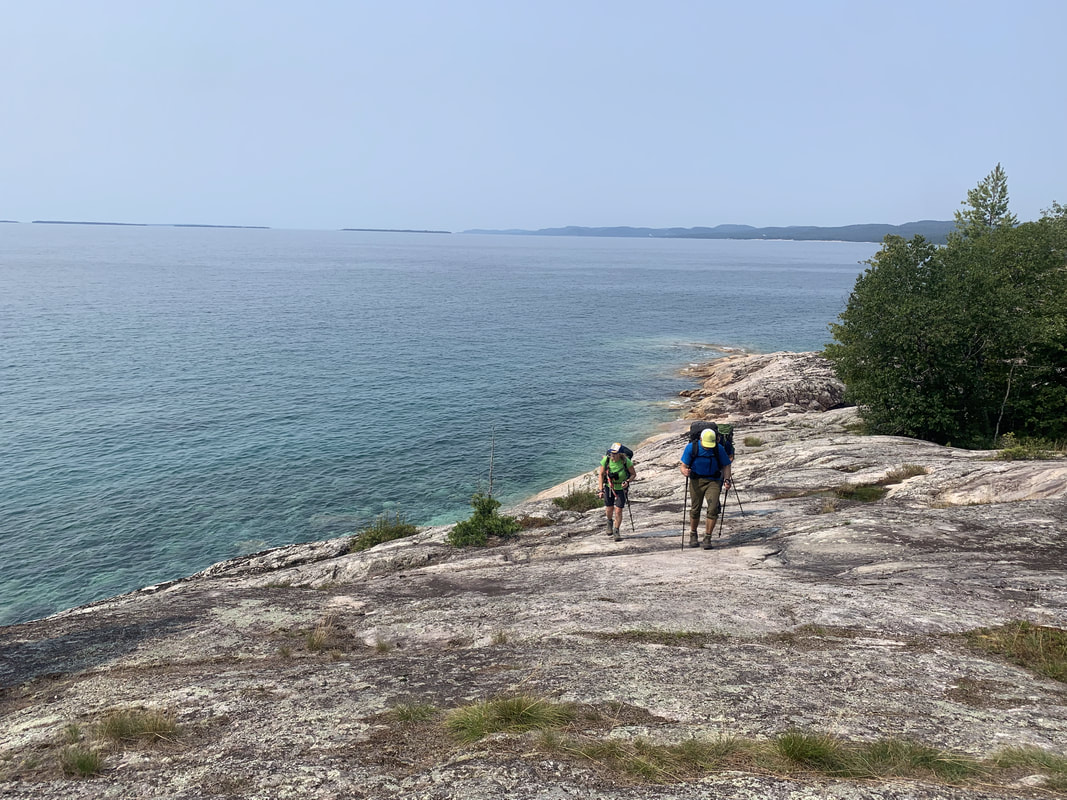
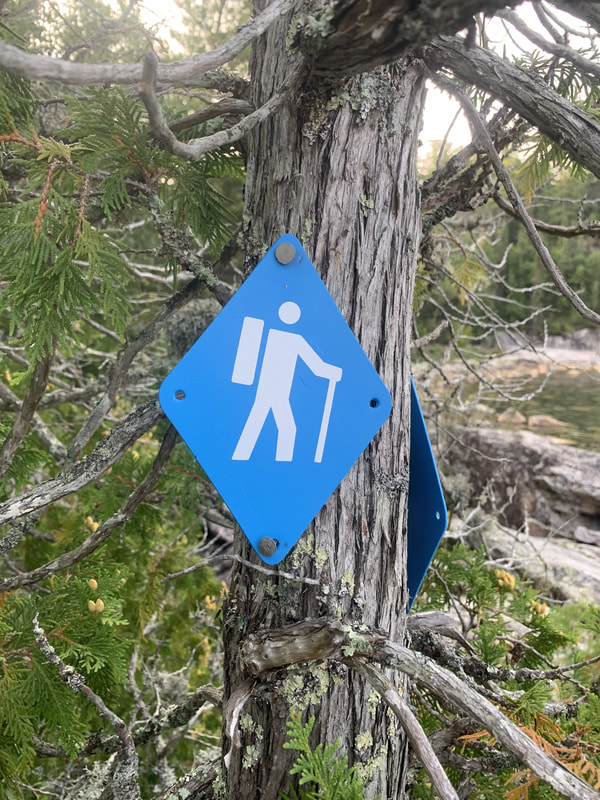
Navigation was simple on the trail with trailmarkers and stakes in the ground within sight of the last one. I could see why they would be very handy during periods of poor visibility. I think I may have took my map out once to check out a side trail and didn't even bring a GPS or compass. I did have a the maps.me app with the trail section downloaded to my phone.
Today we saw one of the the two species of wildlife we saw on the trip: a Golden Plover. This ground nesting bird squawked at us as we passed it's territory. It was suprising to see a living thing other than humans around. Iceland has some birds but no terrestrial wildlife. There is also little to no insects in Iceland. A few midges were all we saw!
Day 1: Landmannlauger to Hrafntinnusker (July 13th, 2023)
The day began at the Reykjavik campsite at the bus stop hoping to get on the 7:30AM Trex bus to Landmannlauger. This was a day later after we intended to head out due to some bad travel karma flying to Iceland from Canada. I had a 24 hour plane delay and a 36 hour baggage delay. The Trex bus pulled up and this was not any old coach bus; it was an off-road version, capable of driving on rough terrain and fording rivers. We hopped on and took the 4 hour journey to Landmannlauger. The last hour of this journey was on a bumpy gravel road that you could understand why they needed these off-road vehicles for. Even then, we arrived at Landmannlauger with the bumper hanging off!
Here we met up with our travel companions whose travel karma was much better than ours. After a brief walk around the hut and hot spring area and a quick bite to eat, we took off around 12:30PM. The trails were initially quite busy with many day hikers exploring the trails in the vicinity of Landmannaluger. It wasn't too long before we were on the Laugavegur trail proper with much less people. Already the scenery was stunning and we were stopping often to take photos. We climbed for much of the first hour or so, and then the trail flattened out. The trail was fairly wide in most places and was mainly a dirt gravel path like you would see in the alpine zone in most mountain ranges.
The distance to our first campsite was 11km and was composed of mainly rolling rhyolite hills with snow patches and small lava fields. Some hiker choose to blow through this hike with long distances per day (doable) but we chose to soak in all the non-stop 360 degree views and spend time taking photos and enjoying our time. It took us 3 hours to get to Hrafntinnusker even though the average time is 4-5 hours. At 63 degrees latitude in July, there is no time pressure to get from hut to hut as it never gets dark!
We arrived at the Hrafntinnusker hut area and paid our camping fees by VISA in the Information hut. Note: I never used cash once my entire trip in Iceland. They take VISA everywhere! We set up our tents inside a rock ring to give us protection from the wind and then headed up to the camper shelter (under construction in 2023) to get out of the cold wind and eat our meals. Also note: every hut sells canned Pilsner beer (2.5%), and some snacks like Pringles or chocolate bars for sale.
Daytime temperatures were around +10C and lows around +4C. This doesn't factor in the windchill which always seems to be present in these open areas and at this altitude of 3285ft. The windchill for the night I spent at Hrafntinnusker was -1C. July is part of the dry season, and we only had a bit of rain overnight the first night. I am pleased to report my lightweight trekking pole tent (Durston Xmid 1P) withstood the violent gusts of wind throughout the night. Check out my video below!
Navigation was simple on the trail with trailmarkers and stakes in the ground within sight of the last one. I could see why they would be very handy during periods of poor visibility. I think I may have took my map out once to check out a side trail and didn't even bring a GPS or compass. I did have a the maps.me app with the trail section downloaded to my phone.
Today we saw one of the the two species of wildlife we saw on the trip: a Golden Plover. This ground nesting bird squawked at us as we passed it's territory. It was suprising to see a living thing other than humans around. Iceland has some birds but no terrestrial wildlife. There is also little to no insects in Iceland. A few midges were all we saw!
Day 2: Hrafntinnusker to Hvanngil (July 14th)
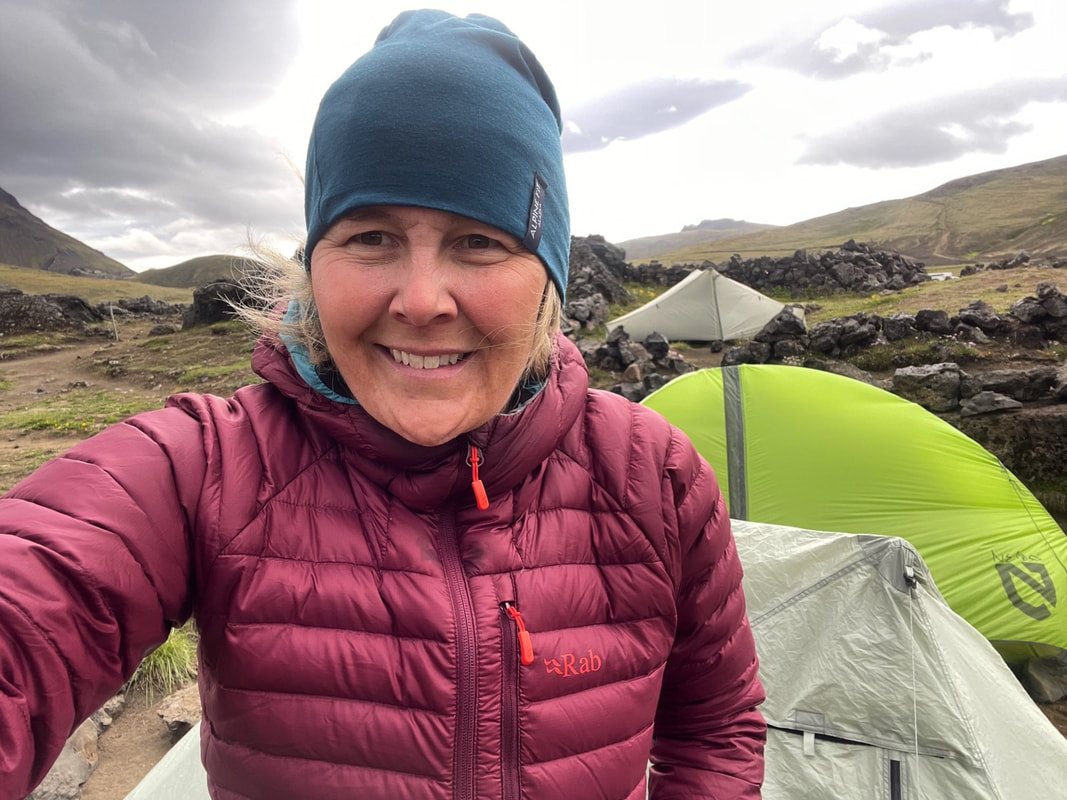
Day 2 began very chilly and my travel mate Deb was wearing every item of clothing she had brought. We made hot beverages and hot oatmeal for breakfast to warm up and waited for the sun's warmth to begin while chatting with some other travels from Germany and the United States.
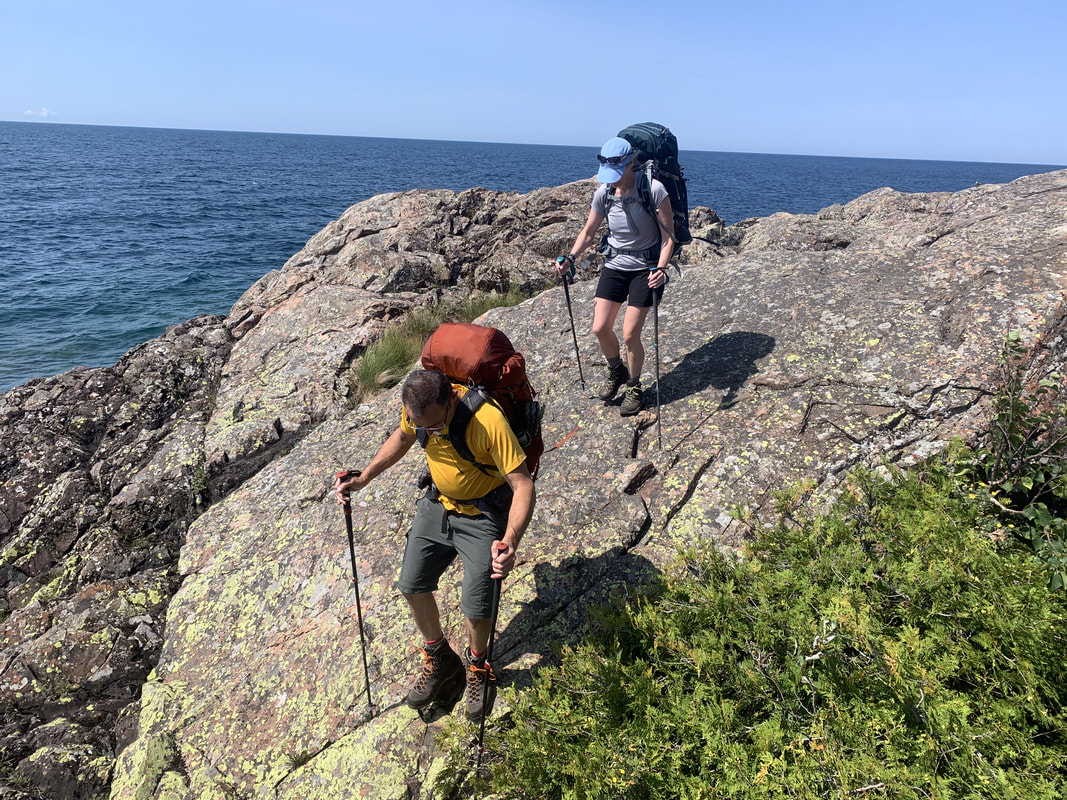
Our goal today was to hike 12km to Alftavatn but we got some advice from the staff the day before: for campers, it was a much better option to hike the extra 4km to Hvanngil as it's more sheltered from the wind. So with that information in mind, we headed off into some undulating terrain over rock and snow. After a big ascent up to the high point of the day the wind kept howling and I kept adding more layers. On this day, I hiked most of the day with 4 layers on my top and gloves.
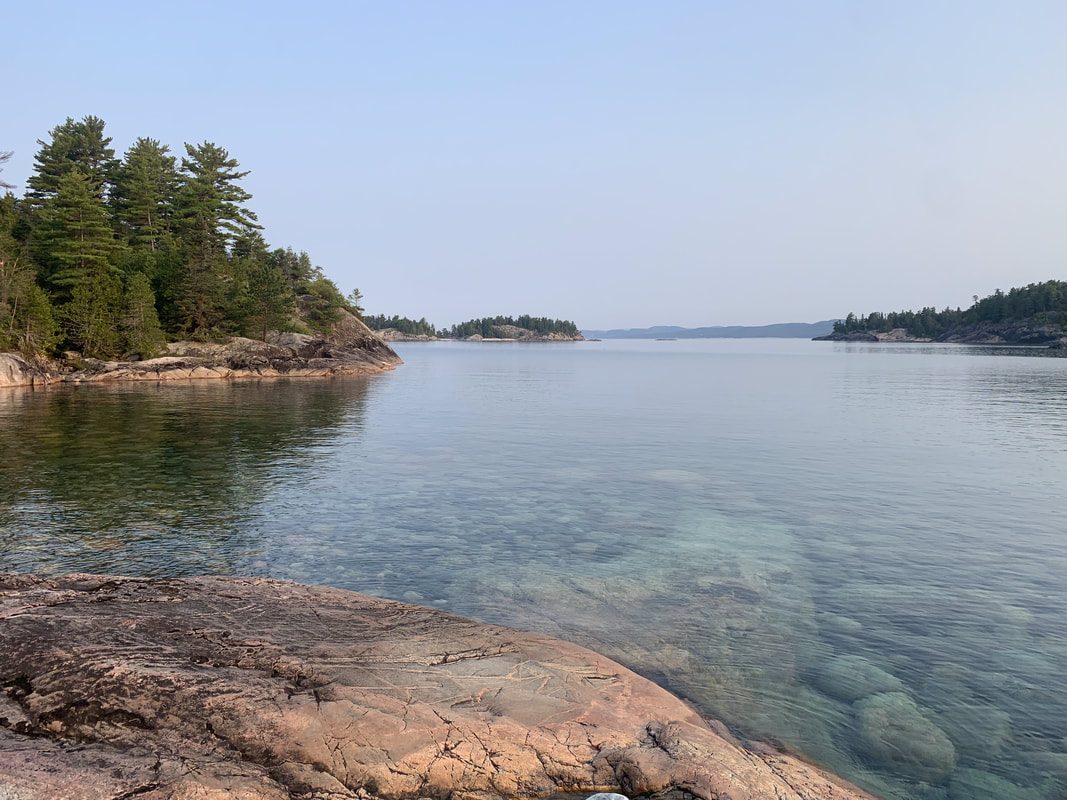
The contrast between seeing glaciers and snow versus geothermal steam vents and bubbling pools was quite striking. Iceland truly is a land of fire and ice. I personally think they should re-name it to "Windland" as from what I have seen so far, that description is the most constant!
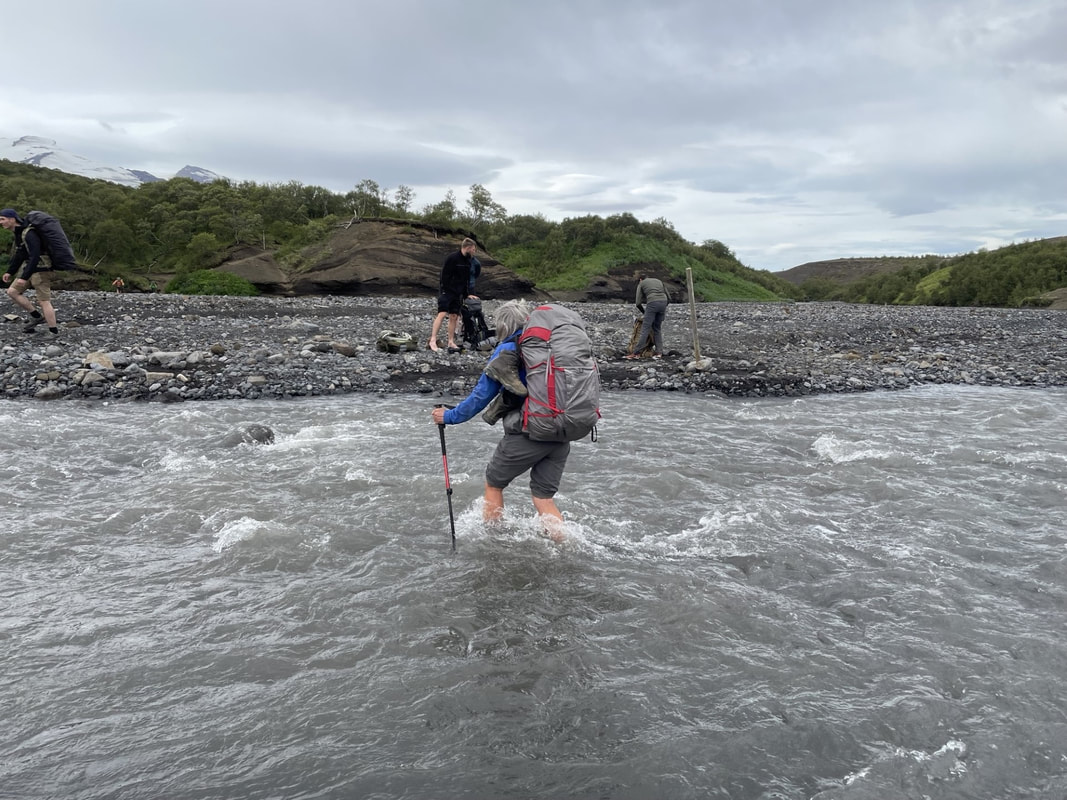
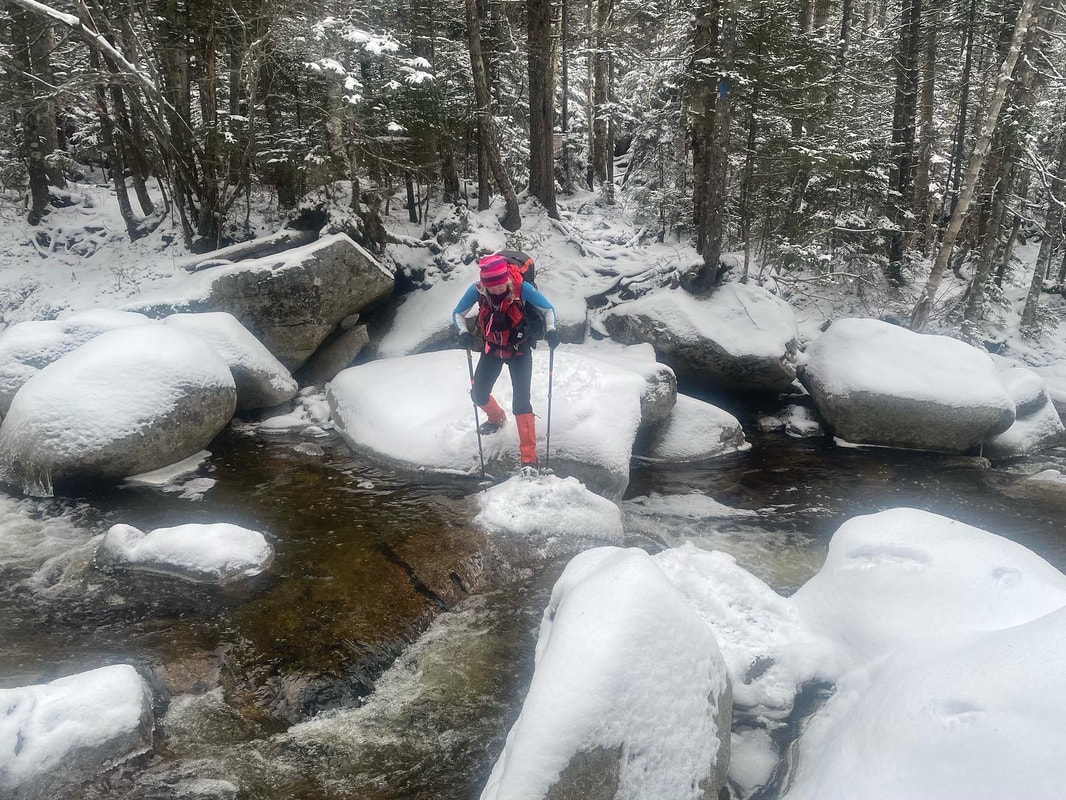
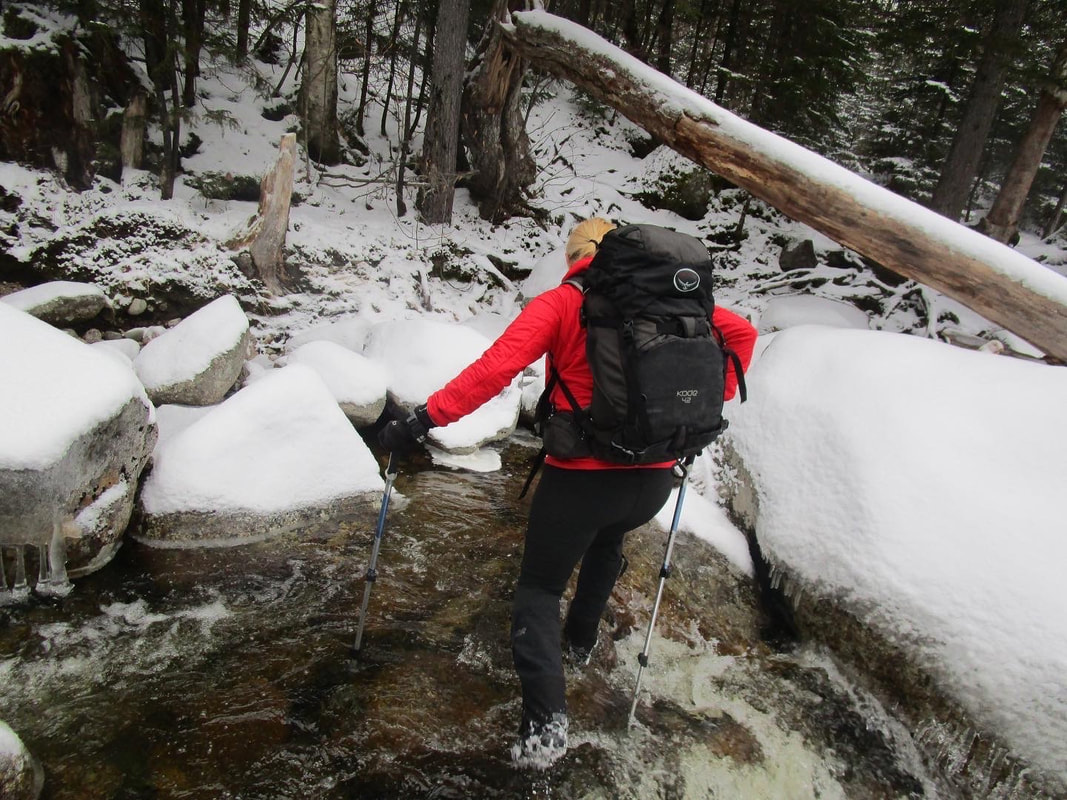
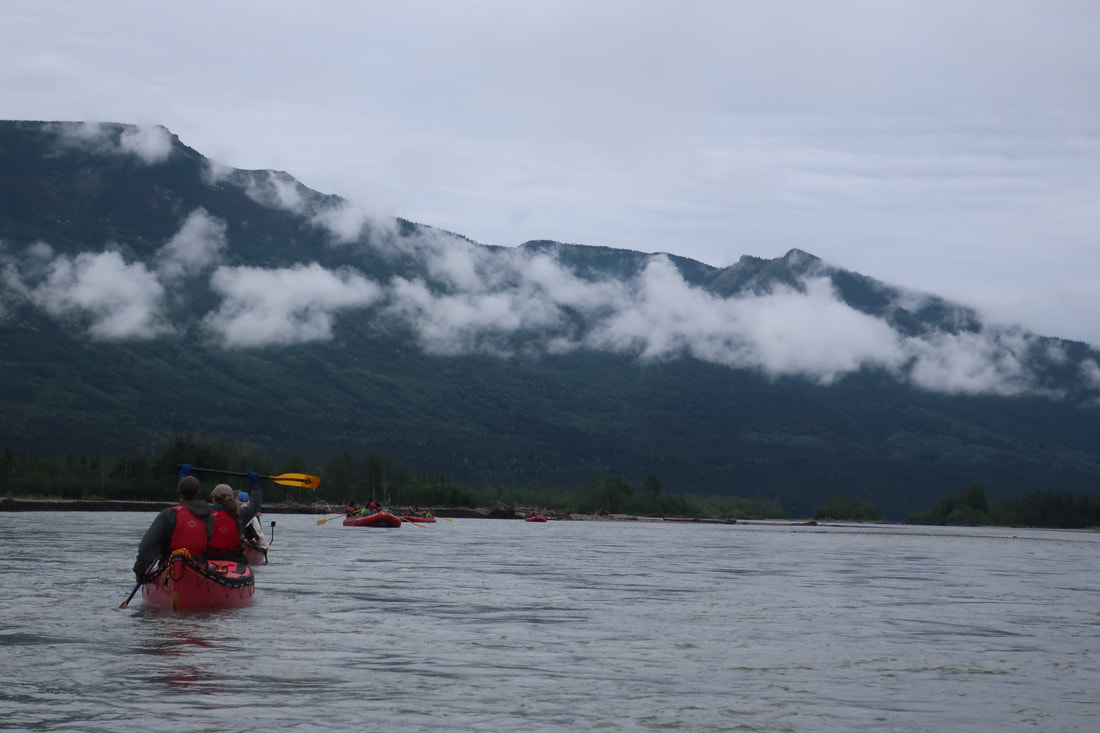
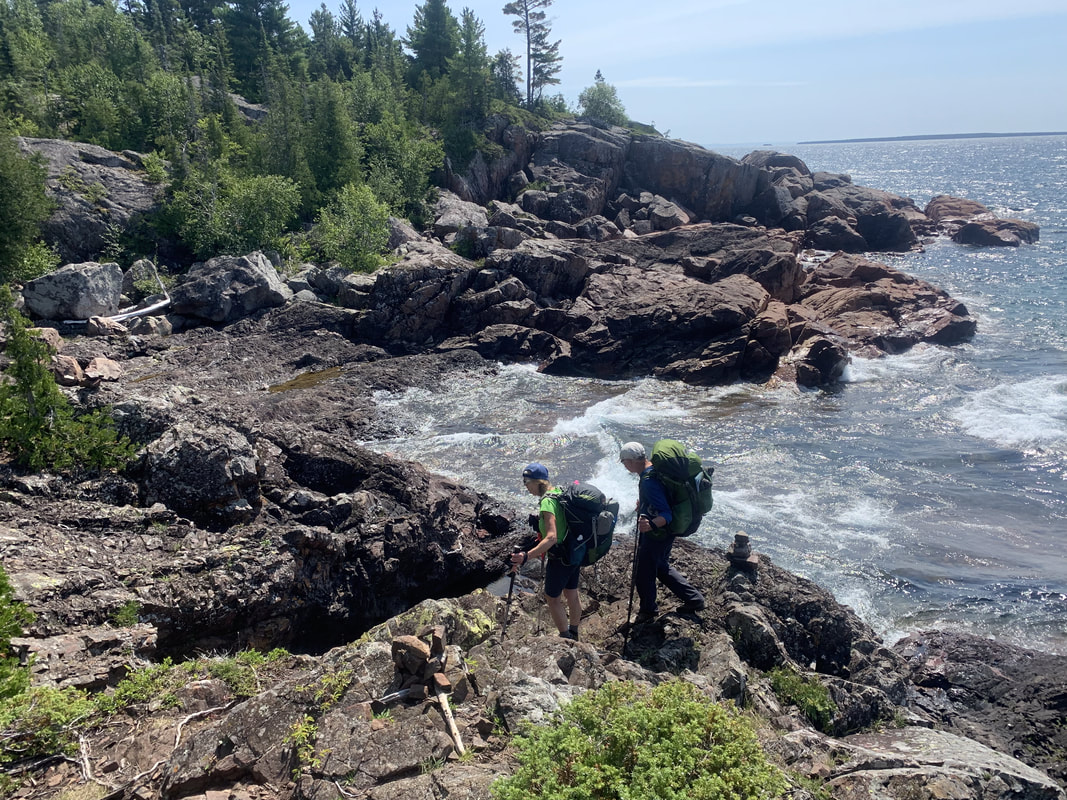
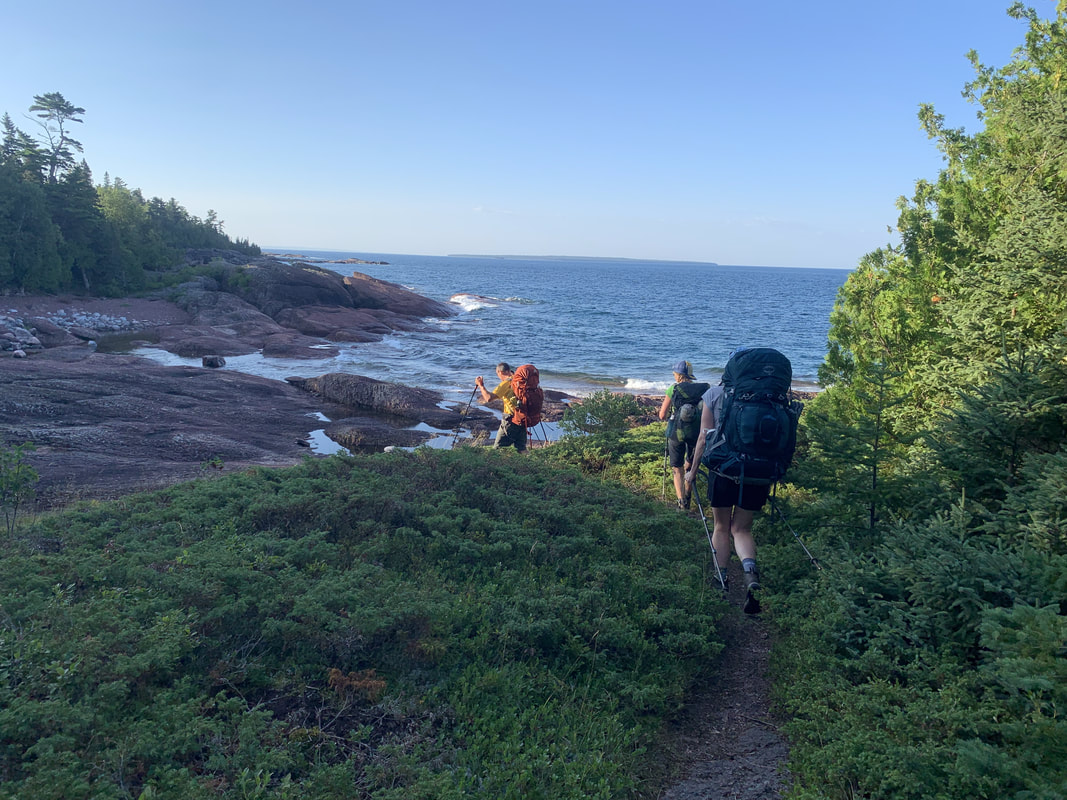
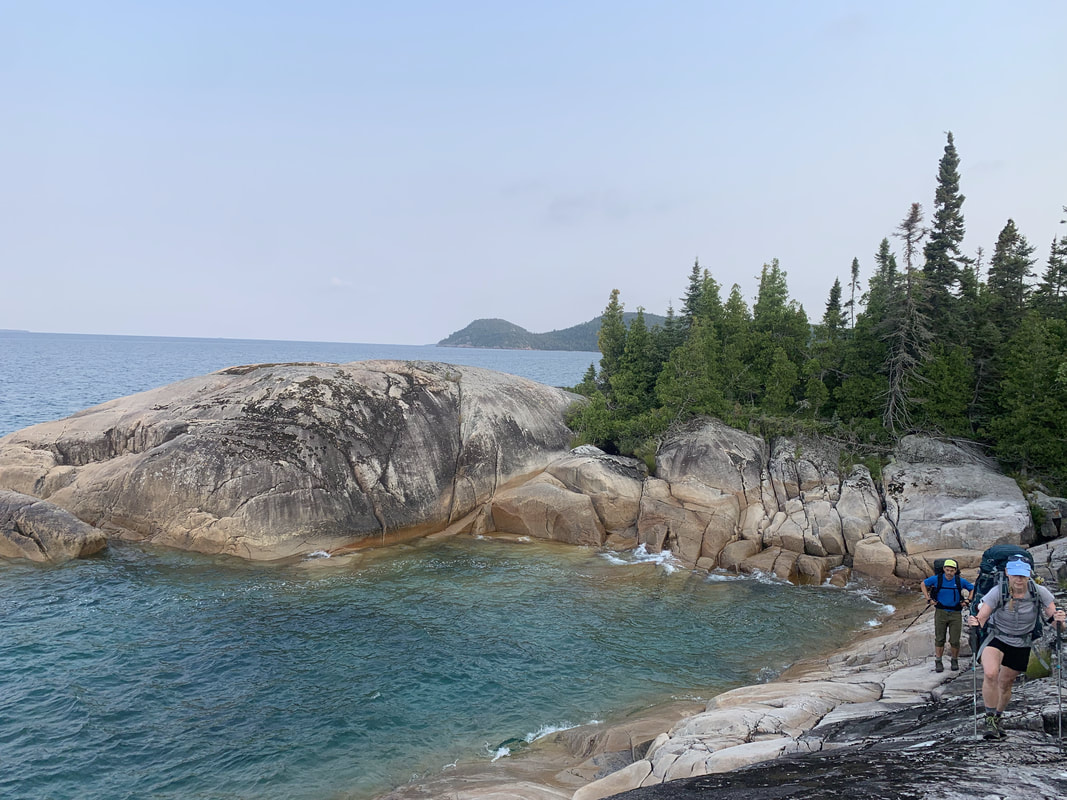
After a very steep 1000ft descent, we stopped to have lunch just a small rain cloud loomed overhead. We ate our lunch and continued into the valley to our first river crossing. Here we saw about a dozen other people who had just finished crossing. There is a cable across the river here and it's a short crossing. Hikers seem to do the the Laugavegur trail in both directions but I would recommend you go from North to South.
We reached Alftavatn and the scenery had changed again to green hills and a large lake. It would have definitely been a great place to camp, but with the wind we decided to move on. We watching one couple try to set up their tent and gave up. That made our decision even easier. The Alftavatn area is accessed by some gravel roads so don't be surprised to see vehicles around unlike the previous day and half.
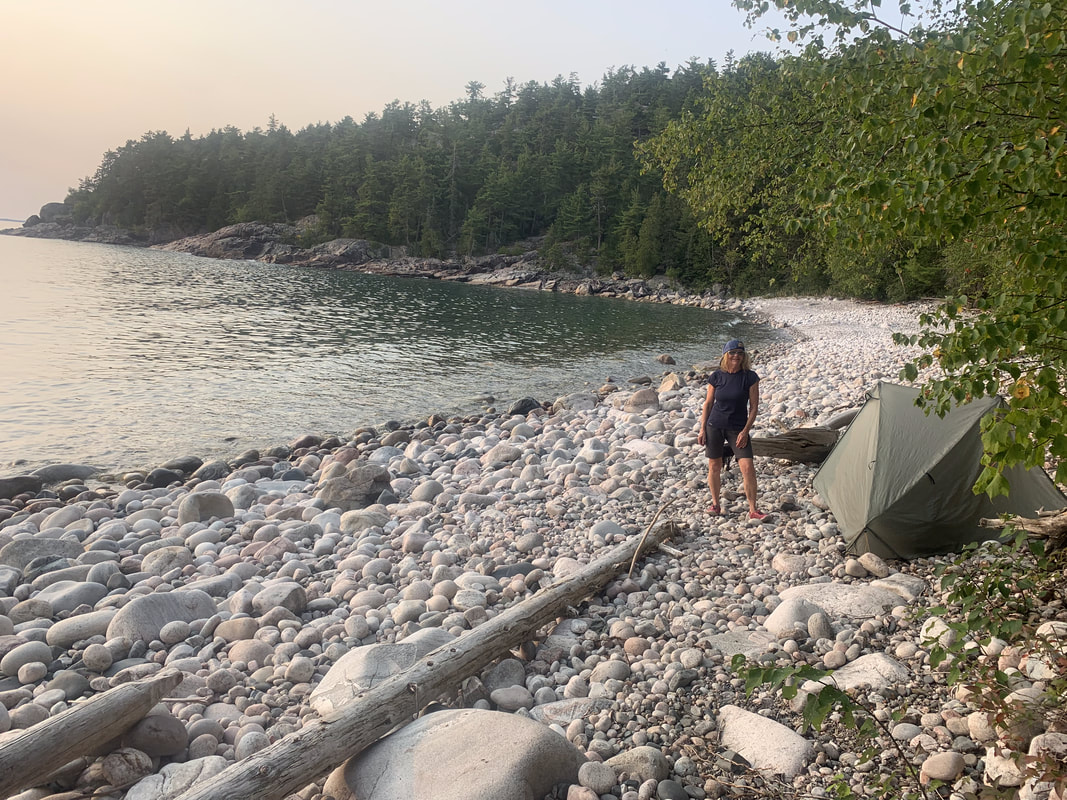
After a quick break at the hut, we continued on to Hvanngil. We had to ford one more river and follow a dirt path and before we knew it, 16km was finished and we were there. We set up tents in rock rings again and used the upstairs of the barn to eat in and get out of the wind. Yes, there was still wind at Hvanngil (at 1925 ft) but it was much more protected. I wore my down jacket and toque for most of this evening. We headed to the tents early each night just to get inside our warm cocoons.
Note: Tap water in Iceland is always potable. Some huts offer showers for a fee (which you can pay by VISA) but all have sinks and toilets. Some have mirrors as well. We didn't take advantage of the showers mainly because we felt it was too chilly to have a wet head!
Day 2 began very chilly and my travel mate Deb was wearing every item of clothing she had brought. We made hot beverages and hot oatmeal for breakfast to warm up and waited for the sun's warmth to begin while chatting with some other travels from Germany and the United States.
Our goal today was to hike 12km to Alftavatn but we got some advice from the staff the day before: for campers, it was a much better option to hike the extra 4km to Hvanngil as it's more sheltered from the wind. So with that information in mind, we headed off into some undulating terrain over rock and snow. After a big ascent up to the high point of the day the wind kept howling and I kept adding more layers. On this day, I hiked most of the day with 4 layers on my top and gloves.
The contrast between seeing glaciers and snow versus geothermal steam vents and bubbling pools was quite striking. Iceland truly is a land of fire and ice. I personally think they should re-name it to "Windland" as from what I have seen so far, that description is the most constant!
After a very steep 1000ft descent, we stopped to have lunch just a small rain cloud loomed overhead. We ate our lunch and continued into the valley to our first river crossing. Here we saw about a dozen other people who had just finished crossing. There is a cable across the river here and it's a short crossing. Hikers seem to do the the Laugavegur trail in both directions but I would recommend you go from North to South.
We reached Alftavatn and the scenery had changed again to green hills and a large lake. It would have definitely been a great place to camp, but with the wind we decided to move on. We watching one couple try to set up their tent and gave up. That made our decision even easier. The Alftavatn area is accessed by some gravel roads so don't be surprised to see vehicles around unlike the previous day and half.
After a quick break at the hut, we continued on to Hvanngil. We had to ford one more river and follow a dirt path and before we knew it, 16km was finished and we were there. We set up tents in rock rings again and used the upstairs of the barn to eat in and get out of the wind. Yes, there was still wind at Hvanngil (at 1925 ft) but it was much more protected. I wore my down jacket and toque for most of this evening. We headed to the tents early each night just to get inside our warm cocoons.
Note: Tap water in Iceland is always potable. Some huts offer showers for a fee (which you can pay by VISA) but all have sinks and toilets. Some have mirrors as well. We didn't take advantage of the showers mainly because we felt it was too chilly to have a wet head!
Day 3: Hvanngil to Emstrur (July 15th )
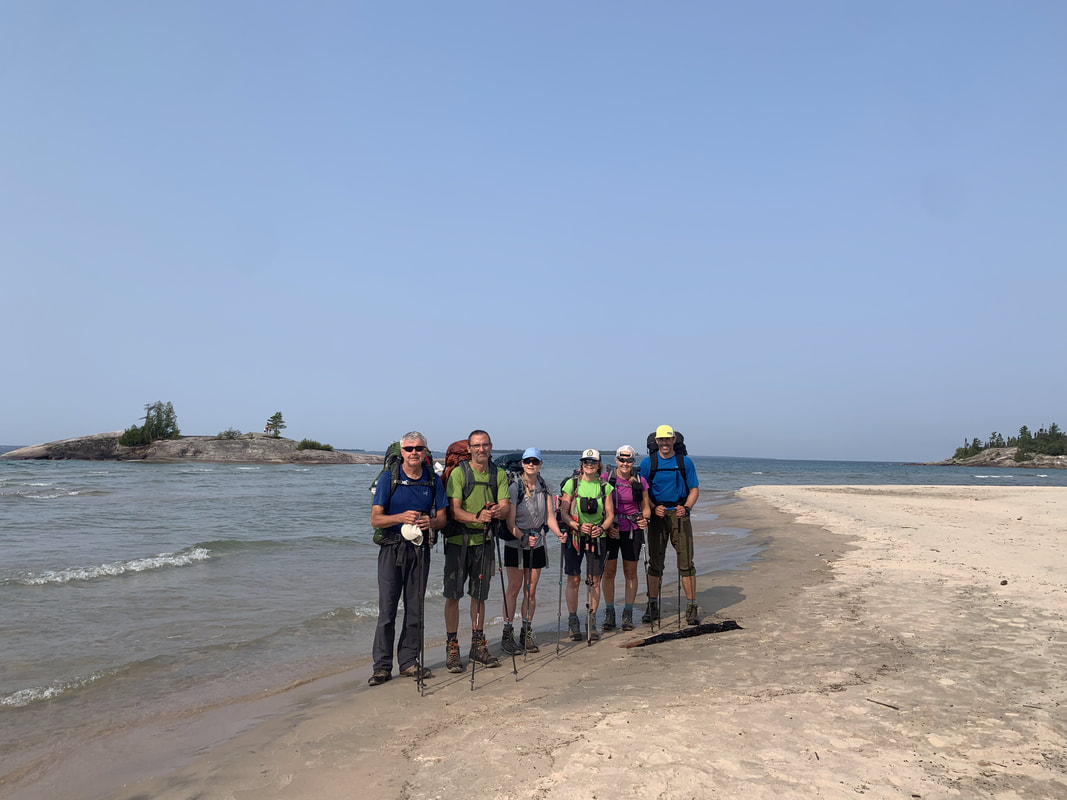
Today we left Hvanngil at 9AM and headed out to new scenery again: a lava field. One of the first obstacles to cross on this day was a river crossing. When we arrived things looked a little peculiar. There was a an ambulance parked on the far side with music pumping and about 300 bags lying on the ground. After crossing, we asked what was going on. We found out the Laugavegur Ultra Marathon was happening and they were set up as a check point. Feeling somewhat demoralized that hundreds of people were going to run the same trail we are hiking in 4 days we took off wondering when the first racer was going to blow by us.
The trek to Emstrur is almost completely flat and through lava fields. Part way through one lava field there was a large inflatable Garmin banner and a crew of volunteers. More music blared here and we pretended we were winning the race! The volunteers took our photo and then we moved on. We hiked up over one small hill and then dipped down to a creek when out of no where a shirtless runner appeared. Without missing a stride, the first place runner ran through the creek whilst simultaneously swooping down with his water bladder to scoop up creek water and then dumped it on his head while keeping up a feverish pace. At that point he had a 5 minute lead. After we got off the trail, we looked up the results and the winner won by 4 minutes. He took 4 hours to complete the 55km trail!
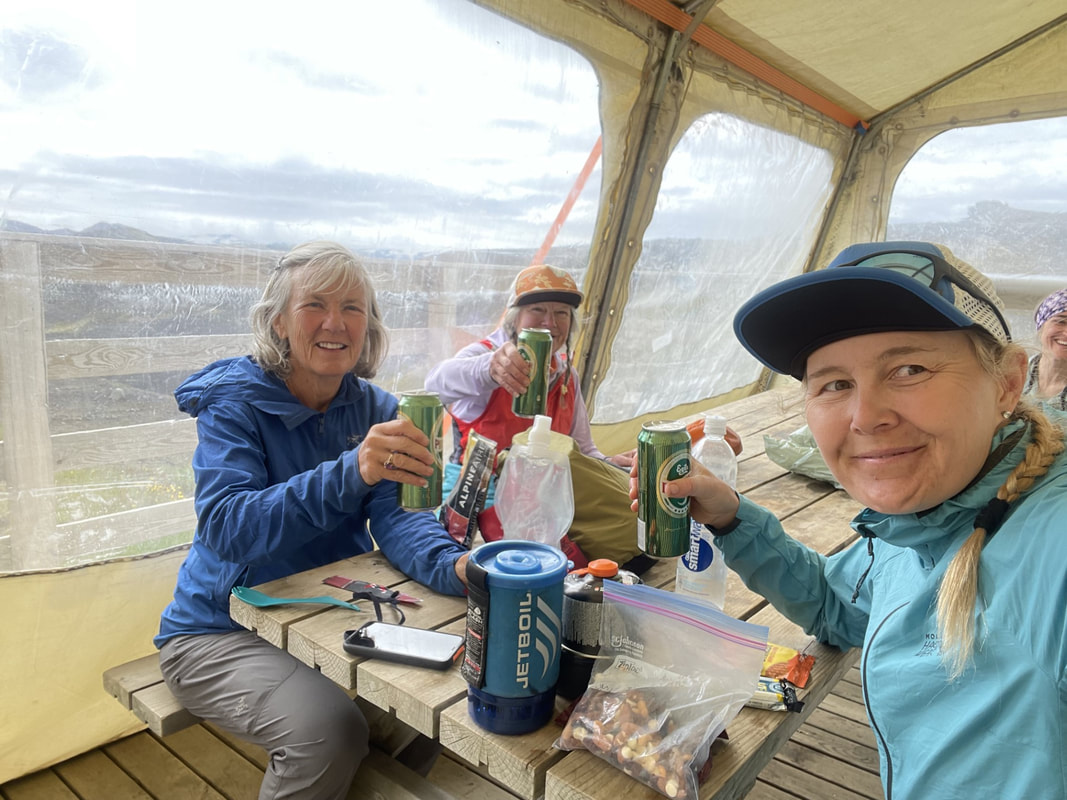
We hiked through another lava field and came across another crew of volunteers that cheered us on. Before we knew it we were descending into the hut and camping area in Emstrur where there were several volunteers ready to refill water bottles, hand out snacks and there was even a doctor on hand for first aid. The music was blaring and we danced our way into the hut and campsite for the night. Ironically the race started at 9AM and so did we....the time said it took us 3 hours and 24 minutes to walk the 15km to Emstrur. Time for lunch!
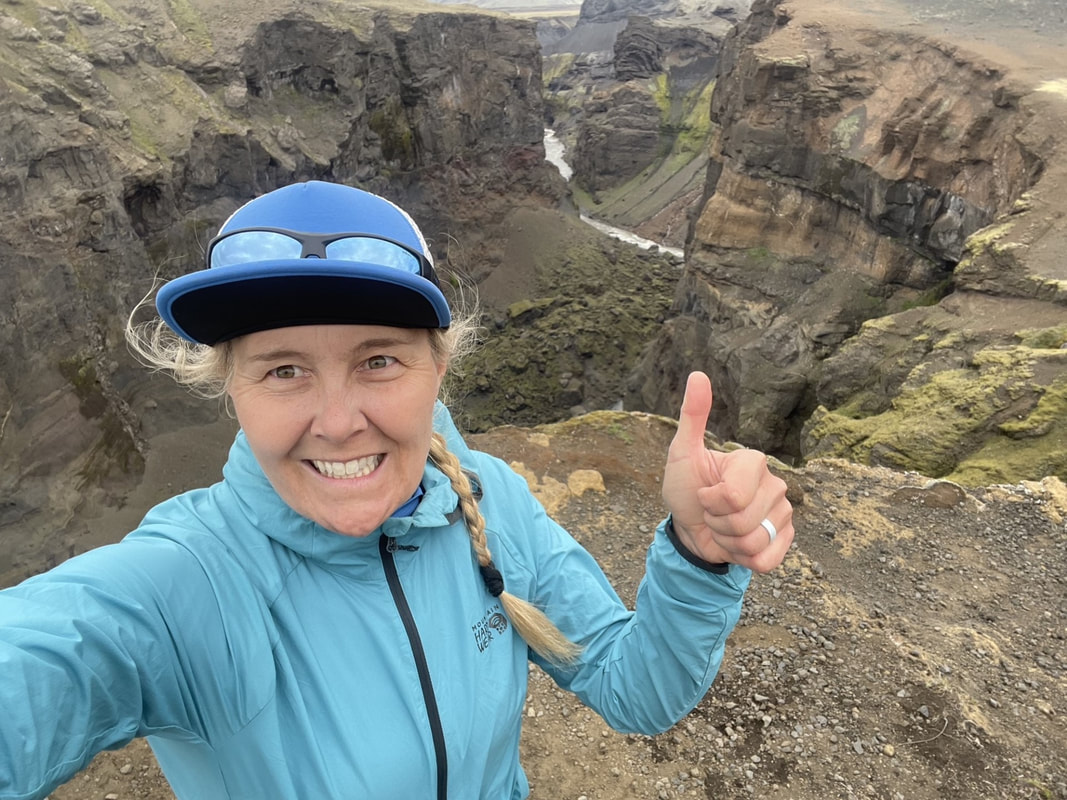
At Emstrur there is a worthwhile side trail to check out to a mindblowing canyon. We checked it out after setting up camp and ditching our packs. The canyon is a must-see 3km addition but the trail keeps going if you want to do a 6km loop. Be sure to check out the Fulmar birds and their nesting sites in the cliff. As we did this, runners kept coming through for the next 7 hours at the hut checkpoint. In Emstrur, there is a dining tent with picnic tables for campers to use, showers, sinks and toilets. There were many large guided groups, self-guided groups and a few volunteers from the race all camping at the site on this night. There were probably around 100 tents!
Costs for camping on the Laugavegur trail was $2500K . In Canadian, this is $25.
Today we left Hvanngil at 9AM and headed out to new scenery again: a lava field. One of the first obstacles to cross on this day was a river crossing. When we arrived things looked a little peculiar. There was a an ambulance parked on the far side with music pumping and about 300 bags lying on the ground. After crossing, we asked what was going on. We found out the Laugavegur Ultra Marathon was happening and they were set up as a check point. Feeling somewhat demoralized that hundreds of people were going to run the same trail we are hiking in 4 days we took off wondering when the first racer was going to blow by us.
The trek to Emstrur is almost completely flat and through lava fields. Part way through one lava field there was a large inflatable Garmin banner and a crew of volunteers. More music blared here and we pretended we were winning the race! The volunteers took our photo and then we moved on. We hiked up over one small hill and then dipped down to a creek when out of no where a shirtless runner appeared. Without missing a stride, the first place runner ran through the creek whilst simultaneously swooping down with his water bladder to scoop up creek water and then dumped it on his head while keeping up a feverish pace. At that point he had a 5 minute lead. After we got off the trail, we looked up the results and the winner won by 4 minutes. He took 4 hours to complete the 55km trail!
We hiked through another lava field and came across another crew of volunteers that cheered us on. Before we knew it we were descending into the hut and camping area in Emstrur where there were several volunteers ready to refill water bottles, hand out snacks and there was even a doctor on hand for first aid. The music was blaring and we danced our way into the hut and campsite for the night. Ironically the race started at 9AM and so did we....the time said it took us 3 hours and 24 minutes to walk the 15km to Emstrur. Time for lunch!
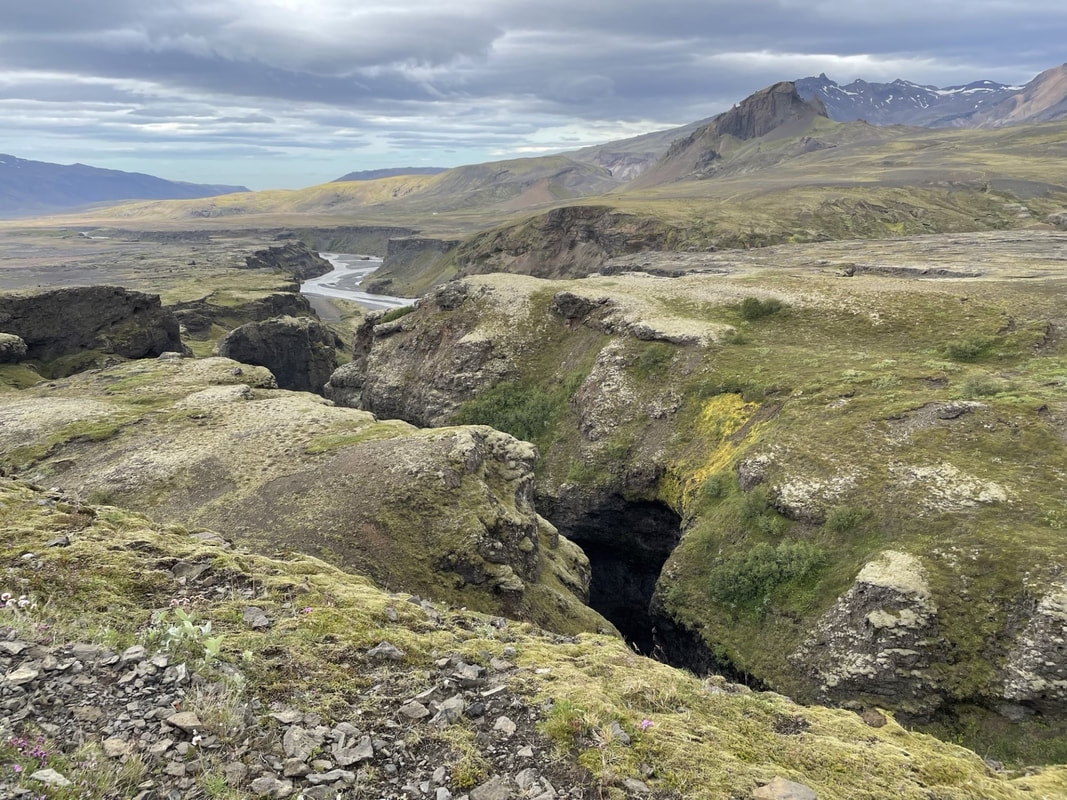
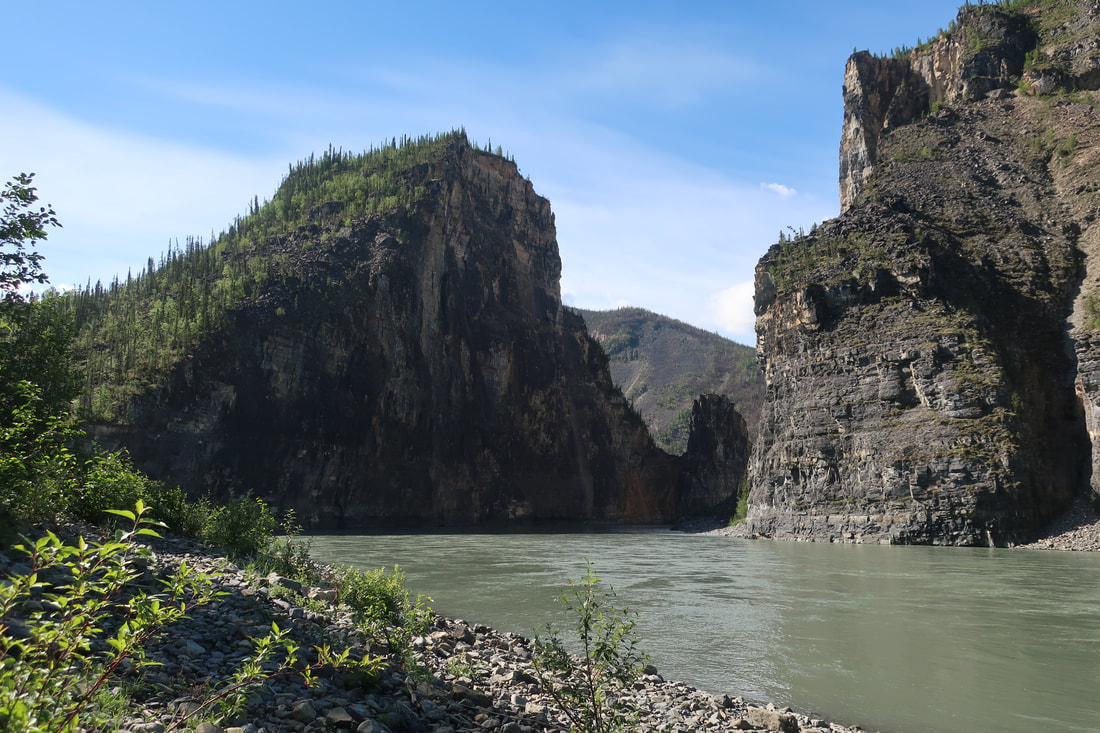
At Emstrur there is a worthwhile side trail to check out to a mindblowing canyon. We checked it out after setting up camp and ditching our packs. The canyon is a must-see 3km addition but the trail keeps going if you want to do a 6km loop. Be sure to check out the Fulmar birds and their nesting sites in the cliff. As we did this, runners kept coming through for the next 7 hours at the hut checkpoint. In Emstrur, there is a dining tent with picnic tables for campers to use, showers, sinks and toilets. There were many large guided groups, self-guided groups and a few volunteers from the race all camping at the site on this night. There were probably around 100 tents!
Costs for camping on the Laugavegur trail was $2500K . In Canadian, this is $25.
Day 4: Emstrur to Thorsmork (July 16th)
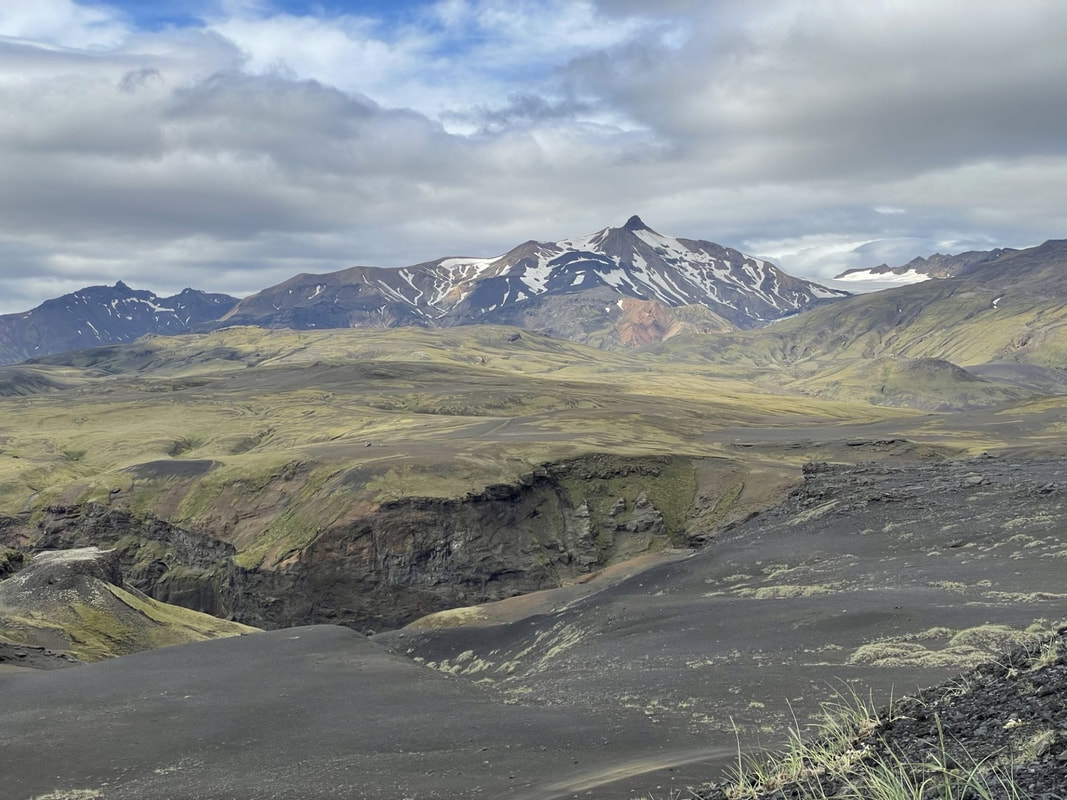
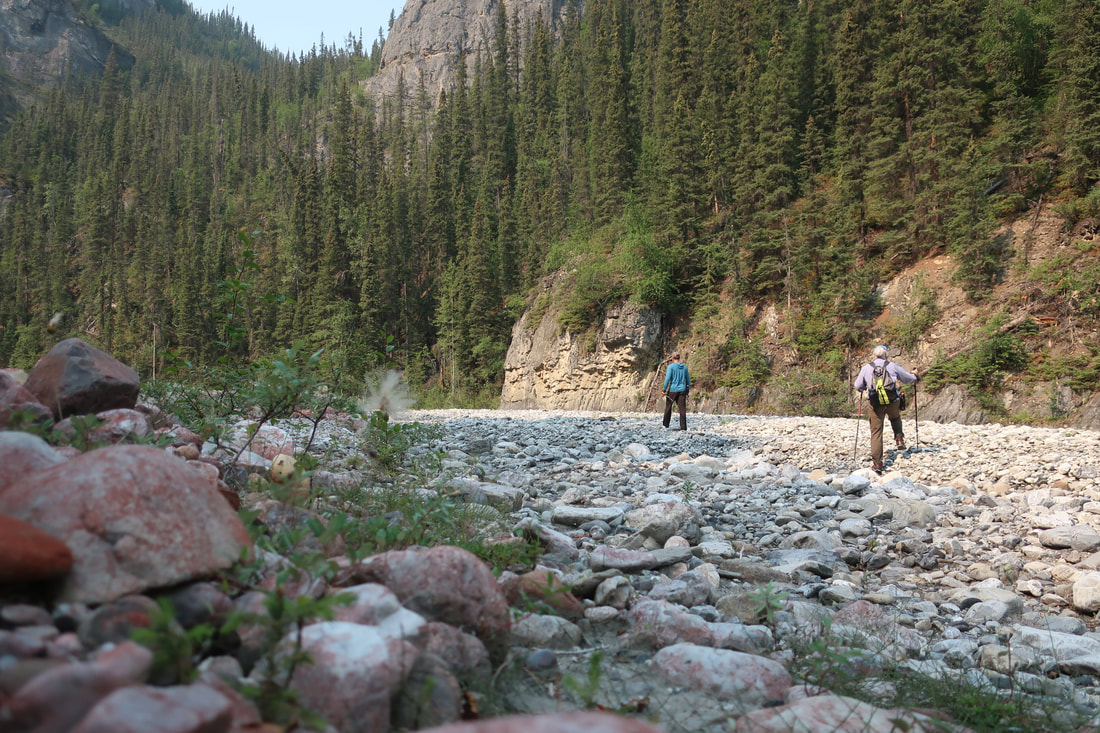
We left Emstrur and headed up the trail to find some litter lying about. This was the first rubbish I had seen on the trip and was left behind by runners. It mostly consisted of cut bananas and bits of pretzels. For the most part the trail was spotless. We hiked through a lava field and down into a beautiful green valley. We climbed out of the valley and dropped down once through some black sand and more lava fields. There were several backpackers starting in the opposite direction at this point. We dropped down and crossed another river with strong current. The water temps are all freezing glacial water temperatures. The snow capped glaciated peaks in the distance are volcanoes, with Eyjafjallajokull being the one on the right that erupted in 2010. Here we noticed many changes to the vegetation....like there was vegetation! Suddenly flowers and tall grasses started emerging as well as small birch trees. Although this was only in the last hour of the hike, it definitely felt the most familiar of the entire trail. We arrived in Thorsmork after 5 hours hiking 15km.
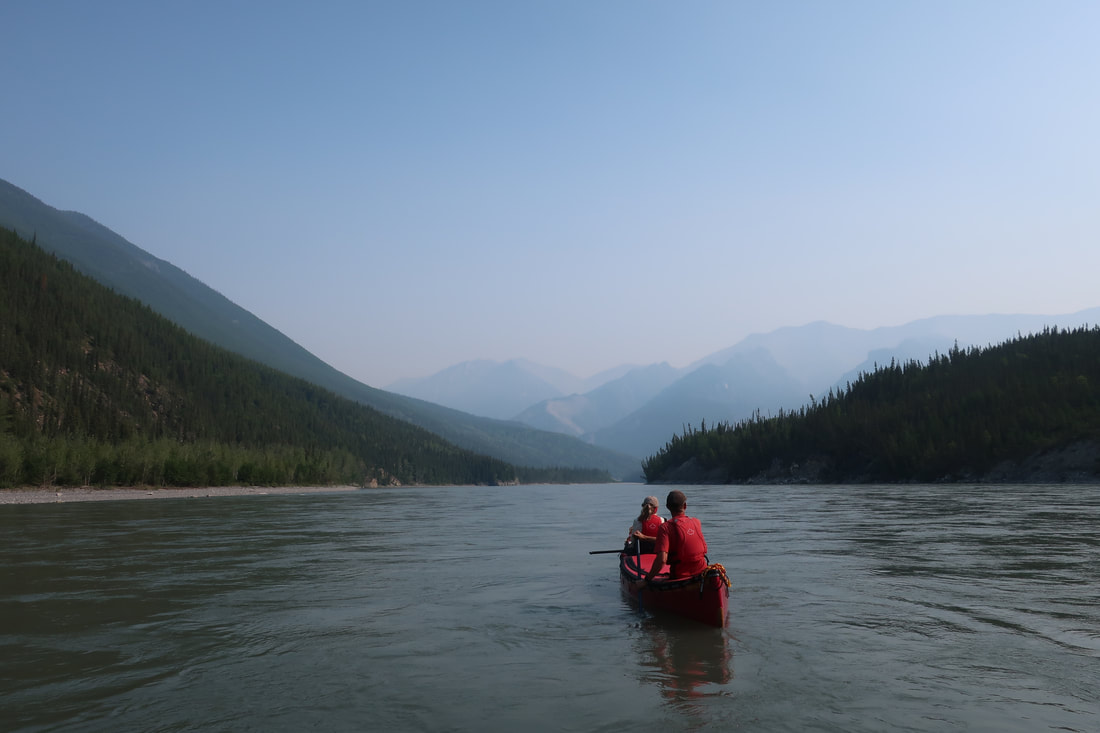
We changed our bus tickets to leave on the 2:30PM bus back to Reykjavik. The bus ride was a whole adventure in itself - fording many rivers in the valley on the way out. Very interesting!
Final notes:
Things I didn't use: Water filter, lightweight camp chair, gaiters, toilet paper, headlamp.
Things I was glad I had: Down jacket, fleece baselayers for sleeping, good tent pegs, goretex jacket, warm hat, gloves, -7C sleeping bag, water shoes, GoPro, sunglasses, shirts with hoods, and hiking poles.
We left Emstrur and headed up the trail to find some litter lying about. This was the first rubbish I had seen on the trip and was left behind by runners. It mostly consisted of cut bananas and bits of pretzels. For the most part the trail was spotless. We hiked through a lava field and down into a beautiful green valley. We climbed out of the valley and dropped down once through some black sand and more lava fields. There were several backpackers starting in the opposite direction at this point. We dropped down and crossed another river with strong current. The water temps are all freezing glacial water temperatures. The snow capped glaciated peaks in the distance are volcanoes, with Eyjafjallajokull being the one on the right that erupted in 2010. Here we noticed many changes to the vegetation....like there was vegetation! Suddenly flowers and tall grasses started emerging as well as small birch trees. Although this was only in the last hour of the hike, it definitely felt the most familiar of the entire trail. We arrived in Thorsmork after 5 hours hiking 15km.
We changed our bus tickets to leave on the 2:30PM bus back to Reykjavik. The bus ride was a whole adventure in itself - fording many rivers in the valley on the way out. Very interesting!
Final notes:
Things I didn't use: Water filter, lightweight camp chair, gaiters, toilet paper, headlamp.
Things I was glad I had: Down jacket, fleece baselayers for sleeping, good tent pegs, goretex jacket, warm hat, gloves, -7C sleeping bag, water shoes, GoPro, sunglasses, shirts with hoods, and hiking poles.


 RSS Feed