Welcome to KPW Outdoors
  • Home
  • About
  • Blog
  • Gear Reviews
  • Trip Reports
  • Media
  • Contact

THE PRESIDENTIAL TRAVERSE

22/3/2015

0 Comments

 
The hardest part of hiking the Presidential Traverse in New Hampshire is not the hiking, it's defining what the Presidential Traverse actually is. If you're an Appalachian Trail hiker, the Presidential Traverse means backpacking along the ridge trail, traversing the ridge line without summitting any peaks. To a day hiker, it means bagging the 5 major summits on the ridge: Mt Madison, Mt Adams, Mt Jefferson, Mt Washington, Mt Eisenhower, and Mt Pierce, potentially all in one day. To others, it means summitting all 12 named bumps along the ridge, and finally, it might mean bagging the 8 listed summits over 4000' to be credited towards the Northeast 111 (115) list. Whatever your definition, this traverse is worth doing. My husband and I decided to do the 36km route over two days on August 17/18th, 2013.

Pre-hike: We tent-camped at Dolly Copp Campground near the small town of Gorham, NH. The popular campground has basic sites with shared washrooms and sinks and can be pre-booked in advance through 'reserve america'. Be warned there are no showers at this campground. We packed day packs for the hike with a small sleeping bag and change of clothes for the hut. 

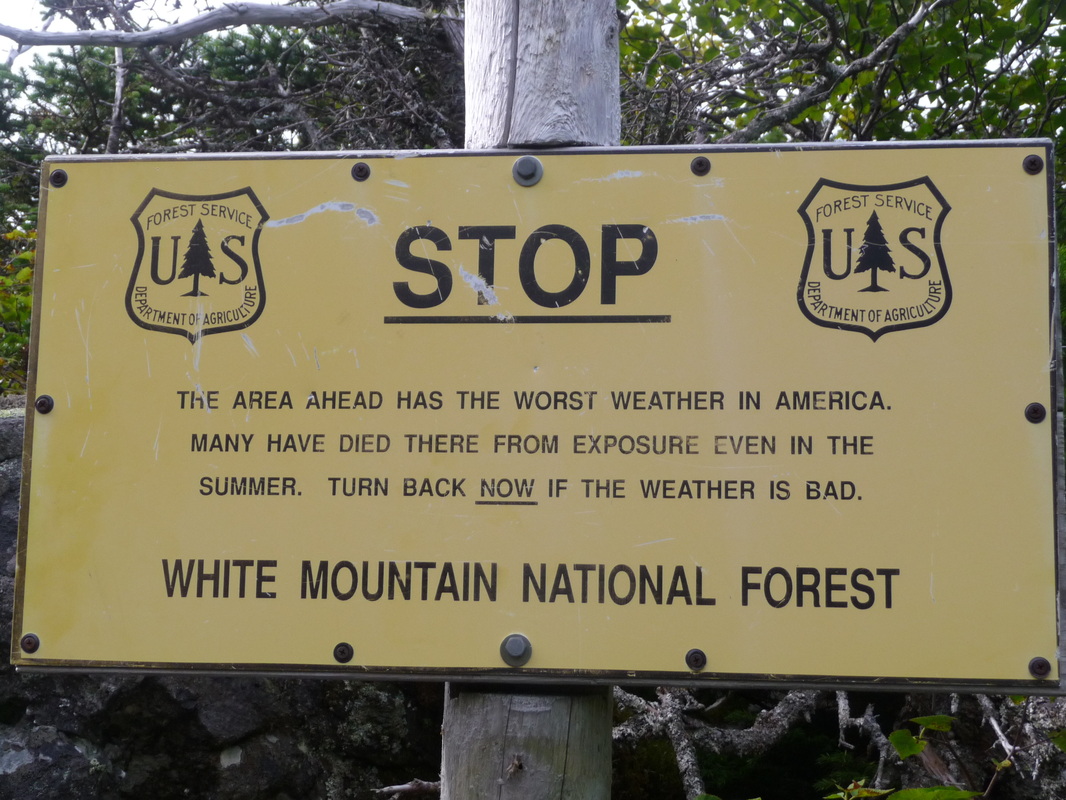
Day 1 - Valley Way Appalachia (1306 ft) to Lake of the Clouds Hut: We parked our car at a popular trailhead called Valley Way Appalachia. We hiked up 4000' up the beautiful Valley Way Trail up to the main ridge. Just before we got there we saw the sign below. The winds on this ridge had the highest recorded winds in the world at one point at 372km/hr. Serious terrain.

Picture
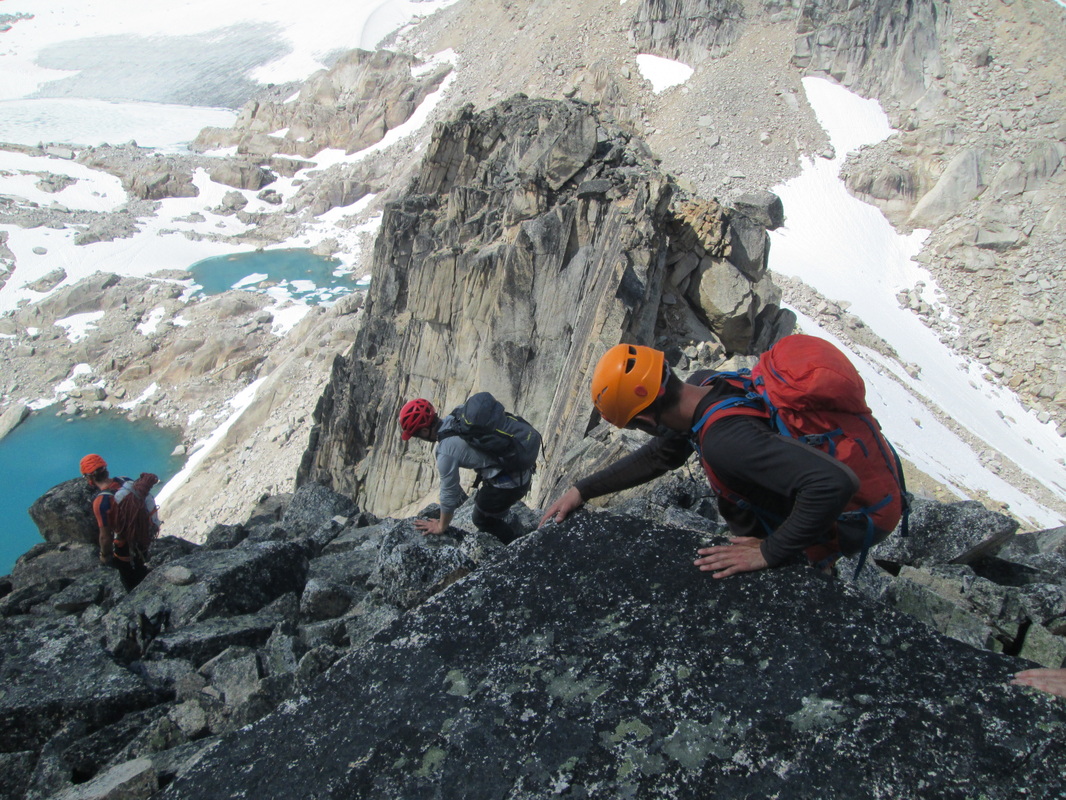
We continued up to the Madison Hut and turned left and summited our first peak Mt Madison at 5367ft. We descended down from the summit to the hut and checked out the facilities. We were also able to fill up our water bottles here as well. Continuing back on the trail we noticed that from the summit of Madison over Mt Adams to the Edmands Col was mainly a big pile of uneven large suitcase size boulders that is essentially the trail. I had not read about these boulders anywhere in advance and didn't realize how long the boulder fields go on for and how annoying walking over boulders would be. Despite being a rock climber and a experienced hiker, the torquing of your feet in all directions over these boulders is something not to underestimate. Make sure your ankles are ready and your footwear is solid. Once you hit Jefferson, the boulders disappear for the most part and the ridge trail flattens out. Summits are reached by veering off the main ridge trail, hitting the summit, and heading back down to the ridge trail on the far side. This pattern would repeat itself for almost the entire trail.
Picture
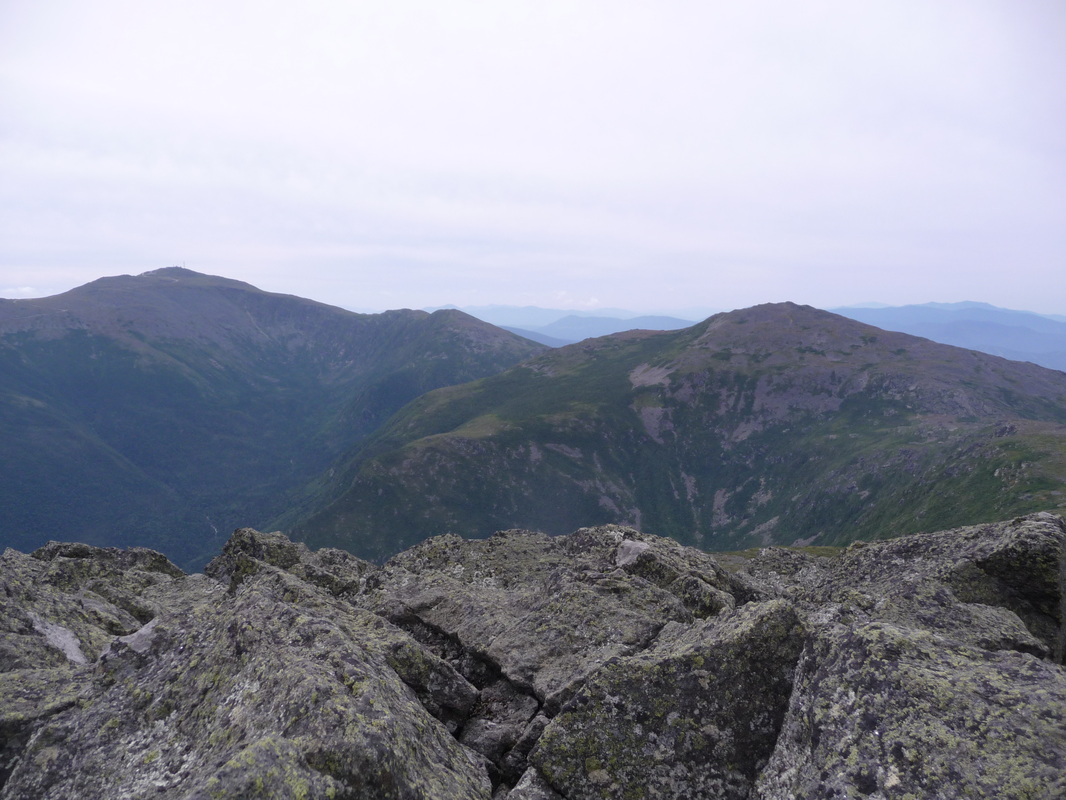
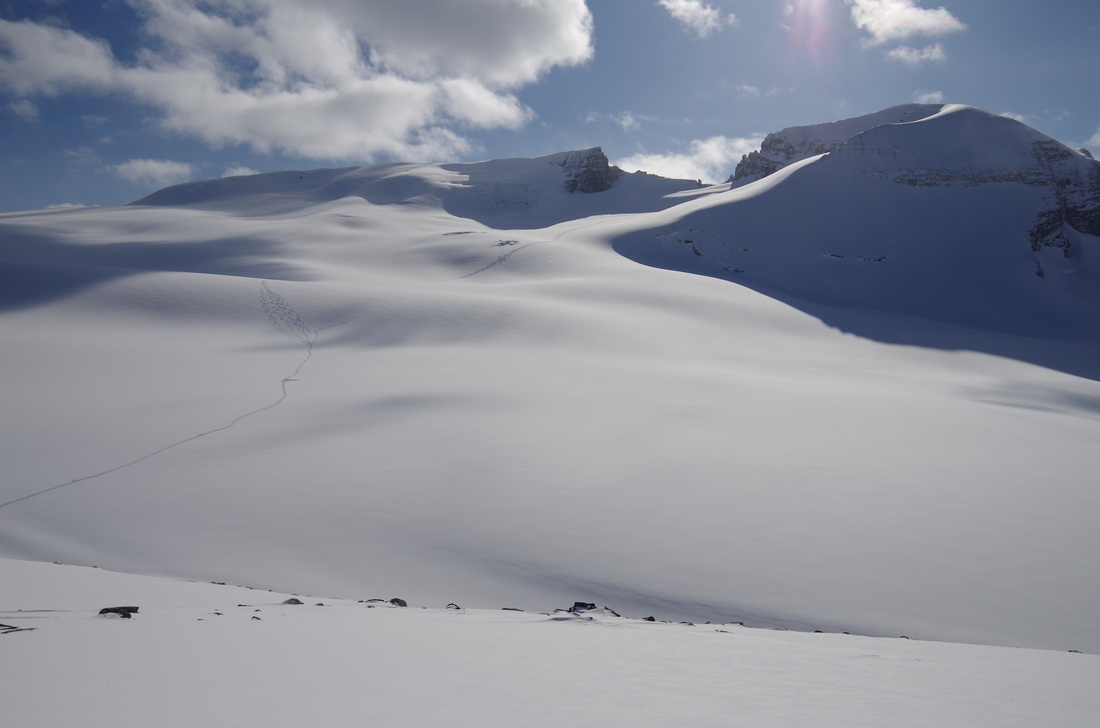
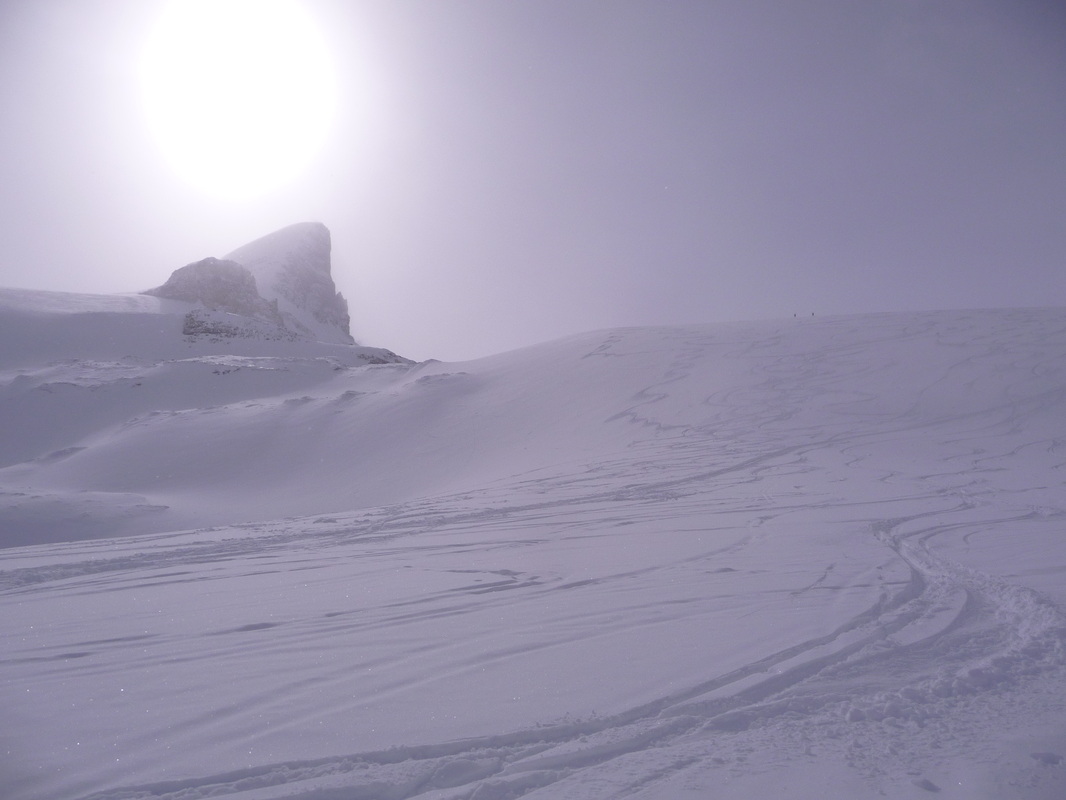
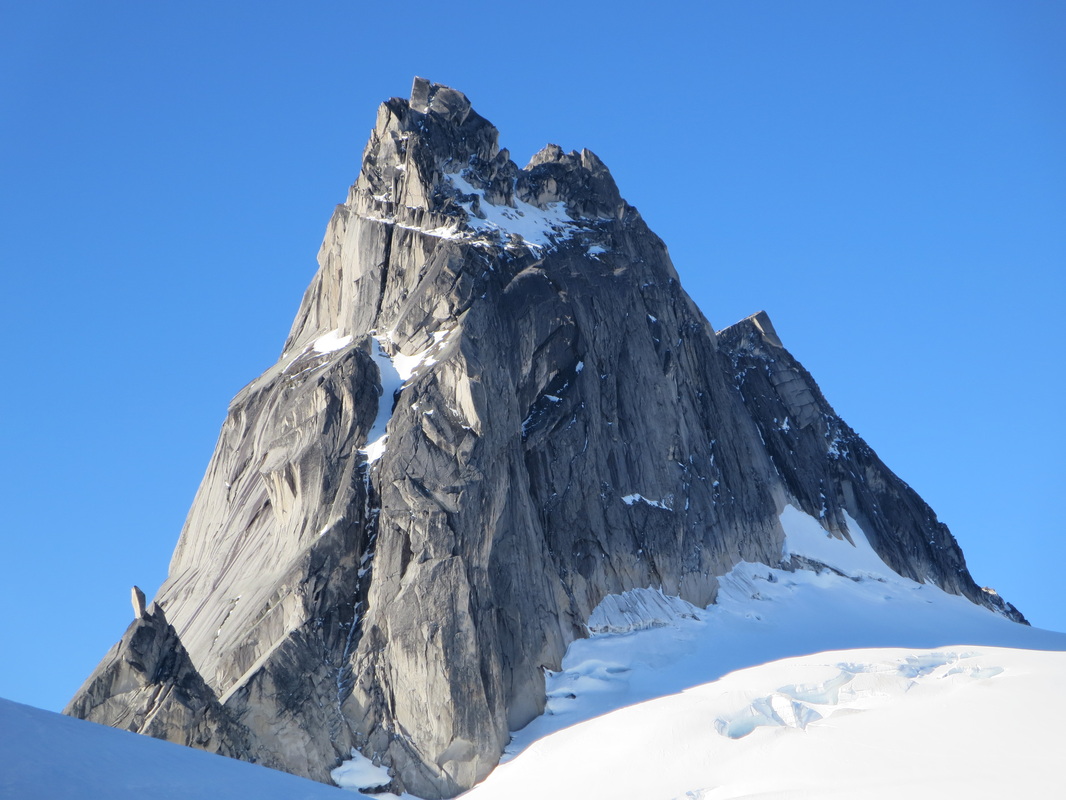
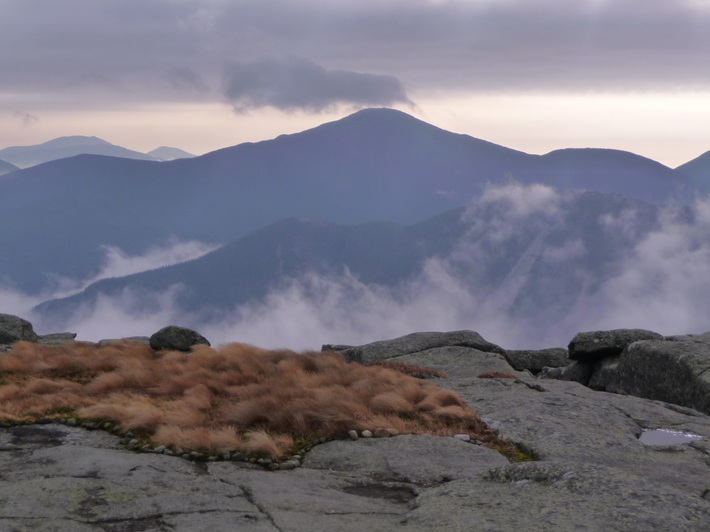
View over to Jefferson and Washington from Adams in a sea of boulders
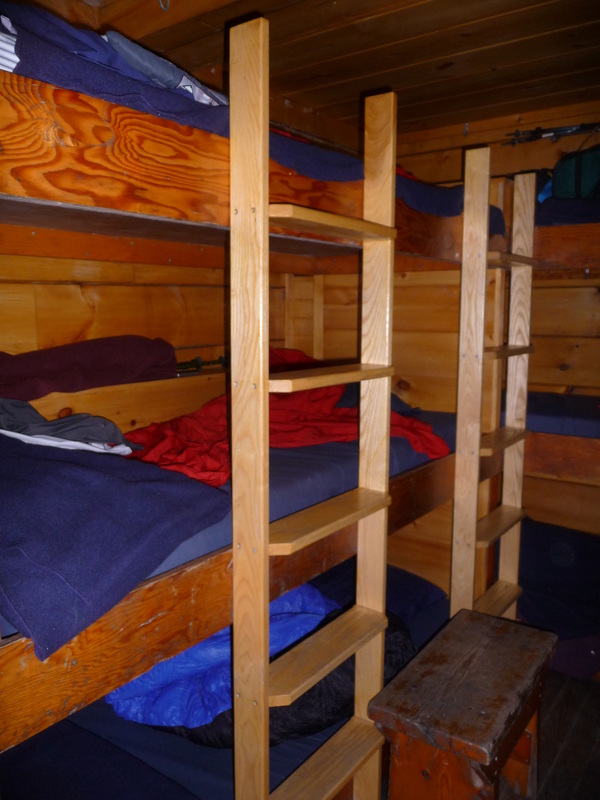
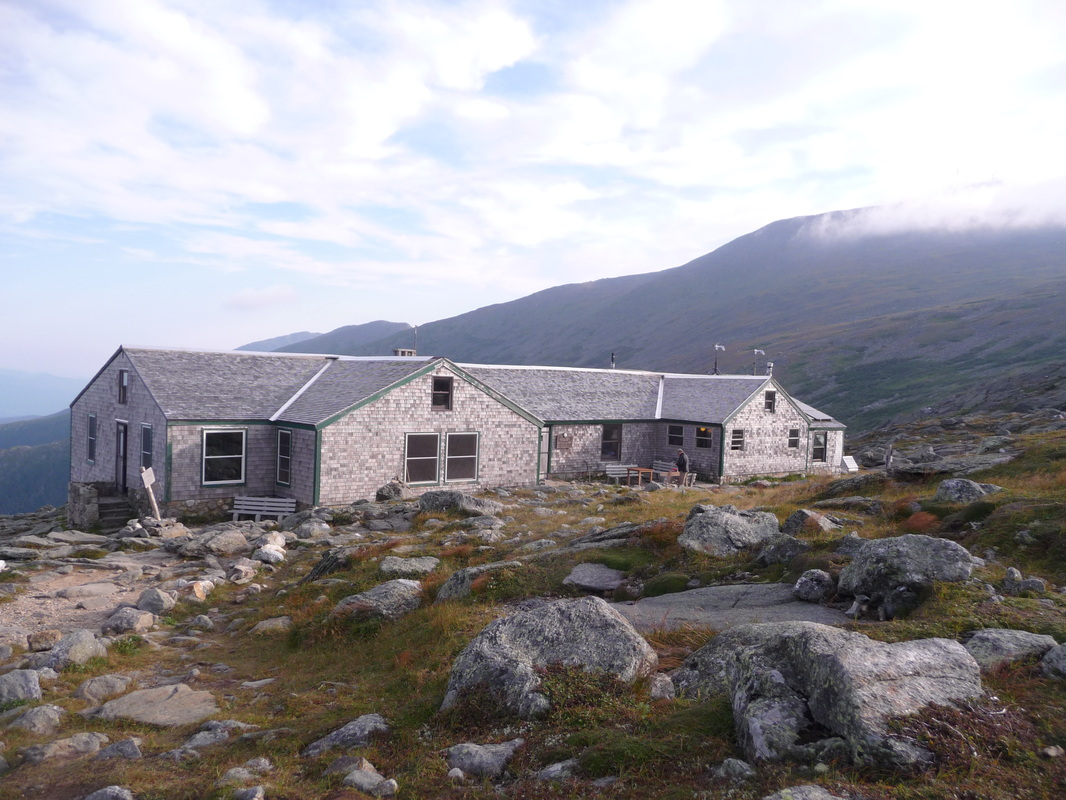
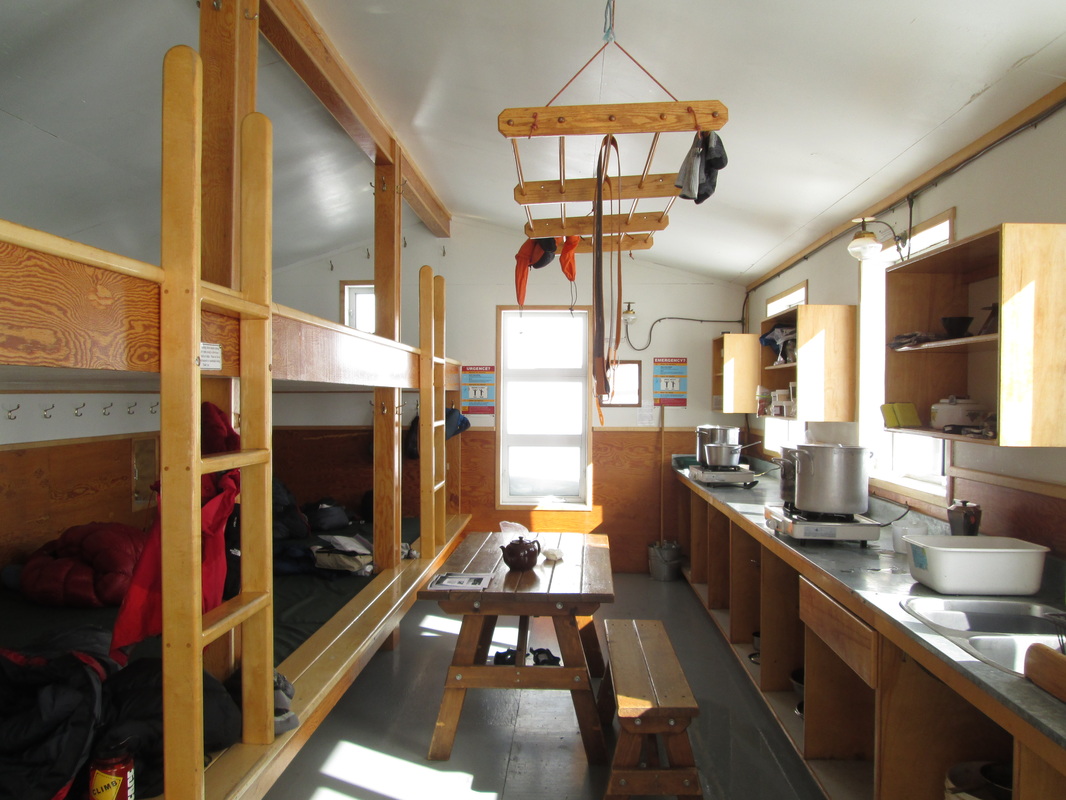
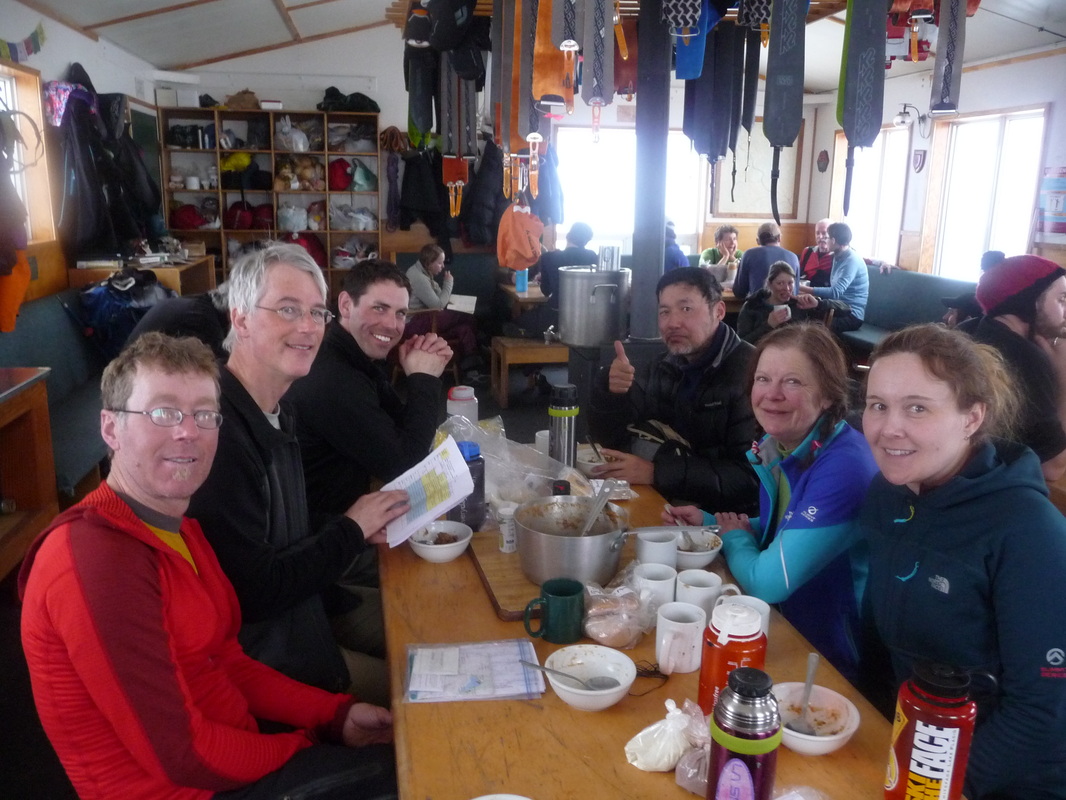
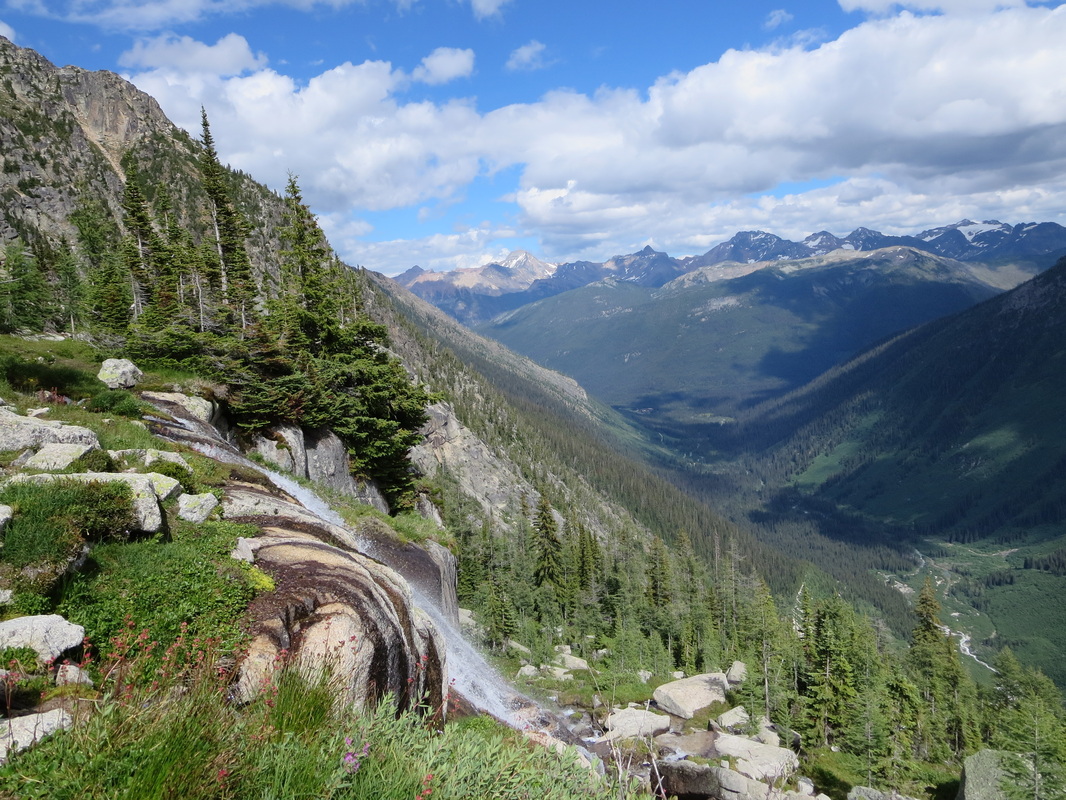
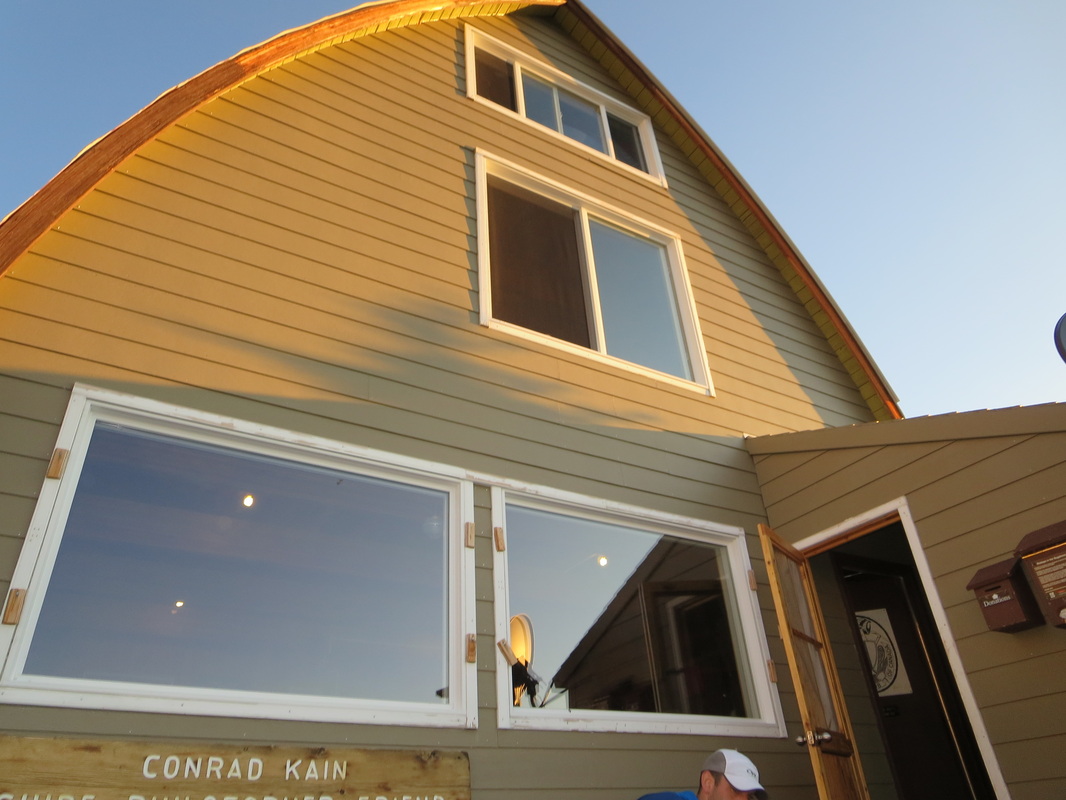
Heading over to Jefferson the views become spectacular. Summitting Jefferson at 5712 ft you are reminded that there is a drivable road and cog railway to the top of Mt Washington. What's the issue? Hoards of tourists are everywhere, many of them "hiking" on the ridge trail in this area-this is NOT the traverse to do to get away from people. Still, walking the beautiful trail between Jefferson, over Mt.Clay, and to Washington is gorgeous. Summitting Washington at 6288ft is interesting with the buildings, cars and people but by now we had our eyes set on descending to the Lake of the Clouds Hut, owned by the Appalachian Mountain Club. This hut has a capacity of 90, and it was overcapacity the night we stayed. There is no camping allowed on the traverse above the treeline, so AT thru-hikers sleep on the dining room floors of the huts. We had to reserve our bunk spot in advance online (link here). As we got there just before dinner, we had last picks of the bunks (see the triple stacked bunks in photo below: I had the knee-high bottom bunk). Our stay at the hut was incredible as the staff are very entertaining throughout meals dressing in costumes and putting on theatrical acts. They are also very helpful if you need trail any trail advice. The food was plentiful and nutritious. At $90/night/pp it better be! I do recommend ear plugs!
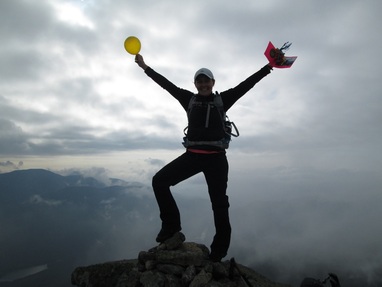
Day 2 - Lake of the Clouds Hut to AMC Highland Centre: Breakfast at the hut is at 8am so our timeline today would be tight to get to the Highland Centre by 4pm to get our shuttle back to our car. We ate and left quickly and within 20 minutes ascended our first summit of the day: Mt Monroe at 5372ft. From this point on, our hiking would be trending downwards: Mt Franklin at 5001ft, the Mt Eisenhower at 4474 ft, and the Mt Pierce at 4310 ft, and finally Mt Jackson at 4052 ft. The trail dips up and down and more and more exit trails appear-especially near the popular Mizpah Spring Hut. This is when I started to realize that people descend off the trail at different points and claim they have done the traverse. Then I realized that everyone has their own definition including a hiker we had met on the shuttle, completing 4 peaks in under 12hours of hiking/running. We continued on to Mt Jackson, one of Northeast 111, that I wanted to summit. We then cut off on the Webster-Jackson Trail, after summitting 10 of the peaks on the traverse.
Picture
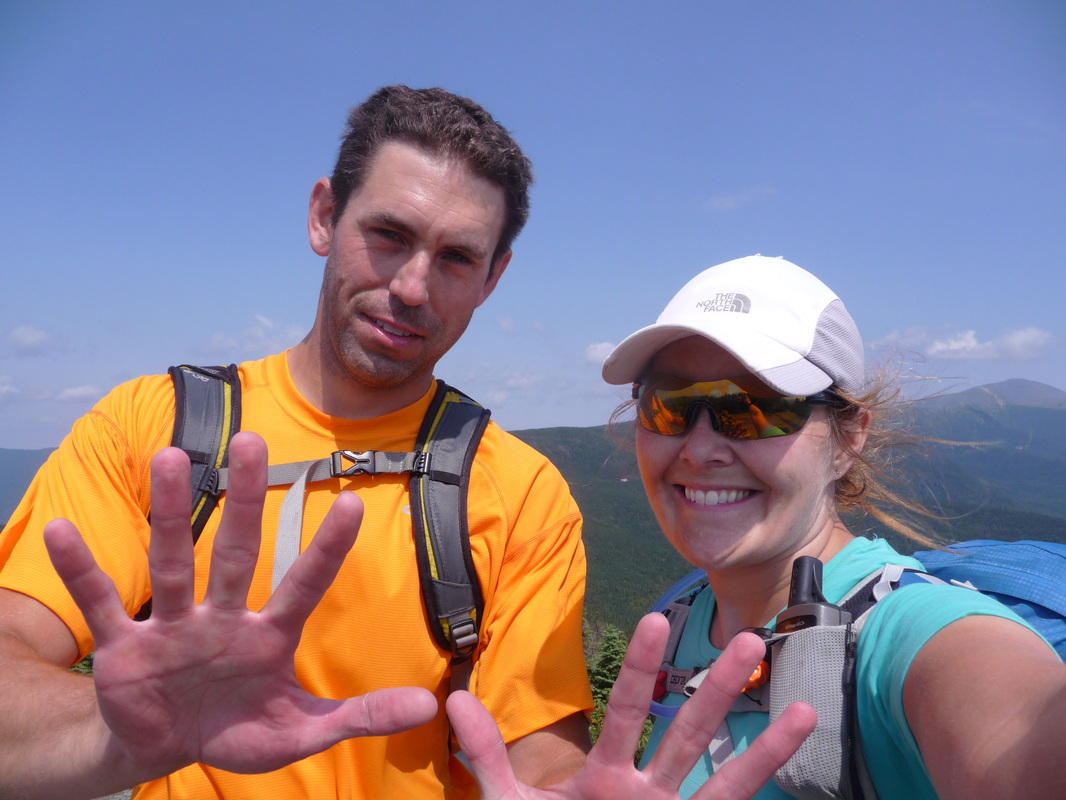
On the summit of Mt Jackson, our 10th peak.
We hiked along the road a short distance and walked into the Appalachian Mountain Club Highland Centre and checked in with reception for our shuttle reservation. We waited in the waiting room for the shuttle, used the washrooms, and bought a cold drink. The shuttle service was great and we we back at our car in no time. We returned to Dolly Copp for another evening and had a shower at Pinkham Notch Centre and a dinner in Gorham. The hike totals: 36km and 10,000ft of ascent in 16 hours of hiking over 2 days.
0 Comments

THE WAPTA WHITEOUT TRAVERSE

20/3/2015

0 Comments

 
Picture
Crossing Peyto Lake
In March of 2013, my husband Glenn, friends Deb and Steve, and myself along with another client from Japan and two guides Nick and Takeshi decided to tackle the classic Wapta ski traverse in the Canadian Rockies. We opted for the longer hut-to-hut version of the trips offered by Yamnuska Mountain Adventures that begins at Peyto Lake. 

Pre trip-March 9th: Meeting at the Yamnuska Offices, our group met our guides and we had a meeting to discuss the trip objectives and to check gear. We also split up some of the food we had to carry and made sure everything was set and ready to go for the next day. Our plan was to head to the Peyto hut for 2 nights, the Bow Hut for 1 night, the Balfour hut for 1 night, and the Scott Duncan Hut for 1 night. Let's go!

Day 1-March 10th Peyto Lake to Peyto Hut (2500m/8200ft) The first real day of the trip, we met at the office at 7am and were on the road from Canmore to the Icefields Parkway to be dropped off at a small parking lot past the main Peyto Lake area. After a quick beacon check and some photo-ops, we descended an icy luge run through the trees to the Peyto Lake. Looking back, this may have been the sketchiest part of the trip. Full packs, tight turns and little room for error! Finally at the lake, we donned the skins, crossed the lake and started ascending. Steep sections meant mastering the uphill kick turn, and avalanche prone areas meant crossing one at a time. Finally out of the trees and into the alpine, we had to take off our skis at one point because of an area of exposed gravel. Hiking up hill in ski boots with our skis strapped on our packs, we realized quickly that the gravel wouldn't last too long and we were back on snow. We skinned down to an old glacier research station and finally onto the glacier itself. The slog up the glacier took time-we sucked the air and every 10 steps or so had to stop to suck in an extra breath. Looking up over to our left we finally saw it! The Peyto Hut lies over 2200ft higher than the Peyto Lake and 4000ft higher than Canmore. I was sure glad to get to the hut that night! A delicious chicken curry dinner was just what we need to fill our bellies and enjoy the 18 person hut all to ourselves.
Day 2- Peyto Glacier Ski Day: Today was to be a powder ski day out from the hut. After a rollercoaster past few days working, catching planes, time changes and elevation gain of over 8000ft, I came down with an 'overtired' migraine headache. I opted out of today's adventures but the gang, after a knot and crevasse rescue morning refresher, headed out onto the glacier for some powder fun. Debbie had never skiied in powder before as 4 of us are Easterners so it was an exciting day for everyone and the conditions couldn't have been more perfect. The photo below shows some of the fun the group had on this day:
Picture
Day 3 - Peyto Hut to Bow Hut (2350m/7709ft): Waking up to frigid cold temperatures, winds, and snow wasn't what I had ordered in my forecast for this trip but we had to move, so off we went. We ascended the glacier with our lead guide Nick testing the snowpack depth with his probe every 100m or so. Visability was non-existent full blown whiteout and navigation was tricky. When our group was moving in a single file line, I looked up and shouted at Nick that I saw a glacier weather recording instrument sticking out of the white vista ahead. It was to be our only landmark for hours. Crossing the glacier over to the Bow Hut was somewhat familiar territory for Deb, Glenn and myself as we had been in the area ascending peaks during our Introduction to Mountaineering Course that we took with Yam during the summer of 2012. Nick, our past and current guide who knows the area like the back of his hand, led the way. The traverse was slow and covering up every inch of exposed skin was crucial. I had one slim spot on my cheek exposed and ended up with frostbite later on. After another hour or so of slogging through Wapta whiteout conditions we found the 'lighthouse', otherwise known as Saint Nicholas Peak. Knowing where we were and that the rest of the distance to the hut was downhill, we transitioned into ski mode and skiied down to the Bow Hut for lunch. In the afternoon, we decided to head back out to the glacier headwall and do some laps with lighter packs. As a snowboarder turned skiier recently, this enabled me to practice my powder turns.
Day 4 - Stalled at Bow Hut : This morning we woke to find out that evening before, a 911 SPOT emergency beacon had been activated on the traverse ahead of us close to the Scott Duncan Hut. Not having much information on what happened, we could only hope they got the help they needed. Knowing that we had been in a whiteout the day before, we wouldn't have been surprised that a group may have gotten into trouble. When we woke up on this day, snow had fallen heavily all night and shot up the avalanche hazard up to HIGH.  We figured we had 3 options: Traverse over to the Balfour Hut, ski out from the Bow Hut and find other local day trip areas to ski tour, or to stay put. After a satellite phone call between our guide Nick and the Yam office back in Canmore, we were advised to stay put as the roads were closed due to the snowfall amount and the avalanche forecast was not good. The group went out in the morning and found some untracked powder past the Onion Skin rock feature by the headwall, and then in the afternoon found some more powder on the headwall itself. Visibility was again awful due to the continuous snowfall, and there was one run I couldn't tell the difference between the ground and the air and couldn't feel the slope angle because the snow was so deep! Being disoriented as a skiier in the alpine left me feeling uneasy. Glenn said at one point he couldn't tell if he was moving or not because of the whiteout, and toppled over gliding on the flats! When we got back to the hut, we realized we weren't the only group that was stalled, as the hut was nearing full capacity.
Day 5: Stalled at Bow Hut (again!): We woke again to find that we had slept through another night of wind and snowfall and avalanche conditions were again getting worse. It was now rated HIGH below the treeline, HIGH at the treeline and HIGH above the treeline. We weren't sure how much snow we actually received but it was closing in on 100cm. So again our guide Nick got on the satellite phone to call the office and again we were advised to stay put. We took the morning off to read, play cards, and essentially be hut-bound. In the afternoon, we skinned up the headwall, practiced some crevasse rescue rigging, and skiied down and practiced some beacon rescue drills before dinner. Tension was high at the hut as everyone's plans were uncertain. We weren't sure if we were leaving tomorrow or not. Today, no new parties arrived and no groups left the hut. Conditions were just too dangerous.
Day 6 - Bow Hut to Bow Lake Parking : After breakfast and yet again another satellite phone call to the office, the decision was made to ski out as the weather was starting to improve. Avalanches were still a concern so Nick was very strict with his instructions on our way down. The first challenge was to descend into a deep alpine bowl where there had already been evidence of minor avalanches. Nick's instructions were to ski down his line. I was the 5th skiier down and had to snowplow through thigh high soupy snow to get to the bottom. Deb, the 6th skiier, fell going down this pitch and feared she would trigger an avalanche. We quickly got out of bowl area and into the trees and into a canyon. I led the group through the canyon area, skiing over heaps of avalanche debris. Heading down our final descent to Bow Lake, we breathed a sigh of relief that the risky business was over and we could finish the trip safely. We got to the parking lot to find the van buried in the snow. After an hour of digging it out, the entire group had to push it out 200m to the road! And of course, as we dug and pushed, it was snowing!
Post Trip: Once out of the alpine and back connected to the internet, we found out that over 100cm of snow fell in 2.5 days! The avalanche conditions were so high for so long that rescuers could not get into where the SPOT beacon had been activated. We read that 2 people (a woman in her 30's and a man in his 60's) had been rescued and that 1 man in his 50's from Abbotsford, BC had perished in a crevasse and his body was not recovered until two days after we were off the traverse.  Upon hearing the sad news, we reflected on our trip and even though it didn't turn out as we had hoped, it was still a great adventure full of meeting new people, skiing new terrain, learning new skills, and we were out safe and sound. The Wapta will always be there...and I'll be back.
0 Comments

THE BUGABOOS

17/3/2015

0 Comments

 
Picture
Pidgeon Spire
Picture
From July 26th-31st 2014 I signed up along with my husband Glenn and friends Deb and Rich with Yamnuska Mountain Adventures to take a guided Alpine Climbing trip to Bugaboo Provincial Park, British Columbia, Canada. The terrain in the Bugs is very technical and steep and shouldn't be attempted by beginner mountaineers or climbers. Even with climbing and mountaineering experience, I felt hiring a guide was the best option. And we had 3 great guides: Nick Sharpe, Eric Osteopkevich, and Richard Howes with 6 clients. Here is an account of our 6 days in the Bugs:

Day1-Kain Hut (2230m/7315ft): The group met up at the Yamnuska office in Canmore and drove over to the town of Radium, BC. From here you take a 45km dirt logging road of varying condition to the Bugaboos trailhead parking lot. Local legend has it that wild porcupines have chewed through brake lines here in the past so we had to wrap up our rental car in chicken wire. The hike up to the Conrad Kain hut begins with a easy trail and then abrupty turns a corner and heads straight up 2300ft or 700m ascent to the hut in 4.5km. This hike can be gruelling with heavy loads and should be the first warning of the steep terrain in the area. The Conrad Kain hut is a large 3-storey barn-like building that is a hub of climbing activity and full of mountaineering history. The Kain hut sits at 2230m or 7315ft elevation.

Day 2- Pidgeon Spire (3156m/10354ft): We woke before dawn and slogged up the rocky trail to the glacier feeling the altitude hit our lungs with every step. After a quick glacier skills refresher, we ascended the steep snow slope of the Bugaboo-Snowpatch col. Snowsteps were up to our knees as we needed to move as quickly as possible to avoid rockfall. Once at the col, we could see our objective for the day: The West Ridge of Pidgeon Spire (photo above). We moved fairly quickly across the glacier approach to the ridge and switched from glacier mode to climbing mode on a rock outcropping at the base of the ridge. Climbing Pidgeon was fairly easy as it's rated a 5.4 PD-. We wore our mountaineering boots, helmets, and packs. The guidebook boasts this climb as one of the best in North America and I can honestly say it doesn't disappoint. The views are outstanding on the entire route. Two rappels and some downclimbing, we re-traced our steps back to the col where we rapped some more. The day took 12 hours. My good friend Deb (in red) and myself (in blue) were dubbed the "A" team as we were quick going up and down. My husband Glenn in the photo below rapping off Pidgeon. 
Day 3: Lion's Way (2830m/9285ft) Today day we attempted an easy multi-pitch rock route in the Bugs called Lion's Way to lead us to the summit of the Central Tower of Crescent Spire. The grade of the route was 5.6 PD+ an was approximately 8 pitches in length. For me, it was a fabulous opportunity to expand my trad climbing skillset as I'd been primarily a sport climber until this point. The climbing was not difficult, but I had never climbed with a pack or trad equipment before so that made the climbing different for me. I loved this route as it wasn't overly consequential but had some great views. Bugaboo climbing is on extra-gritty granite meaning you don't really need chalk but you will probably need tape. 
Picture
One of our guides Eric Ostopkevich and me seconding below on Lion's Way
Day 4: Marmalota (3019m/9905ft) Day 3 started early at 3 AM to attempt another summit of Marmalota. We ascended a different dirt trail up to a different glacier by headlamp, donned our glacier gear and started the slog up. Acclimatization had progressed and at this point and the heavy breaths have now gone and we were moving quickly. Hopping over crevasses on the way up we reached the rock when the sun was rising. The route we were to take was rated a 5.6 again, and we did this one in our mountaineering boots. In hindsight, I think I would have preferred rock shoes. The 'feel' of Marmalota is a bit sketchy, as loose rock fell off the slope with our movements and hand holds broke off into crumbly bits. The peak felt like it was eroding compared to the solid feel of Pidgeon days before. Ascending Marmalota takes time and there is some technical and very exposed moves. Maybe because of the flaky nature of the peak, I didn't feel as comfortable. Our guides were fantastic, keeping the energy positive and the mood 'light'. For me, the guides earned their money that day, especially on the descent. After 3 rappels, we faced a dilemma with how to get over the bergshrund and onto the glacier. Our guides had us do a 50m rap down to a rap station on the only rock around that we could sling some cordelette around. The 6 of us crammed in on top of one another, attached to this one outcropping. The next rappel onto the glacier was super fun as we had to "Mission Impossible" style rap over the 3m gap created by the bergschrund onto the glacier. We quickly retreated on the sunny glacier back to the hut, a total of 13 hours for the day.

Picture
Rich happy to be down from Marmalota but not back on the glacier yet!
Day 5-East Post Spire (2728m/8950ft) Today we opted for a an easier option. After a late start and a big breakfast-did I mention the food was fantastic? We hiked up to the Appleby Campground site and continued on through the trail to the summit of East Post Spire. This summit is short, and more a simple scramble. We ate lunch on the summit- our fourth summit in 4 days! We descended to a top roping area so that I could play with trad gear on top rope. After a couple hours, storm clouds rolled in and we descended back to the hut.
Day 6-Heading Out Our group decided our bodies had been pounded enough and it was time to head out. We descended the steep, gruelling trail on the way down with heavy packs and returned to find our car in the parking lot hadn't been eaten. We headed to Radium for some ice cream and headed back to the Yam office in Canmore for some debriefing and trip wrap-up. This trip will be one to remember for sure. The steep technical terrain is challenging. I am already thinking of my return trip to check off the famous classic Kain route! I would highly recommend Yamnuska Mountain Adventures for their guiding in the Bugaboos as I never once questioned my safety and felt that their professionalism was second to none. Another great week in the mountains..... :)
0 Comments

ALGONQUIN PARK: CANOE LAKE CLASSIC LOOP

17/3/2015

0 Comments

 
Algonquin Provincial Park is located in central Ontario, Canada. It is a world renowned canoe tripping destination with many options for car camping and wilderness canoe tripping. I have been canoe tripping in this park now for 25 years, and it always holds a special place in my heart. The park is over 7000 square kilometers in size and has numerous options for short and long distance canoe routes. Reservations are recommended in advance and can be made here.

The Canoe Lake-Big Trout-Canoe Lake loop I will describe is one that I've completed over a dozen times. It is a classic route in the park and it is my number one choice for guiding my outdoor education classes. It can take a leisurely 5 days, or as short as 2.5 days. With my large groups I do the route in 3.5 days, and 3 nights as described below. The route has a great mix of small creeks, big lakes, and progressively hard portages.

The route starts at the Canoe Lake access point along highway 60. Highway 60 is the main highway that runs through the middle of the park. Cell service is accessible along the highway but a short 1 hour paddle off the highway and the cell service dies. Be prepared for backcountry camping beyond this point and make sure you have the adequate skills (canoeing, portaging, water purification, navigation, bear safety, wilderness first aid, etc) and knowledge before entering the wilderness area. Be sure to pick up your permits from the park office, rent any equipment items from the Portage store or Algonquin Outfitters, and use the flush toilet for the last time. Campsites in the backcountry have a limit of 9 people and have only a fire pit and a small pit toilet as facilities. 

Day 1-Canoe Lake to Burnt Island Lake (half day): Heading north along Canoe Lake, enjoy the old cottages and summer camps on the shores and islands. Stop at the Tom Thompson memorial on your way into the narrows at the north end of the lake. Veer right to the Joe Lake portage trail and portage the flat 250m trail around the dam. There is an outhouse along this trail if you need it. Paddle under the bridge hugging the right hand shore of Joe Lake moving through a narrow and into Little Joe Lake. On your right, you will see the Arowhon Pines Lodge, the setting for the movie Indian Summer, and the last man-made building you will see for days. The next short 165m portage you encounter is easily skipped in high water. Paddle through the creek to start the longest portage of the day 435m. A short paddle across Baby Joe lake and through a short final portage of the day 200m (make sure you go right at the fork!), and you'll be on Burnt Island lake. Depending on the weather and time of year, there are many sheltered campsites and wide open campsites along this lake. Listen to the loons as dusk hits.

Picture
Sunset on Burnt Isle
Day 2- Burnt Island Lake to Big Trout Lake (7hrs): A nice warm-up paddle in the morning to finish the remaining length of Burnt Island Lake, and head to the 790m portage that traverses to Otterslide Lake. Getting out onto Little Otterslide Lake is always a relief, mainly from the heinous bugs that always seem to be hungry throughout the last portage. Paddle through Little Otterslide through a small creek that offers great wildlife watching to Otterslide Lake. I often stop for lunch at a campsite close to the Otterslide Creek portages to fill up water bottles and to fuel up for the challenge ahead. Otterslide Creek is a series of 5 portages along a narrow watercourse varying from 105m in length to 750m in length. This is a great test of portaging efficiency. There are many interesting features through this creek including wildlife sightings, beaver dams, and boardwalks to portage on. Once through the creek, you will be feeling low energy but a short paddle out to Big Trout lake will welcome you with a breeze and a plethora of fresh water to purify for your water bottles. I have my groups paddle over to the islands to choose a fitting campsite for the evening. Big Trout Lake is a great lake for swimming! 
Day 3-Big Trout Lake to McIntosh Lake (5 hrs): The morning's route through the remainder of Big Trout, White Trout Lake and Grassy bay will take hours. If windy it could take all day. As you pass through White Trout you will see a Ranger cabin on the shores. Paddling through Grassy bay is one of the highlights of the trip. This is the best opportunity to see the wildlife on the trip and hopefully it will not disappoint. My record is 6 moose in one trip through! Navigating through the creek can sometimes be tricky so for the most part if you take the widest, most well used path it works. Upon finishing the creek at the 745m portage, take a well earned break for lunch and re-fueling. The next portage is one of the toughest on the trip as there are 2 heart-pounding hills to carry your gear up. Paddle a short creek and then finish off the day with a 510m portage into McIntosh Lake. Look down as you paddle away from this portage. The bottom is often viewable 15m above at the surface. I like to camp at the southern most campsites closest to Ink lake. If the wind was in your favour, this day is relatively short!
Day 4- McIntosh lake to Canoe Lake (6.5hrs): Hopefully by now your packs are beginning to feel light as food has been consumed from the previous days. This will be a good thing leading into this morning's challege: a 2320m portage from Ink Lake to Tom Thomson Lake. The portage begins with a flight of stairs-I am not kidding! Portage your gear up the stairs to large flat landing area at the top. From here pace yourself through the 2320m, taking stops at the rest spots along the way. The portage is not overly difficult in terms of terrain, but it is long and heavy gear and multiple trips will weigh on you-no punn intended. It takes about a half hour to walk through the portage without stopping so with big groups I create strategies and challenges to get the equipment through the most efficient way possible. This portage can be buggy, and there has been bear activity witnessed in the past. After a photo-op with the portage sign at the end, hop into the boats once again and paddle through Tom Thomson to Little Doe Lake. Stop for lunch at a campsite and paddle on through Fawn Lake, Tepee, and Joe Lakes. You will recognize the bridge you canoed under a couple of days ago that will lead you back to the first portage of the trip. Backtrack through the portage and Canoe Lake and you have completed the loop. Celebrate with a treat from the restaurant or store at the access point!  
Picture
McIntosh Lake
0 Comments

THE NORTH RIM AND LONG RANGE TRAVERSE, NFLD

9/3/2015

0 Comments

 
Picture
Western Brook Pond
Gros Morne National Park in Newfoundland is a recognized geographical area both nationally as a park and internationally as a UNESCO World Heritage Site. Gros Morne is jam-packed with unique geological features such as an inland fjord,  the orange tablelands, sand beaches, coastal shoreline, and a large area of rugged wilderness. According to Parks Canada, it is visited annually by over 100,000 people. 

In July of 2011 my husband and I attempted to complete the longest backpacking trip in the park-The North Rim and Long Range Traverse. The Long Range Traverse is a popular backpacking trip, starting at the end of the Western Brook Pond Fjord boat tour. The North Rim starts at the dock of the boat tour and adds about 27km to the 35km Long Range Traverse. The North Rim is not a hike that is popular due to its unappealing rugged nature. In fact, when we did it, only 2 groups had been in before us all year.

The trip actually starts at the Visitor Centre where you pick up your permit ($122.60CDN). Before you get your permit, you must pass a written test to prove your navigation skills. Did I forget to mention this trip is trail-less? Good map and compass/GPS skills are mandatory skills for this wilderness trip. In addition to your permit, Parks will give you a VHF transmitter to carry in your pack in case they have to find you! We parked our rental car at the Gros More Mountain trailhead and hired a taxi to take us up to the Western Brook Pond parking lot. The drive takes about a half hour. For more planning tips, click here.

Day 1- Start to Snug Harbour:We hiked into the Ferry boat landing and took a boat cruise to start the trip. We knew that we would miss out on this by not doing the Long Range Traverse, so we wanted to explore the fjord and scope out some of our route for the first two days. Getting to our first campsite ended up being much more than we bargained for. With 3 days straight of rain before we started, the water levels had risen greatly including the outflow from the Western Brook Pond. The Parks staff had warned us of this, citing that the level might be 'above the knee'. My husband took the first pack across and sank into waist deep fast flowing water. He yelled at me to say he'd come back to get my pack and good thing he did. When I went across I sank to armpit deep and my feet left  the bottom and I ended up in a swimming position pulling myself over on the cable. Good thing I am a swimmer and a whitewater paddler and am comfortable in current. The rest of the journey to Snug Harbour displayed signs of moose activity everywhere, not surprising as there is an overpopulation of moose on the island.


Picture
What ended up being waist deep on my 6'2" husband.
Picture
Day 2 - Snug Harbour to Long Pond: Our first night at Snug Harbour was uneventful and then next morning we got early to hike the 1500ft up to the top of the rim. As soon as we reached the rim and then the weather turned foul. High winds, rain, and plummeting temperatures challenged our abilities. In addition, we learned how frustrating tuckamore can be. Tuckamore is the Newfie word for low-lying dense, stunted fir trees that, when hiking through, is akin to walking through a cedar hedge. We got to the Long Pond campsite in gale force winds and driving rain. It took the two of us get the tent storm lashed down onto the platform and once finished we jumped into our sleeping bags with clothing we brought that was dry and it took 3 hours before we felt warm. Temperatures felt like they were at the freezing mark. We ate handfuls of snacks for dinner as the wind and rain howled for hours and hours.

Day 3 - Long Pond: We woke up to freezing cold temperatures, wet gear and complete fog. We couldn't even see 50m out of our tent. We pushed back our start time and kept postponing until our cut off time of noon. We got to noon and the weather hadn't broken, and spent the day reading and keeping warm in the tent. We were storm bound! We stayed inside most of the day until we heard the sounds of a helicopter. Yes, that's right, search and rescue was checking in on us! We didn't give them any S.O.S. type signals and so it left. We thought other groups may have bailed with the extreme weather.

Day 4 - Long Pond to Bear Box: We rose on day four and the temperature was significantly warmer. That said the thick fog still lingered but we figured it would burn off and headed out. Navigation was extremely difficult as we had to check our GPS position on the map  every 100m to see if we were where we should be. Around 2 PM the clouds finally broke and we had our first sunbeams of the trip. The views opened up and we found the campsite no problem. We were able to find a boggy tent site and dry out our gear until the bugs came out. To escape the bugs, we jumped into the tent after dinner. We had just cleared our tent of bugs when my husband said "I need to go out and brush my teeth". I tried to persuade him to not go but he insisted. When he was outside brushing, he yelled at me to grab my trekking poles because he was looking at a bear. We watched the bear feeding for 45mins and in that time it kept getting closer and closer. Our food and stove was in the bear box (provided at each site) so we knew that wasn't attracting him. We returned to the tent to let him be and stayed quiet and wide-eyed for hours into the night. It started raining again and everything was soaked again. The next morning we got up and left as soon as we could. We called this site "Bear Box" as there was nothing at the campsite other than a bear box to distinguish it!

Day 5 - Bear Box to Hardings Pond (17km): Starting in the rain once again, we reached the end of the North Rim trail when we reached the viewpoint for the Western Brook Pond. Views weren't great and the famous photospot wasn't photogenic on that day (photo above). When we were hiking up the rocky slabs out of the valley, my hiking pole slipped on the rock and poked my husband just below the eye. A close call and lesson learned about following people up steep slippery slopes too closely. We continued on to Harding's pond for the night, where we found two other parties camped out on the tent platforms. People! We chatted with them for a bit before realizing that there was no third platform so Glenn and I had to pitch our tent on a small bit of sandy flat ground. As soon as we pitched our tent it started to rain, again. 

Day 6 - Harding's Pond to Finish (22km):  We woke at Hardings Pond, packed up before the other parties and began the day with promising sunshine. Finally! The undulating terrain took us up and over many rock outcroppings and past many view points and we saw two massive caribou! We hiked around many mud puddles and bogs. The day ended up being the best day for views and weather, but our toughest day physically. We descended the steep and sketchy Ferry Gulch to the Gros Morne Campsite and made the decision to march out the last 5km to the parking lot, a total of 22km for the day.

Picture
The conditions on this trip proved to be very challenging. The rain had created very muddy, slippery and boggy conditions and on many of our steps we sank over the ankle. My double gaiter (OR Salamander and OR Crocodiles on the right below) kept my feet absolutely dry until the end of Day 4. The saturated ground made us have to make many detours around puddles, deep mud, and bogs. At the last minute I had thrown in some plastic garbage bags to use if things got wet. The ended up saving the trip as we used them as extra protection ground covering on the floor of the tent, crossing swollen rivers, and keeping wet tents incased. The extra weight of our saturated gear ended up giving me a nasty case of plantar fasciitis after the trip was over. Hike totals: 70km and 10,000ft of ascent!
Picture
We coined a phrase on the trip that encapsulates this photo: Bog Sloggin'
This wasn't the first National Park I had backpacked in and I found the infrastructure in the backcountry sites lacking. Each site was to have 3 tent platforms (only one of the sites we stayed on did), a green pit toilet and no campfire rings. We found campfire rings that had been used at almost every site even though regulations said othewise. We advised the park office of our disappointment having to sleep on wet bog more that once. This may have changed since 2011. The parks staff also said they closed down the trail after we got on as it was too dangerious to cross rivers, etc. No kidding! The conditions apparently were the worst in 87 years with the volume of rain and the cold temperatures. Another great adventure in the books! :)
Picture
OR Salmander and OR Crocodile double gaiters kept my boots from getting wet unlike my husband's left.
0 Comments

ADIRONDACK 46'R JOURNAL

4/3/2015

0 Comments

 
Picture
Picture
From 2010-2012 I made a goal for myself to reach the highest 46 peaks in New York State over 4000 feet. The list of these peaks is well known and a select group of about 8000 people or so have now completed the feat, known in the area as '46ers'. Not being a resident of this state or country, I would have to commute 4.5hours one way on weekends to attempt this goal. If you're not familiar with the Lake Placid area, it is one of complete beauty with numerous activities abound: skiing, golfing, road biking, fly fishing, etc. 

The hikes to reach the tops of these peaks are technical hiking/scrambling with eroded trails that head straight to the top without a single switchback. Most hikes ascended 2000-4000 feet in one push, and
took over 25 days of hiking, and the average length of the hike was 9 hours. I summited in every month of the year, and navigated the unmarked trails successfully.


To read more about the hiking tales and learn more about the 46 peaks, I created a blog as proof I could submit to the ADK 46R organization. The link below will take you to my site:


http://kpwadkjournal.blogspot.ca/

0 Comments

    Author

    Canadian gal hooked on pursuing outdoor adventures, testing outdoor gear, and a passion for outdoor education.

    Archives

    November 2022
    August 2022
    March 2022
    August 2021
    August 2020
    January 2020
    August 2019
    July 2019
    October 2018
    August 2018
    July 2018
    April 2018
    August 2017
    November 2016
    September 2016
    August 2016
    January 2016
    December 2015
    August 2015
    May 2015
    April 2015
    March 2015

    Categories

    All
    Backpacking Trips
    Climbing Trips
    Hiking Trips
    Paddling Trips
    Skiing Trips
    Trekking Trips

    RSS Feed

Instructor/Ambassador for:
Picture
Picture
Picture
​<script type="text/javascript" src="http://classic.avantlink.com/affiliate_app_confirm.php?mode=js&authResponse=d43d81bd3781e1d2abd21e2d070927932a5cd5c0"></script>

​