Welcome to KPW Outdoors
  • Home
  • About
  • Blog
  • Gear Reviews
  • Trip Reports
  • Media
  • Contact

SO YOU WANT TO BECOME AN ADIRONDACK 46ER?

3/9/2017

6 Comments

 
Picture
"A 46er is not something you can buy or join, it's something you become" - Jim Weeks
So you've visited Lake Placid, you've hiked a 46er, and you've fell in love with the Adirondacks. Many people have become hooked to the High Peaks Region this way and once you do, it's hard to stay away. I know -  it happened to me too. 

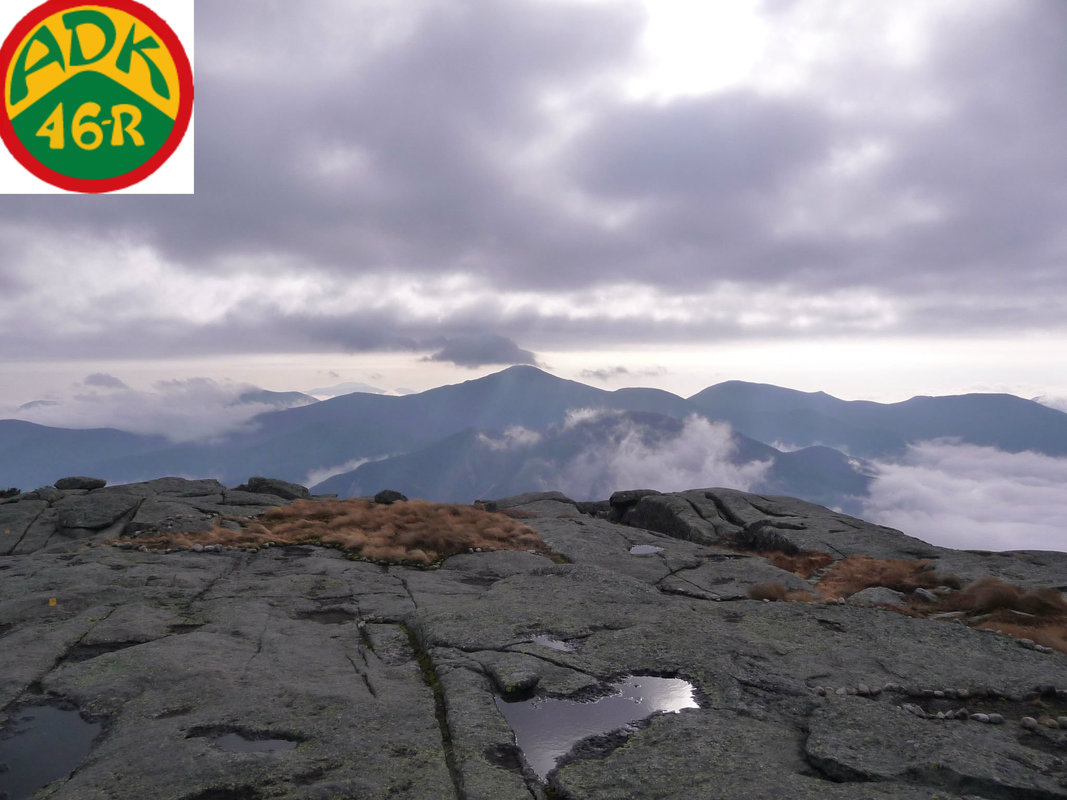
The High Peaks region of Adirondack Park is a hiking mecca. It is a massive area containing over 6 million acres and over 2000 miles of hiking trails. According to historical measurements, there are  46 peaks over 4000 feet in height and the goal of many is to summit all of them and belong to a club of members that have done the same: The ADK 46ers. There are now over 10,000 members of this club dating back to the 1920's when many of the peaks had no access trails and hikers had to bushwhack their way up. I completed my first round in 2012, but have returned to hike most of the 46 again. I have attained summits in all months of the year. I firmly believe that if you can hike the 46, you can hike anywhere in the world.

For some it's a walk in the park, for others it tests your every limit. Some share time with old friends, some make new friends, and some go solo. According to Grace Hudowalski #9:  "There is something spiritual in it. The mountains mean something different and special to each person. They are what connect us as a group. But the journey is an inward one, learning about yourself".

If you're up for the challenge here are my tips:

1. Recording Your Hikes

Print off a list of the peaks to check off as you hike them. Many can be grouped together and done in the same day. After your hike, you need to record details of your hike like: date, time, weather, what you saw, photos, and other interesting info. These records are what helps you prove that you have accomplished the summit in order to approved by your correspondant at the ADK 46er organization. Some people make a simple written journal on paper, some create a blog, some use a spreadsheet. Personally I created a blog and then printed it off as a keepsake book afterward! To submit your record, head to the ADK 46er webpage and begin the process listed there. They used to only correspond by mail, but have begun an electronic version.

2. Trail Information

a) Each Thursday the Department of Environmental Conservation (DEC) releases an updated trail condition report for hikers hiking the High Peaks. This is an important report to read before your trip as it gives up to date information on things like: flooded areas, bear reports, closed sections of trail, seasonal information, etc.

b) Here are some other links to find out recent trail info:
TrailsNH.com - compilations of most recent trip reports from the internet for each peak
Adirondack 4000 Footer Hiking Group on Facebook - Recent photos and a community willing to answer questions
The Mountaineer- This Keene Valley store is great for speaking to someone about local conditions as well as picking up any rentals you may need (snowshoes, skis, crampons, etc). They also sell plastic coated topo type maps with hiking trails of the entire High Peaks region which you will need for your goal.

c) An excellent website for trail descriptions and timing is Andrew Lavigne's ADK website. He has multiple trip reports from every peak including photos, distance, elevation gained, hiking time, etc. He also has .gpx files that you can download and load on your GPS for those winter unmarked trail hikes. A valuable resource that sure that helped me when I did my 46.

3. Where to Stay

a) Backcountry camping in the High Peaks Wilderness areas at Lean-to's and campsites is free. These sites are first come, first served, and most require you to hike in 3 miles to reach the site. The sites normally have an outhouse and are close to a water source.  There are a couple of spots that you can essentially drive to and camp for free. One is South Meadow road on the Loj road, but it has limited sites and are almost always full. Another one is along Corey's Road near the Seward Range. There are also 2 hike-in cabins along John's Brook that have to be reserved in advance.

b) State Parks and other car campgrounds: There are numerous paid campgrounds that include campsites with picnic tables, showers and flush toilets, and running water. Popular ones include: 
Lake Harris State Campground
Wilmington Notch Campground
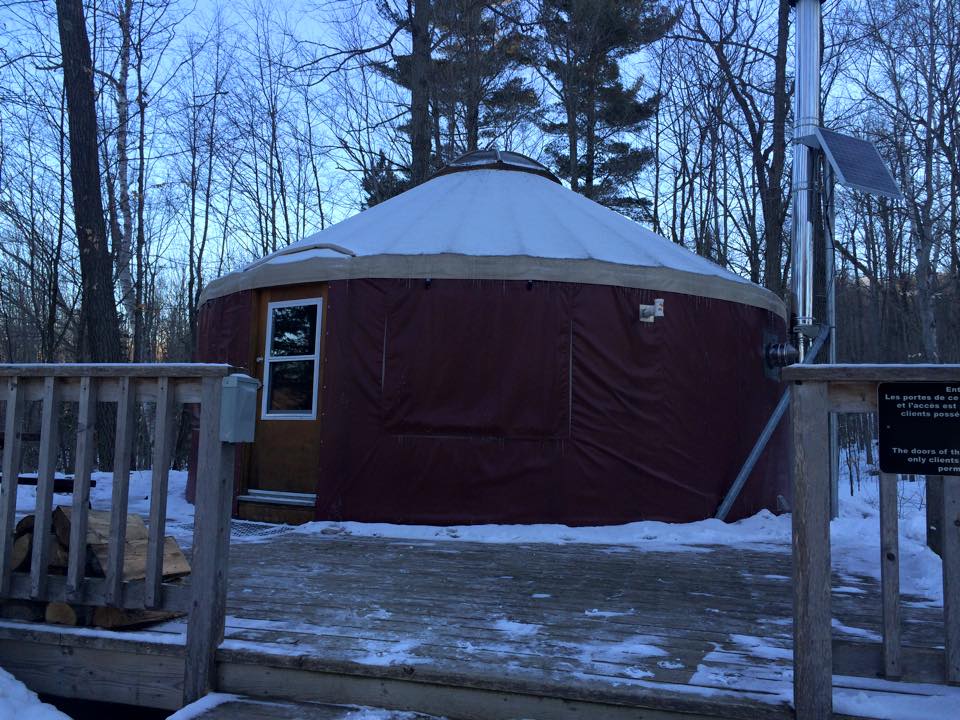
Adirondack Loj Campground (also have lean-to's and canvas cabins for rent)
KOA Lake Placid/Whiteface

c) Cheap Lodging
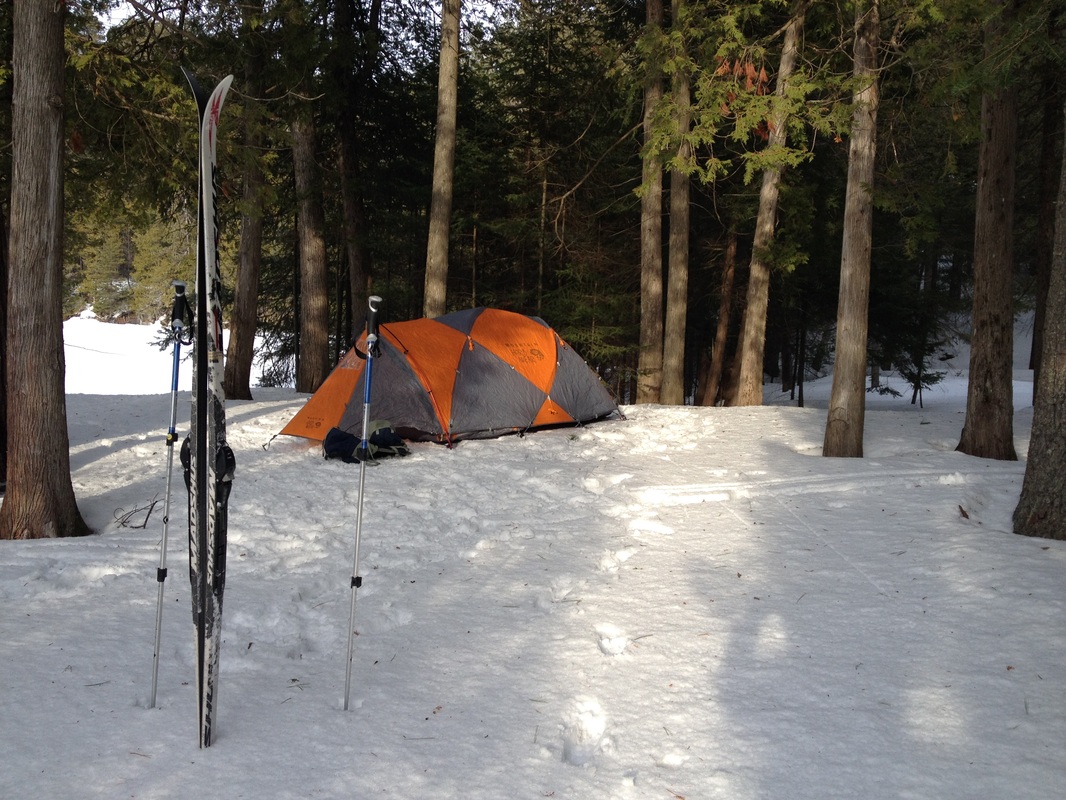
I try to camp in the summer months, but tend to gravitate to lodging in the winter months (sometimes I winter camp!). Here are some of my favourite places to stay on the cheaper end of the spectrum:
Keene Valley Hostel
TMax-n-Topos Hostel
Cascade Motel
Roostercomb Inn, Keene Valley
Adirondack Hotel in Long Lake
Cloudsplitter Cabins in Newcomb

4. Weather and Equipment

a) Make sure to check out the weather forecast for your hike. Checking the Keene Valley weather however may not give you an accurate prediction of what's going on 3500 feet above so check the National Weather Service's Mountain Forecast before you go.

b) Dress for the LOW. If the nighttime low is 25F, and the daytime is 40F, dress for the LOW. As you ascend, the temperature gets cooler. I find if you start your hike early, head up to the top and descend late afternoon, your average hiking temp all day will be around 25-30F depending on the wind. Never dress for the daytime high, and always bring multiple layers.

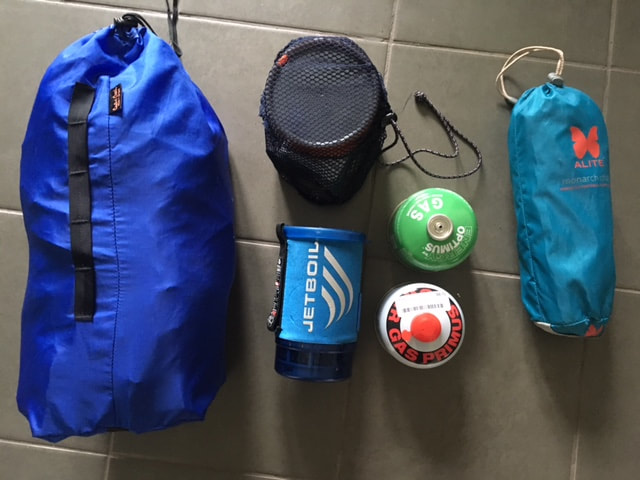
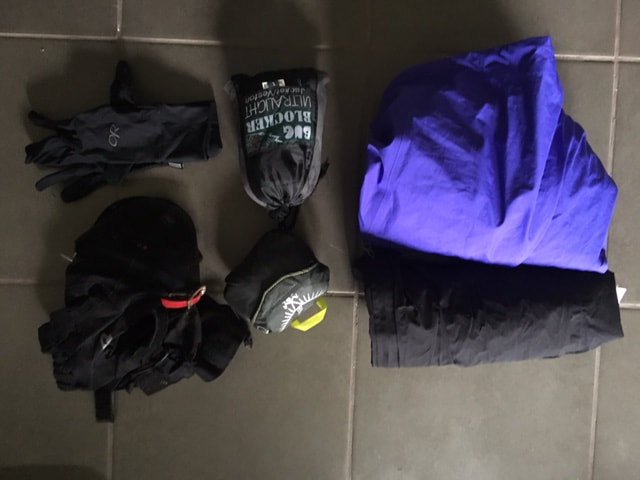
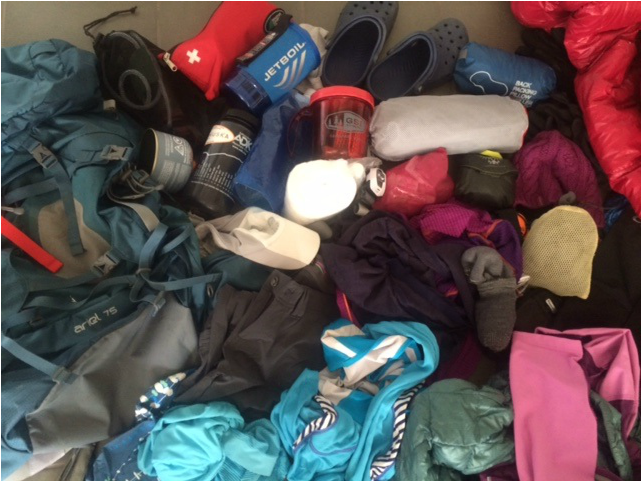
c) What to bring? Here is a printable list of equipment you should be bringing with you on your day hikes for all four seasons in the ADKs. Dress in layers: Baselayer (polyester,merino wool, polypropelene), Insulation (fleece, wool, down), Wateproof-Breathable Rain and Wind Shell (Goretex Paclite, Hellytech, Entrant, Pertex). Many of the hikes are remote, so if you don't have map, compass and GPS skills go with someone who does (or learn yourself!). Many hikes start and end in the dark, so a headlamp is mandatory on every hike. Many DEC ranger reports cite rescues caused by people getting caught out at night without a headlamp. Survival gear is also important as cell service is rare while hiking and shouldn't be relied on for Ranger rescues. Be prepared! Winter hikes require snowshoes, microspikes and crampons. Don't skimp on equipment! Here is the link to my list.

5. Training
For anyone who has done any ADK hiking, undoubtedly they would be characterized as 'steep', 'rocky', 'rooty' and 'wet'. Showing up without a doing some work beforehand is a recipe for failure. Here are a few recommendations:
a) Aerobic training: Swim, cycle, run, nordic walk, or hike at home on a regular basis in order to prepare your heart and lungs for the 3-12 hour long hike. High intensity intervals really help get your body ready for the steep sections when the heart is really pumping. Try 5 x 1 minute of upping your pace the next time on your run, swim, cycle, or walk.
b) Strength training: You need to prepare your legs for hiking, and your arms for pulling on roots or pushing on hiking poles. Here is what has worked for me:
- Weighted pack ascents: Find a local ski hill, or staircase, or any and load a pack with weight (waterbottles  or medicine balls work great) up to 15-30lbs for day hiking. Your body will be used to carrying a pack and weight.
-Strength training: Lunges, squats, step ups, calf raises are 4 key lower body exercises. I lunge with 2 x 20lbs x 3 sets for weeks before hikes. Triceps, lats, biceps and shoulders are also good muscle areas to train for poling or scrambling as well core training for balancing on logs, snow spines and rocks.
c) Flexibility- Stretching out your muscles and maximizing your joint range of motion is important in hiking. Scrambling up rocky sections, high steps, and jumping over brooks requires flexibility. Preventing injuries is important, and flexibility is key.
d) Additional skills - Having a background in rock climbing, ice climbing, and/or mountaineering is an asset in the High Peaks. Scrambling up rocky cliffs becomes less scary as does your footing on icy slopes if you have had training in this area. Consider this an positive addition to your hiking skillset.

6. Becoming Official
Once you have completed your 46, there are a few things left to do. One, is to submit your hike logs and join the ADK 46er organization. You will be notified of your acceptance and awarded a certificate at a banquet the following May at the Crowne Plaza in Lake Placid. Membership privileges include the ability to order official 46er swag, and receive the PEEKS magazine mailed to you home. Two, is to summit the unofficial 4000 footer mountain McNaughton! CONGRATULATIONS!!! 

What's next? If you still have the hiking bug and want another challenge, check out these other hiking challenges:
Winter 46er
Saranac 6er
Northeast 111er  (115)


See you on the trail! 
KPW
6 Comments

GEAR LIST FOR PUKASKWA COASTAL TRAIL

14/8/2017

1 Comment

 
Picture
Pukaskwa Coastal Trail Gear List
Gear List for Pukaskwa National Park Coastal Backpacking trail from summer 2017. We planned on 7 days to do the Coastal trail and Mdaabii Miikna Trail. Temps for early August are lows of 5-10 degrees celcius and highs of 18-25 degrees celcius. The trail does not gain that much in elevation, and we plan to move 10-12km per day. 

Before a backpacking trip I weigh everything. I make decisions on what I am bringing based on weight. For example, I will weigh three shirts and decide which one to bring based on which one is lighter. 

For a full detailed trip report of the Pukaskwa Coastal Trail, click here.

Here is what I'm carrying on my back:
1. Osprey Ariel Women's Backpack 75L size small (4lbs 14oz/ 2.1kg)
2. Osprey pack rain cover size large (3oz/ 0.9 kg)
3. Western Mountaineering Summerlite sleeping bag (1lb 7oz/525g)
4. Outdoor Research Compression Bag for sleeping bag 8L (2.4oz/66g)
5. Jetboil Flash stove (14oz/397g)
6. Two large fuel cans for stove (12.5oz/356g each)
7. MSR Gravityworks Filter (11.1oz/320g)
8. GSI Ultralight Nesting Bowl/Mug (4.3oz/121g)
9. Alite Monarch Chair (20oz/566g) **luxury item**
10. MSR foldable spork (0.35/10g)
11. Lighter 
12. Small container with Campsoap, J-cloth
13. SPOT Generation 2 emergency beacon (7.4oz/209g)
14. Small First Aid Kit (blister, athletic tape, medications, bandages, etc)
15. Toque (2.5oz)
16. OR Base Sensor gloves (1.2oz, 35g) and Mont Bell waterproof over gloves (1.1oz/32g)
17. Toiletry Kit: toothpaste, toothbrush, lip chap, ear plugs, etc.
18. OR dry stuff sack for clothes 10L (1.9oz/54g)
19. Black Diamond Liquid Point Shell Goretex Paclite rain shell (12.6oz/356g)
20. Mountain Hardwear Dry Q elite  full zip rain pants (8oz)
21. Big Agnes Q Core SLX Sleeping Pad (16oz/ 465g)
22. Sea to Summit Ultralight Pillow Regular SIze (5.3oz/60g)
23. Garbage Bags x 3 (for lining pack, wrapping a wet tent in, etc)
24. Food (8 breakfasts, 8 lunches, 7 dinners) (10lbs)
25. Black Diamond SPOT headlamp (3.1oz/90g)
26. Canon Powershot camera, extra battery and SD card (5 oz/141g)
27. Iphone 5S for nighttime reading and possibly useful in emergencies (5.1oz/144g)
28. 1 roll of toilet paper and small bottle of hand sanitizer
29. Sunscreen (0.63oz/17g)
30. Bug jacket (4.5oz/127g)
31. Crocs (7oz/198g)
32. OR Salamandar Gaiters (6oz/170g)
33. Amazon Kindle Paperwhite (7.2oz/205g)
34. Buff (1.1oz/31g)
35. Swiss Army Hiker knife (3.3oz/94g)
36. Nalgene Bottle, 1L (6.2oz, 175g)
37. Platypus Bladder, 1L (1.2oz, 35g)
38. Clothes: OR Ascendent Jacket (10oz/283g), OR Deviator top (6.3oz/178g) Woolx Midweight bottoms (4.8oz/136g), OR Ferrosi Hoody (11.5oz/326g), Bathing Suit, Smartwool light hiking socks (2.5oz/70g), Patagonia Button Sun Shirt (5.5oz/156g)

I will be wearing the Women's MEC Sandbagger Pant, OR Gauge Tee , Marmot ball cap, Smartwool PHd Outdoor Light Cushion socks, Patagonia active briefs and Brooks sportsbra. I will also be using Black Diamond Alpine Carbon Cork Trekking Poles, Arcteryx Bora Mid GTX hiking boots, and Smith Pivlock V90 sunglasses.

My husband is carrying our MSR Hubba Hubba Tent while I carry the stove, fuel, and water filter. Other group members are carrying other group gear like: GPS, batteries, rope, siltarps, compass, map, etc. My group gear portion is the SPOT beacon.

Approximate weight: 36lbs

**Post-Trip: I used everything I brought except my bug jacket (yay!), my first aid supplies (yay again!) and my second can of fuel (one large can was sufficient for 2 people).
Food, bowl/mugs, spoons, stove/fuel, chair
Sleeping bag, pillow, mat
Gaitors, gloves, bug jacket, pack cover, rain gear
1 Comment

HOW TO SURVIVE CAMPING IN ONTARIO BUG SEASON WITHOUT EVER BUYING BUG SPRAY

27/5/2017

2 Comments

 
Picture
Coghlan's Bug Jacket from MEC
Bug season. I can hear the groans now. From mid-May to early July, many Ontarians hide away in their homes and cottages waiting for bug season to end. Mosquitos and Black Flies prey in hordes on any exposed flesh. For years way back in the 90's I returned home from camping with blood stained clothes, wet DEET covered skin, and looking like I had acquired the measles. DEET, Muskol and other repellents do work, but sometimes not good enough. 

I have spent the last 15 years working as an Outdoor Education teacher and have spent the second week of June deep into the wildest swamps and portages in Algonquin Park (along with dozens of teenagers). By the way, high school groups are the only people in the park at that time of year. Why? It is the epi-centre of bug habitat (BONUS: It's also a great time to see moose, as they survive by standing in pools of water). I once counted 600 mosquitoes on the outside of my tent on one trip.  And I haven't use bug spray in over 10 years! How do I do it? Read on to find out:

Here are my tips for making bug season more bearable:

1. Buy a bug jacket

Bug jackets have revolutionized surviving bug season for me. I bought a jacket 10 years ago and it's still going strong (pick one up for $13.75 from MEC). Avoid buying the screen/cotton combination jackets (too hot!) and ones that have a black or dark coloured screen over the face (grey is the best). Buy a jacket if you can that is one size larger then you would normally wear as the baggy screen fabric is a key to keeping the bugs off your skin especially when wearing a t-shirt). Larger sizes make wearing it an outer layer over a fleece or hoody easier as well, and you can retract your hands in the sleeves when you have more room. These jackets are worth their weight in gold. I make them mandatory equipment on all my trips. 

2. Wear long pants

Long pants are essential during bug season. It might be 25C degrees out, but if you are in the backcountry they are a massive barrier to keeping your skin away from the bugs. Choose pants that are light enough to stay cool in, but thick enough to deter bites. Avoid pants with holes in them, or for ladies, avoid leggings as bugs can eat right through them.
​
3. Wear long socks

Ankle socks are a favourite of most people, especially during summer weather. My rule during bug season is to wear longer socks. When camping, I will wear synthetic or merino wool hiking socks and tuck my pant ends into them so that bugs can't travel up the leg of my pants and feast on my legs. It looks ridiculous, but it works!

4. Wear a baseball type hat

Wearing a brimmed hat makes sense for many reasons, but in bug season it's also advantageous. I wear a baseball hat with a solid brim under my bug jacket. This keeps the bug jacket hood and face cover off my face, and allows me to breathe without sucking in the screen fabric. Also, avoid trucker hats in bug season, as bugs will be able to bite through the mesh fabric at the back of the hat. For women with longer hair, tie hair in a ponytail and keep the bug jacket hood off your neck.

5. Wear running shoes

As soon as the snow melts, some people immediately switch to wearing flip flops, Crocs, Birkenstocks and Keen sandals. All of these should never be worn during bug season. I normally wear old running shoes in the backcountry when paddling or camping, and hiking boots when backpacking.  Camping in August? Bring the sandals then.

6. Wear gloves

Hands are the hardest part to cover during bug season. Consider bringing a thin liner glove to use when cooking or doing other tasks. When portaging a canoe, I retract my hands into the sleeves of my larger size bug jacket and watch the bugs land on the fabric, not my flesh.

By taking these tips into consideration, bug season becomes completely manageable. I never think of bug season as hardship anymore and have no problems spending time in the epi-centre of bug breeding habitat. So get outside and enjoy our natural wonders...bugs and all!

Happy Camping!
2 Comments

TIPS FOR TREKKING IN NEPAL (EVEREST REGION)

8/11/2016

0 Comments

 
 After a trekking trip to Nepal in October 2016, I've compiled a list of tips for future trekkers in the Everest region:

Trekking Agency: You should use one. Priority at the tea houses, translators, amazing knowledge of the area, culture, and logistical wizards. I have no regrets about using one, and giving the people of Nepal my money. I chose Nepal Vision Treks, who met or exceeded every expectation I had. Highly recommended. For our group of 6, we had 3 porters, 1 assistant guide and 1 head guide.

Money: Even if you've paid for a trekking company package, you'll still need to bring Nepalese Rupees with you. Paying for wifi (350-500 rupees per night), hot water (150-300 rupees), bottled water (150-350 rupees), battery charging (~350 rupees/hour), and other supplies (toilet paper, chocolate, pringles, coke, beer). There is an ATM in Namche, but it's better to have already exchanged money in Kathmandu. You will also need to have on hand your tips for your porters. Our 3 porters and 1 assistant guide stayed in Lukla preparing for their next trek and so we had to tip them before returning to Kathmandu.

SIM Card: Buying an NCell SIM card is cheapest at the airport. For $11, a 1 GB data plan was used almost every day on the trek. There were 3 places that the cell network didn't work and wifi had to be bought.

Diamox: Most people start taking Diamox in Namche, and I would recommend this. We had people in our group who waited until it was too late to start this medication and had altitude sickness. Preventing altitude sickness is never a bad thing! Count the number of pills before you go. We had people with 7 pills vs people with 28 pills on our 17 day trek. The more the better. Diamox can be used both prophylactically and as treatment for altitude sickness.
A 'Super Deluxe' room in Lobuche 4910m.
Typical laminated menu.
Medications: Bring your entire medicine cabinet. Once on the trek, it will be hard to find medications. Perscription medications for diarrhea is advised, as well as over-the-counter medications including: anti-nauseant, anti-diarrhea, advil, tylenol, migraine meds, eye drops, throat lozenges, cough and cold medications. Also don't forget a small first aid kit that includes blister bandages.

Weight limit: There is a 15kg per person weight limit for flying from Kathmandu to Lukla. This is a combined weight for your duffel bag and your daypack. This sounds like a lot, but it isn't. We wore extra layers on the plane and stuffed pockets with energy bars and batteries to get around the limit.

Solar Panels: October is very sunny month and so using portable solar panels on your day pack are very useful. Two members on our trek had panels (Solardyne and Goal Zero) and were able to charge their phones almost fully everyday. The Goal Zero brand worked slighty better in our experience, but was heavier.
Fried potato with vegetables.
Garlic soup
Showers: We only had hot showers in Namche on Day 3 and Day 14 of our trek. Between showers, we used baby wipes to keep clean. Luckily you move so slowly at higher altitude you are unlikely to sweat!

Supplies in the Khumbu: Shopkeepers and Tea houses sell things you probably forgot or didn't bring enough of. You regularly see: Toilet Paper, batteries, and bottled water. Soda pop like Coke, Sprite, and Fanta can be found. Snacks such as chocolate bars (Snickers, Mars, Toblerone), and Pringles. 

Tea Houses: Most tea houses offer rooms with 2 single beds. Beds are often a wood frame with a foam mattress 6-8".  Rooms are unheated and most often have a shared toilet along the hallway. The dining rooms normally have a stove (fueled on dried yak dung), and are where most groups hang out. This rooms although warm, are vectors for germs. Most teahouses at higher altitudes run on solar panels so electricity can vary so keep your headlamp handy. Washroom floors are often wet due to bucket flushing, so chose footwear that you don't mind getting wet. Flip flops are too cold for higher elevations.

Menus: Tea house menus are all the same. The offer a variety of hot drinks, soups, and main dishes. Hot drinks include coffee, teas, and hot juice crystals. Soups include broths like garlic soup, dal (lentil) soup, and vegetable. Main dishes include: Pastas, pizza, spring rolls, momos (like a perogie), fried rice, curry rice, fried potatoes, and chow mein. For breakfast, common items like porridge, toast, eggs, hashbrowns, french toast, and pancakes. With our trekking company, we were allowed 1 hot drink and 1 menu item for breakfast and lunch, and for dinner were were allowed 1 hot drink, 1 soup, and 1 menu item. We found the portions big enough to fill our bellies.
Fried Rice, Garlic Soup, Momos
Our cold room in Gorek Shep
Dal Bhat
​Hospital visits: Two of our group members made hospital visits for minor issues. Both times they were asked to pay cash $US Dollars for their visit and their medications. Saturday visits cost more than weekday visits. It is advised to carry $200 US in case a visit is needed.

Water: In order to stay hydrated, we drank between 4-5L of water per day. We had our Nalgene bottles filled at the tea houses by our guide, and then we treated the water with our Steripen Adventurer.  Over the course of our 17 days, we used 6 CR123 batteries for 3 people. The Steripen is quick and effective, we never got intestinal ailments. We also saved money compared to buying bottled or boiled water, and helped reduce waste issues with the bottles. The only exception was Gorek Shep, where we had to buy bottled water as the water quality there was poor- full of sediment.

Sleeping bag: A minimum of a -15C down bag is required. Room temperatures ranged from -2C to +15c but were most consistently in the single digits. Each night was cold and damp and your bag is your refuge. 

Cold: What surprised most of our group is how much we underestimated how cold it was going to be. Trekking in the higher altitudes, you move at a snail pace, and don't generate any heat. Be more prepared for cold than you think! Lots of warm layers including merino wool baselayers. Tea houses are also very damp and cold. A big down jacket is essential wear!

Laundry: Another thing that surprised us was that nothing dries over 3400ft. Anything damp remains damp so I wouldn't advise doing laundry to keep things clean. Bring an extra pair of socks, underwear, and t-shirts to avoid doing laundry. We saw a few people tying damp clothing to their backpacks to dry during they day but even then the clothing ended up dusty!
Solar panels on our packs during the day
Most of the higher villages at higher altitude run on solar
​Germs: Use hand sanitizer as much as possible. Shared dining areas, bathrooms and pillows are vectors for viruses. Our group came down with a nasty cold virus, despite all our preventative measures. One suggestion is to bring your own pillow case as you never know who has been coughing into it the night before.

Female Menstruation: Menstruating at altitude can complicate acclimitization and be a pain. If possible, use birth control methods to avoid having your period. If not possible, note that 2 of our group members started their menstruation cycle at 4400m and then it stopped over 4900m and then started again upon return to 4800m. Using a Diva Cup is recommneded compared to tampons as it produces less waste.

Gear: Make sure you buy good gear before you go and use it. Here is a list of gear our group thought was important/not important:

Don't bother: Thermos, gaiters, water bottle parka, selfie stick, SPOT satellite messenger, microspikes (used for 10mins), pee bottle.

Essential gear: Sunhat, Buff, thick down jacket, sunscreen, lip screen, sunglasses, energy bars, nuun tablets, hand sanitizer, medications, ear plugs, headlamp, travel lock, baby wipes, toilet paper, toque, light gloves, merino wool clothing, UV proof clothing, light softshell jacket, Osprey backpack, hiking poles and a -15C to -25C down sleeping bag.

Have any questions? Don't hesitate to ask below! Read my trip report for my trek to: Everest Base Camp and Cho-La pass.
Gokyo Resort Teahouse
Steripen Adventurer
0 Comments

WIND RIVER GEAR LIST

12/8/2016

1 Comment

 
Picture
PictureThe weigh scale
Planning for 6 person canoe trip for a northern Yukon river isn't always easy. For our 6 person group we split up group gear and emergency gear, and had our own person and paddling gear. We planned for a 15 day trip with a limit of 2300lbs for our float plane ride in from Mayo. The 2300lb limit includes:

-The weight of all people
-The weight of all gear
-The weight of all canoes (and if strapped on the plane on the outside, count for double)

There is a scale at the float plane base to weigh all your gear and people beforehand but it's a good idea to know your weights before you go. I'll breakdown the gear into emergency gear, camp group gear, paddling gear, personal gear.

Emergency Gear:
-Communication devices: Satellite phone, SPOT devices, and pelicase(s)
-Field Hospital (first aid kit)
-Maps
-Compass and GPS
-Repair Kit for boats, duct tape, wrench and screwdriver for assembling/disassembling boats for nesting
-Bear Spray (we had 4)
-Bear Bangers

Camp Gear:
-Tarp
-Firebox
-Back up stove (like Coleman 2 burner)
-Large container of white gas 
-Pot sets
-Dutch Oven
-Gloves 
-Water filter
-Water bladders for storing filtered water
-Plates, Bowls and Cups
-Utensils for eating
-Utensils for cooking
-Strainer
-Sink for washing dishes
-Dish clothes, and scouring sponge, dish soap
-Lighter and matches
-Table
-Rehydrator containers (Vega type bottle)
-Wanagan
-Camp Chairs
-Barrels: 4 x 60L, 1 x 30L
-Staples: milk powder, oil, spices, etc
-Food
-Toilet paper and brown bags
-Trowel
-Small drybag for packaging lunch separate

Paddling Gear:
-Drypants and Drytop
-Neoprene gloves/mitts
-Paddle and spare
-Throwbag
-Bailer
-Rope for lashing
-Carabiners for clipping items into lash points
-Spray Deck (not necessary on this river but great if you have it)
-PFD
-River shoes
-River hat (no helmets this trip)
-Sunglasses
-Canoe
-Pin Kit

Personal Gear:
-Hiking boots
-Hiking poles
-Small hiking backpack
-Sleeping bag
-Sleeping mat
-Tent
-Pillow
-Camp shoes
-Rain pants
-Rain jacket
-Headlamp
-Books and cards for rainy days
-Journal or iPhone
-Camera and extra batteries and pelicase
-GoPro and extra batteries
​-Selfie stick with PFD like OrbitPole
-Clothing: 3 pairs of socks, 1 pair of pants, 1 pair of shorts, 1 pair of merino wool bottoms, 1 pair of fleece bottoms, 2 t-shirts, 1 longsleeve baselayer, 1 softshell jacket, 1 fleece jacket, 1 fleece base top, 1lightweight down jacket, 1 pair down pants, 1 bra, 5 pairs underwear.
-Toque and mitts/gloves
-Buff
-Bug jacket
-Toiletries
-Nalgene water bottle
-115L Drypack
-Fishing gear (flyrod and flies)

All personal gear for myself and my husband fit inside our 115L Drybag. Our paddling, group (our portion), emergency gear and food fit in two 60L barrels. If I were to do it again, I wouldn't bring extra batteries for my headlamp (never used it once!), would bring an MSR Dragonfly instead of a Coleman 2 burner Stove, and would bring a spray deck (for warmth!). Hopefully this list helps you out on your trip!

What did I eat on the Wind River Trip? Click here to find out.
Click here for my Wind River Trip Report.


1 Comment

GLUTEN-FREE CANOE TRIPPING

9/7/2016

2 Comments

 
Picture
Food for a 15 day canoe trip
PictureShepherd's Pie: Dehydrated Potatoes, Veggies, and Beef
Multi-day canoe tripping menu planning while being gluten-free can be a challenge. Here are some of the ideas I've accumulated over the past couple of years canoe tripping. I canoe trip in different ways, and each has different options for food. Some trips are what I call 'canoe-camping' (ie, no portaging), others are flatwater canoe tripping with portages, and whitewater river tripping. A canoe-camping trip may include a cooler, heavy food, and many luxuries where as a canoe trip with portages might make you ditch the cooler and make you think more lightweight. I recently planned a menu for a 15 day wilderness whitewater trip, all gluten and dairy free that included mainly dehydrated meals.

My original post on gluten-free backpacking has many commercially prepared packaged food that contain no gluten and could all be used in a canoe tripping setting. The problem with commercially packaged dehydrated meals is that they can be expensive and don't offer much variety. 

No matter what the canoe trip, I always bring my MSR Dragonfly stove fueled with white gas. I have a MSR Base 2 Set and Quick Frying Pan and an small outback oven. With this cooking gear, one can create many excellent meals. Generally I pull out the stove for breakfast and dinners at the campsite, and tend to pack lunches that don't have to be cooked and can be eaten on the go.

I have found great options for GF canoe tripping at places like the Bulk Barn, Costco, Natural Food stores, Camping stores, and local grocery stores. I often have to go to all the places above if I'm going on an extended trip. 

Owning a dehydrator is advantageous when backcountry camping. I dehydrate my own food for the convenience of having healthy nutritious meals in a lightweight package that last a long time!

Here are my suggestions:

Breakfasts:
-Glutino Pop Tarts
-Bakery on Main Granola (variety of flavours)
-Bob's Mill Gluten-Free Pancake Mix (will work with just water mixed in)
-Glutenfreeda Instant Oatmeal
-Muffins (store bought or homemade)
-Bake Tea Biscuits/Scones (brand)
-Hash browns (either real potatoes or from dehydrated package)
-Gluten Free English Muffins and pre-cooked vacuum sealed bacon sandwich
-Gluten free Bagels 
-Eggs (real or powdered)

Lunches:
-Gluten free loaf (lemon poppy seed, banana, chocolate)
-Bagel sandwich (with spreads, etc)
-Promise Sandwich rolls 
-Costco Vacuum sealed Gluten Free bread (great for 2nd week of trip)
-Gluten free pepperettes or jerky
-Gluten Free Summer Sausage
-President's Choice Crispbread (large crackers in a variety of flavours)
-Rice crackers and Casbah Powdered Hummus 
-Mixed nuts or trail mix
-Apples
-Dehydrated fruit, fruit leather, banana chips
-Real Fruit Gummies, Fruitsource bars
-Jubejubes, swedish berries, gummies
-Yogurt covered raisins
-Corn nuts, roasted chickpeas
-Toasted Coconut slices
-Dark chocolate covered blueberries, cranberries, almonds, etc
-Energy bars (Clif, Kind, Solo, Larabar, Kronobar, EatNakd, GoMacro, Probar,etc)

Dinners:
-Passage Foods Pad Thai Sauce with rice noodles, chicken, veg
-Stirfry: Uncle Ben's Bistro Express Rice, steak, veg, VH sauce?
-Pasta: Catelli gluten-free pasta, with tomato sauce, with pepperettes
-Fajitas:GF tortillas, pre-cooked and vacuum sealed chicken, veg
-Tacos: Dehydrated ground beef, taco seasoning, shells, toppings
-Burritos: Tortillas, refried beans, ground beef, tex mex rice, seasoning, toppings
-Quinoa-beans, veg, pepperettes, spices
-GF Pasta with Pesto Sauce (brand), deydrated chicken
-Gluten Free macaroni and cheese
-Chili- Made at home and dehydrated
-Jambalaya-Rice, Dehydrated tomato sauce, spicy chirzo GF sausage, veggies
-Shepherd's Pie- Dehydrated ground beef, dehydrated veg, potato flakes
-Sweet Pototoes-Dehydrated
-Soup-Dehydrated Miso soup, lentil soup
-Bake corn bread 
-Pizza (premade gluten-free crust or tortilla, sauce, peperettes, veg, cheese)
-Pre cooked chicken and steak strips in vacuum-sealed packages often last up to Day 3 for me.

Drinks:
-Nuun electrolyte tablets
-Country Time Lemonade or Crystal Lite single serve juice crystals
-Tea or coffee
-Purest Hot Chocolate

Snacks:
-Smores with Kininikinick Gluten Free Graham Crackers,marshmallows, chocolate
-Bob's Mill Black Bean Dip and rice crackers
-Alpine Aire Nachos and Guac
-GF Baking from home
-Rice Krispie Squares (GF rice krispies)
-Popcorn (bring kernals and oil, not jiffy pop)
-Apple Crisp

Resources: 
1. Lipsmackin' Backpackin' by Christine and Tim Connors
2. Backpacker Backcountry Cooking by Dorcas Miller
3. The New Trailside Cookbook By Kevin Callan and Margaret Howard
4. Wanapitei Canoe Tripper's Cookbook by Carol Hodgins

Have any other suggestions or questions? I would love to hear from you! Leave me a reply below. :)

2 Comments

DAY HIKING GEAR LISTS FOR FOUR SEASONS

31/3/2016

1 Comment

 
 So Krista, what's in your pack? Friends new to hiking often ask me what to bring and why I carry what I do. I hike in a 4 seasons, normally in Ontario and Upper New York State. My hiking normally takes me up 1000ft (300m) to 7000ft (2100m) per day, and hikes can be as long as 33km (21miles).

Most hikes I do go out of cellphone range, so I carry a SPOT device on me always. I have summitted almost 100 peaks in this area of the world, in every month of the year, and have gained some insight on what to bring in order to be prepared.

I like to strike a balance between keeping my pack weight down and bringing extras to keep my prepared IF I ever needed to stay out overnight in an emergency. This has never happened thankfully!

Each time we approach a new season, it's time to swap out some items out of my hiking pack. Here is my day hiking gear list for the different seasons:


Summer                           Fall/Spring                                          Winter
​Small 15-30L pack           Medium 25-30L sized pack                Large 40L pack
2-3L water/Gatorade      2-3L water/Gatorade                          2-3L water and bottleparka
Short gaiters                    Short gaiters &/or Long Gaiters        Short and Long Gaiters together
Boots (snowsealed)        Boots (snowsealed)                             Boots (snowsealed)
Socks                                 Socks and extra socks                        Socks and extra socks
Shorts                               Pants or shorts                                    Shell jacket and softshell pants
T-shirt                               T-shirt, LS base, vest/softshell jkt     Long baselayer and thin fleece
SPF/bugspray                  SPF                                                         SPF? Hand/foot warmers
Hat                                    Hat and Toque                                     Light and Heavy Toque
Sunglasses                       Sunglasses                                           Sunglasses
Poles                                 Poles (bring baskets)                          Poles with baskets, Ice Axe?
Survival kit &First aid     Survival kit & first aid                          Survival kit, First Aid, full bivy
Compass and map         Compass and map                              Compass and map
GPS & extra batteries     GPS and extra batteries                     GPS and extra batteries
Headlamp &batteries     Headlamp & extra batteries              Headlamp & extra batteries
Rainjacket and pants      Rainjacket and pants                          Down jacket,downpants, & booty
Extra Layer-longsleeve   Down jkt, extra base/fleece               Extra baselayer, extra mittens
Bottle of Gatorade          Gatorade or Thermos of tea             Thermos of tea
Camera                             Gloves and Mittens                             Gloves and Mittens and extras
Cellphone                         Snowshoes? Microspikes?                 Snowshoes, crampons, or spikes 
                                           Camera                                                  Camera
                                           Cellphone                                              Cellphone (keep battery warm)
Blue foam square            Foam square to sit on                        Large foam piece to sit/lie on
Plastic bags to line pack, Plastic bags to line pack,                   Plastic bags to line pack,
waterproof items,            waterproof items,                              waterproof items, emergency 
emergency wet boots      emergency line wet boots                emergency line wet boots
Stuff sacks                         Stuff sacks                                            Stuff sacks
PLB or SPOT                     PLB or SPOT                                         PLB or SPOT
Rain cover for pack         Rain cover for pack                             Toilet Paper&Hand Sanitizer
Toilet Paper& HS             Toilet Paper& Hand Sanitizer

Survival kit contents include things like: Small firestarters, water tablets, extra food, extra batteries, emergency blankets, large orange garbage bags, swiss army knife with saw, 24hr hand/foot warmers, whistle, electrolyte tablets, matches, etc.

First Aid Kit contents include things like: Athletic tape, triangular bandage, antiseptic swabs, gauze, pain meds, blister bandages, etc.

To print a copy of my list click here. If you have any questions comment below, I'd love to hear from you!

Happy Hiking!
Krista
Picture
Hiking in late September in the Adirondack Mountains, New York
1 Comment

DONJEK GLACIER ROUTE BACKPACKING GEAR LIST

17/8/2015

3 Comments

 
Picture
Technology has revolutionized the way I backpack. Gear has changed to be more compact and lightweight, radically changing how I pack for a multi-day backpacking trip. This August 2015, I am heading to the Yukon Territory, Canada to attempt the Donjek Glacier Route in Kluane National Park with 5 friends. The route is approximately 120km in length, crosses 2 mountain passes and numerous creeks. It's a route rather than a trail, with no designated campsites. Daytime temperatures are expected to be in the 18-22 degree celsius range and the nightime temperatures should be around 6-8 degrees. We have booked just a little less than 9 days for this trip.

Kluane National Park rules state that we have to carry all our food in an approved bear barrel. For a 9 day trip, we got the biggest ones we could find: The Counter Assault Bear Keg. This makes food packing challenging, and adds 3.5lbs to our over all base weight. Some of the decisions on camp kitchen gear reflect this added challenge. I primarily eat a lot of dehydrated meals on backpacking trips and love eating out of the packaging creating little mess and no clean-up. It's physically impossible to fit all the meals you need in the barrel, so we have to take them out and re-package them. To, rehydrate, we will be using a GSI Fair Share Mug with lid, but at just over 7 ounces, is lighter than carrying around all the packaging from the meals (an empty bag weighs in around 2 ounces). The trade off is that we have to clean dishes instead of packing out packaging.

Here is what I'm carrying on my back:
1. Osprey Ariel Women's Backpack 75L size small (4lbs 14oz/ 2.1kg)
2. Osprey pack rain cover size large (3oz/ 0.9 kg)
3. Western Mountaineering Summerlite sleeping bag (1lb,7oz/525g)
4. Chinook compression sack for sleeping bag 
5. Jetboil Flash stove (14oz/397g)
6. Two large fuel cans for stove (12.5oz/356g each)
7. MSR Miniworks water filter (16.1oz/456g)
8. GSI Fair Share Mug (Bowl) with lid (7.5oz/188g)
9. Sea to summit collapsable mug (2.4oz)
10. MSR foldable spork (0.35/10g)
11. Lighter 
12. Small container with Campsoap, J-cloth
13. SPOT Generation 2 emergency beacon (7.4oz/209g)
14. Group First Aid Kit (blister, athletic tape, medications, bandages, etc)
15. Toque (2.5oz)
16. OR Base Sensor gloves (1.2oz, 35g) and Marmot waterproof over gloves (4oz)
17. Toiletry Kit: toothpaste, toothbrush, lip chap, ear plugs, etc.
18. OR dry stuff sack for clothes
19. Marmot Minimalist Goretex Paclite rain shell (14.4oz)
20. Mountain Hardwear Dry Q elite  full zip rain pants (8oz)
21. Big Agnes Air Core Sleeping Pad (21oz)
22. MEC backpacker's pillow (5.3oz/150g)
23. Garbage Bags x 3 (for lining pack, wrapping a wet tent in, etc)
24. Bear Keg plus food (8 breakfasts, 9 lunches, 8 dinners) (14lbs)
25. Black Diamond SPOT headlamp (3.1/90g)
26. Canon Powershot camera, extra battery and SD card (5 oz)
27. Iphone 5S for nighttime reading and possibly useful in emergencies (5.1oz)
28. Toilet Paper and Hand Sanitizer
29. Sunscreen (0.63oz)
30. Bug jacket (4.5oz)
31. Crocs (7oz)
32. OR Women's Crocodile Gaiters (8.9oz,/252g)
33. Bearspray (7.9oz, 225g)
34. Buff (1.1oz)
35. Swiss Army Hiker knife (3.3oz/94g)
36. Nalgene Bottle, 1L (6.2oz, 175g)
37. Platypus Bladder, 1L (1.2oz, 35g)
38. Clothes: Mont Bell Ultra Light Down Jacket (7.7oz), MEC T3 fleece base layer top (6.3oz) and bottoms (4.8oz) , OR Ferrosi Hoody (11.5oz), extra OR Echo Tee-Shirt (2.3oz), Wigwam light hiking socks (2.5oz),  LIFA longsleeve shirt (5oz)

I will be wearing the Women's Marmot Lobo convertible pant (9.1oz), OR Echo Tee (2.3oz), The North Face ball cap, Smartwool PHd Outdoor Light Cushion socks, Patagonia active briefs and Sugoi sportsbra. I will also be using Black Diamond Alpine Carbon Cork Trekking Poles, Arcteryx Bora Mid GTX hiking boots, and Smith Pivlock V90 sunglasses.

My husband is carrying our MSR Hubba Hubba Tent while I carry the stove, fuel, and water filter. Other group members are carrying other group gear like: GPS, batteries, rope, siltarps, compass, map, etc. My group gear portion is the first aid kit and SPOT beacon.

Approximate weight: 38lbs
POST TRIP: I used almost all of my gear except my bug jacket (yahoo!), and most of my first aid kit (yahoo again!), and extra SD card. I would make some changes to my list after being on this trip. I should have brought my Western Mountaineering Ultralite -7C sleeping bag instead of my Summerlite as I found the Summerlite was at it's limit on about half of the nights on the trip. I might have also found another insulating layer or thicker down jacket useful as well. The nights were cold (often around freezing) and the days were warm (felt like 30 C). I ate all my food except for a few extra bars and 2 cups of soup. Our second fuel canister was almost completely full. I have learned that a medium size can lasts 2 people one week while backpacking. Barrels should be turned upside down at night to prevent rain from seeping through the cracks. All in all, I feel my packing was adequate in most regards.

Check out my trip report on the Donjek Glacier Backpacking trip here.
3 Comments

MICROADVENTURES

29/3/2015

1 Comment

 
I recently read a New York Times article on the benefits and virtues of microadventures. Alastair Humphreys, the article's subject, won the 2012 National Geographic Adventurer of the Year award not for his month or year long expeditions, but for his smaller bursts of adventure closer to home. He coined the hashtag #microadventure, and is promoting the idea of thinking about what short, fun, new adventures you can create for yourself close to home. 

For me, feeding my adventure hollow leg is essential to nurturing my soul and keeping me from drowning in the daily routines of life. The mundane cycle of going to work, repeating the same fitness routines, and dreaming of the next major adventure months away has become my normal way of life. 

About a year ago, before reading the NY Times article, my husband and I decided to drive 20 minutes down the road, cross country ski 90 minutes into a small, remote lake in late winter. We arrived at camp at 4pm, cooked dinner, slept overnight in our winter gear, and reversed the process the next morning. While just over 20 hours for the entire adventure, we returned home feeling mentally, spiritually, and physically refreshed and refuelled. This, I believe, is the spirit of the microadventure.

Picture
Our first winter overnight microadventure campsite

After our winter camping experience, we have since done a few microadventures, all of which have been close to home, on a weekend, and easy to pack for. 

Winter Camping: A three hour drive took us into the eastern boundary of the Adirondack State Park of NY State.  On the eve of the winter solstice, we snowshoed 9km with full packs into a Adirondack Lean-to, and slept overnight in winter conditions. The next morning we quickly ascended a 4000' peak, and reversed the process back to our cars, leaving less than 24 hours after we started. Costs associated with this trip: gas money.

Canoe-Camping: A 2 hour drive took us to a large canoe-camping lake. There, after a 2 hour paddle in, we found a free campsite and set up for the night. We took a small hike from the campsite to reach a lookout, swam in the lake, and had long campfire at night. Canoe camping without portaging requires less preparation as you can dump as much gear as you want into the canoe including a sealable cooler! Costs: gas money.

Yurt: My most recent microadventure involved renting a yurt with 2 friends about a 90 minute drive and 6km cross country ski from my house. The yurt, supplied with a woodstove (wood included), propane stove, bunk beds, and a outhouse WITH toilet paper! Trails were easy to navigate and could be skiied with the use of a headlamp if arriving after dark. Check-out time was 11am, so no reason to rush out the next day. Costs: $150/night divided by 4 people for the yurt, and gas.
Microadventure criteria in my mind needs to be one of two things: Either trying a completely new activity or trying an old activity in a new place. The excitement of the new adventure is what feeds and replenishes the soul, breaking up the dreaded work week. Refuelling the soul has many positive effects many of which come from disconnecting from technology and immersing yourself in a natural environment. I am already thinking of new microadventures closeby: dogsledding, sea kayak camping, and bike touring. Alastair has also come out with a book on microadventures which I plan to read in the coming months to hopefully gain even more microadventure ideas: 'Microadventures: Local Discoveries for Great Escapes'. 
1 Comment

    Author

    Canadian gal hooked on pursuing outdoor adventures, testing, outdoor gear, and a passion for outdoor education.

    Archives

    November 2020
    October 2020
    August 2020
    November 2019
    November 2018
    November 2017
    October 2017
    September 2017
    August 2017
    May 2017
    November 2016
    August 2016
    July 2016
    March 2016
    January 2016
    December 2015
    September 2015
    August 2015
    May 2015
    March 2015

    Categories

    All
    Backcountry Living
    Books
    Fitness
    Gear
    Nutrition
    Training
    Trip Planning

    RSS Feed

Instructor/Ambassador for:
Picture
Picture
Picture
​<script type="text/javascript" src="http://classic.avantlink.com/affiliate_app_confirm.php?mode=js&authResponse=d43d81bd3781e1d2abd21e2d070927932a5cd5c0"></script>

​