My husband Glenn Wallace and I were involved in a canoe rescue on Opeongo Lake in Algonquin Provincial Park on October 10th, 2020.
The press release to the media can be found here.
The media release has some inaccurate facts that my husband and I would like to correct. As he was the main rescuer in the situation, I have (with his permission) posted his account of the incident below.
My husband's account:
On Saturday I was involved in an incident that I believe should be shared as a learning experience for all. Krista Petrie-Wallace and I were planning to spend a relaxing Thanksgiving weekend camping in Algonquin Park with Rodney Wilson and family. We were to sea kayak into the East Arm of Opeongo Lake and enjoy a three day excursion into the Park.
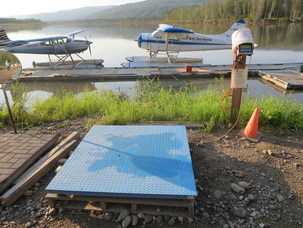
We launched at the Opeongo Lake access point/Algonquin Outfitters location in early afternoon and had paddled uneventfully to the head of the South Arm. We then began to work our way across the most exposed section of the lake, where all three “arms” converge.
Opeongo Lake is the largest in the Park and has a reputation for rough waters in windy conditions. The wind (from the W/NW) was a steady 25 km/h with gusts that were significantly higher. Once in the exposed area of the lake our group broke into two groups. Krista and I were with the youngest member of our group and trailed the first three members of our group by a few hundred meters.
About 2:20 PM Krista commented that she thought she saw an overturned canoe and two upright canoes in the distance to our east. It was difficult to tell with the distance and 2 foot wind swell. After a quick conversation it was agreed she would continue on with the young paddler and I would break off to investigate. Little did I realize this would be the start of a 2.5 hour stretch of nearly constant maximal paddling effort for me.
The three canoes were about 1 km from our location, near the entrance to Jones Bay. Paddling hard I covered the distance in minutes and approached the scene. As I closed the distance I could see 6 people in two upright canoes and 3 people swimming alongside the third canoe.
Upon arriving to the group I immediately could see a catastrophe was unfolding. My instant assessment revealed:
a) none of the three people in the water could swim with any competence, although they (and all in the group) were wearing PFDs.
b) none of the three people in the water were dressed for cold water immersion
c) none of the 9 people involved had the skills to affect a rescue
d) language barrier was a very real issue
e) there were no other people, boats, etc. anywhere near to help me
I knew that if the three people were not pulled from the water in a timely fashion they would all die. At this point the shore was about 200 meters away, but the strong wind was pushing the swimmers out into the middle of Jones Bay.
I ordered the six people in two canoes to paddle to the northern point of Jones Bay, start a fire, and prepare dry clothes for the three people in the water. I also asked if the two strongest paddlers in the group could return to help me in one of the canoes. Having a second craft would open up additional rescue possibilities.
I got the weakest swimmer of the group (she could not swim at all nor kick her legs to assist) hanging onto the stern handle of my boat and headed for shore. After 20 minutes of maximum effort paddling I had battled through the wind and towed her to shore. I told those waiting on shore to get her into dry clothes immediately.
As I started out for the second swimmer, the canoe I had asked to assist me suddenly blew by. The two paddlers were completely unable to control the boat in the conditions and immediately blew eastward into the bay, removing the possibility of any help for me. Those two paddlers were eventually blown by the wind onto the eastern shore of the bay and remained on shore until rescued.
The second swimmer had been able to kick his legs aggressively, allowing him to hold his position against the wind. I returned for him, got him holding my kayak, and paddled the 200 meters back to shore as quickly as possible. This person was able to help significantly by kicking his legs aggressively as I towed him.
At this point 6 people (including 2 swimmers) are on the northern point that marks the beginning of Jones Bay and another 2 people are in the boat that has blown onto the eastern shore of Jones Bay. The third swimmer is still in the water and has been immersed for about an hour at this point.
The third swimmer had been unable to hold his position and is now 500 – 600 meters from shore. I race out to get him, locate him, and get him on the back of my kayak. By this point we are in the middle of Jones Bay, the wind has picked up even more, and the waves are 2-4 feet high. For 20 minutes I paddle as hard as I can toward the northern shore of Jones Bay where I have taken the others. After 20 minutes I realized that it was physically impossible to pull him directly into the wind. I shifted to Plan B, which was to try to run with the wind and hopefully make the eastern shore. It was further in distance (over 1 km likely), but I was hoping the strong wind/waves would help drive me. After another 20 minutes of maximal paddling it was clear I was not making progress. The inactive swimmer hanging from the back of the boat was making any meaningful forward progress nearly impossible in the water conditions present. I realized the only way to potentially save the third swimmer was to get a motor boat.
I told him I’d be back and he bailed off my boat. I figured I could paddle the 7 km back to the launch in about 40 minutes, where help could be raised and motor boats activated. I was also holding out hope that I might see one of the Algonquin Outfitters water taxi boats in the interim and wave it down.
I’d traveled about ¼ of the way south toward the put in when I saw an occupied campsite on an island. A couple was standing on the beach looking out into Jones Bay. I quickly told them of the dire situation unfolding and asked if they had any emergency communication device. They did – a Garmin In Reach. They were not that familiar with its use, but I told them told press SOS immediately. I didn’t stop long enough to see if they were successful, but rather kept paddling south as hard as possible. I would find out later the SOS worked at 4:20 PM and emergency services began to converge on Opeongo Lake.
Just a few minutes later (around 4:25 PM) I saw the water taxi boat and was able to wave him over. After I briefed him on the situation he was able to contact a second water taxi nearby and within a few minutes both boats were roaring off into Jones Bay to locate the third swimmer.
I turned my kayak around and headed back out into Jones Bay to assist. Jones Bay is literally 4 square kilometers of water – 2 km wide at its mouth, 2 km deep. By the time I arrived 15 – 20 minutes later they were still searching. Within a few minutes of reaching the middle of Jones Bay I located the third swimmer. It was immediately obvious the situation was now exceptionally critical. With the boats nearly a kilometer away searching the eastern reaches of the Bay, I paddled toward them as fast as could. I had closed about half the distance when the boats spotted me, realized why I was probably paddling toward them, and came to me. I immediately boarded the larger of the two boats, pulled my sea kayak on board, and jumped to the front of the boat to act as primary spotter. Both boats began a high speed grid search of the area I had last seen the third swimmer.
At this point I vaguely remember seeing the red sea kayak of my wife Krista enter the scene. She had reached our campsite and returned as quickly as possible knowing my extended absence meant real trouble.
Around 4:45 PM I spotted the third swimmer (unresponsive) and pulled him into the boat. The boat operators had told me previously that the emergency SOS had the ambulance on its way. Given the condition of the third swimmer I felt his only chance of survival was to get to the launch as quickly as possible and into the care of medical professionals. The water taxi was a very large metal boat with a 225 horsepower engine – both meant for high speed work in rough water. We ran the 10 minutes back to the launch under full power. I was unable to administer any first aid during this journey as the ride was extremely rough.
Upon landing at the docks someone (I’m not certain who) jumped into the boat and began to administer CPR on the third swimmer.
There were probably 50 – 100 people scattered throughout the grounds of Opeongo Outfitters. I canvased them to see if any were doctors, nurses, or medical professionals – none were. Shortly after this the ambulance arrived.
The next phase was to ensure the safe rescue of the other 8 people. When Krista had returned she had distributed emergency blankets, etc. to both the 6 people on the northern shore and the 2 people on the eastern shore. With a flotilla of boats now in action all 8 people were safely returned to the launch.
I’m certain this event will spark much conversation around safe backcountry travel.
In the interim, everyone would be well advised to consider these two points.
1) Cold water kills. Even in southern latitudes most of the Canadian boating season corresponds with water temperatures that can kill you if unprepared.
2) Wear high visibility clothing when partaking in outdoor activities. The victim was wearing a black jacket and dark blue PFD. This made it very difficult to spot him from both my kayak and the boat.
In conclusion, both water taxi operators were fantastic. We immediately formed an effective team once I had flagged them down. I didn’t get the name of either young man driving, but they deserve kudos for their efforts. Thanks to Brandon (also of Algonquin Outfitters) who later joined the effort to help rescue the stranded survivors as well.
Thanks to OPP Constable Jason MacDougall for his professionalism while processing the aftermath of this incident.
~Glenn~
We both feel terribly for this group and the tragic loss they have had to endure. Our condolences to the family members of the deceased.
The sad part was that this tragedy was entirely preventable. As an outdoor education teacher, I reflected on this incident and have some important recommendations that could help others in the future.
Krista's takeaways:
1. Learn how to swim. Being able to swim 200m with a PFD on could have saved a life.
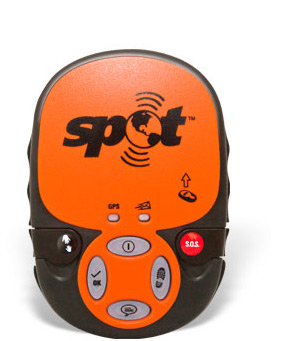
2. If you travel in the backcountry or anywhere out of cell range, buy a satellite enabled beacon like the Garmin inReach. Activation enabled emergency services quite quickly in this situation. (I had one with me in my kayak, but it was not at the scene when it was needed).
3. If you own a Garmin inReach know how to use it, especially how to send an SOS message.
4. Wear high-visibility clothing when paddling and wear a PFD. You are easier to spot from a distance.
5. Learn canoeing and canoe rescue skills before backcountry travelling. Take a course through Paddle Canada or ORCKA. Know strategies and tactics for paddling in windy conditions.
6. Outfitters should screen or have a mandatory orientation in cold water conditions in the fall/spring for all canoe renters and possibly should deny rentals based on ability levels.
7. Paddle Canada/ORCKA/Canadian Drowning Coalition need to develop canoe courses and/or educational safety materials that new Canadians can understand (ie different languages).
If anything good can come from this tragedy is that the outdoor community needs to start a conversation about how the users of our parks and backcountry spaces are changing and many of these users don't have the swimming skills, canoeing skills, and water safety knowledge to be in the backcountry. The outdoor community needs to address how we can encourage these citizens to continue to explore our wilderness areas but also in a safe manner. We need to do better. Let's start this ball rolling. Share your ideas below in the comments
Wear your PFD!
Krista and Glenn
The press release to the media can be found here.
The media release has some inaccurate facts that my husband and I would like to correct. As he was the main rescuer in the situation, I have (with his permission) posted his account of the incident below.
My husband's account:
On Saturday I was involved in an incident that I believe should be shared as a learning experience for all. Krista Petrie-Wallace and I were planning to spend a relaxing Thanksgiving weekend camping in Algonquin Park with Rodney Wilson and family. We were to sea kayak into the East Arm of Opeongo Lake and enjoy a three day excursion into the Park.
We launched at the Opeongo Lake access point/Algonquin Outfitters location in early afternoon and had paddled uneventfully to the head of the South Arm. We then began to work our way across the most exposed section of the lake, where all three “arms” converge.
Opeongo Lake is the largest in the Park and has a reputation for rough waters in windy conditions. The wind (from the W/NW) was a steady 25 km/h with gusts that were significantly higher. Once in the exposed area of the lake our group broke into two groups. Krista and I were with the youngest member of our group and trailed the first three members of our group by a few hundred meters.
About 2:20 PM Krista commented that she thought she saw an overturned canoe and two upright canoes in the distance to our east. It was difficult to tell with the distance and 2 foot wind swell. After a quick conversation it was agreed she would continue on with the young paddler and I would break off to investigate. Little did I realize this would be the start of a 2.5 hour stretch of nearly constant maximal paddling effort for me.
The three canoes were about 1 km from our location, near the entrance to Jones Bay. Paddling hard I covered the distance in minutes and approached the scene. As I closed the distance I could see 6 people in two upright canoes and 3 people swimming alongside the third canoe.
Upon arriving to the group I immediately could see a catastrophe was unfolding. My instant assessment revealed:
a) none of the three people in the water could swim with any competence, although they (and all in the group) were wearing PFDs.
b) none of the three people in the water were dressed for cold water immersion
c) none of the 9 people involved had the skills to affect a rescue
d) language barrier was a very real issue
e) there were no other people, boats, etc. anywhere near to help me
I knew that if the three people were not pulled from the water in a timely fashion they would all die. At this point the shore was about 200 meters away, but the strong wind was pushing the swimmers out into the middle of Jones Bay.
I ordered the six people in two canoes to paddle to the northern point of Jones Bay, start a fire, and prepare dry clothes for the three people in the water. I also asked if the two strongest paddlers in the group could return to help me in one of the canoes. Having a second craft would open up additional rescue possibilities.
I got the weakest swimmer of the group (she could not swim at all nor kick her legs to assist) hanging onto the stern handle of my boat and headed for shore. After 20 minutes of maximum effort paddling I had battled through the wind and towed her to shore. I told those waiting on shore to get her into dry clothes immediately.
As I started out for the second swimmer, the canoe I had asked to assist me suddenly blew by. The two paddlers were completely unable to control the boat in the conditions and immediately blew eastward into the bay, removing the possibility of any help for me. Those two paddlers were eventually blown by the wind onto the eastern shore of the bay and remained on shore until rescued.
The second swimmer had been able to kick his legs aggressively, allowing him to hold his position against the wind. I returned for him, got him holding my kayak, and paddled the 200 meters back to shore as quickly as possible. This person was able to help significantly by kicking his legs aggressively as I towed him.
At this point 6 people (including 2 swimmers) are on the northern point that marks the beginning of Jones Bay and another 2 people are in the boat that has blown onto the eastern shore of Jones Bay. The third swimmer is still in the water and has been immersed for about an hour at this point.
The third swimmer had been unable to hold his position and is now 500 – 600 meters from shore. I race out to get him, locate him, and get him on the back of my kayak. By this point we are in the middle of Jones Bay, the wind has picked up even more, and the waves are 2-4 feet high. For 20 minutes I paddle as hard as I can toward the northern shore of Jones Bay where I have taken the others. After 20 minutes I realized that it was physically impossible to pull him directly into the wind. I shifted to Plan B, which was to try to run with the wind and hopefully make the eastern shore. It was further in distance (over 1 km likely), but I was hoping the strong wind/waves would help drive me. After another 20 minutes of maximal paddling it was clear I was not making progress. The inactive swimmer hanging from the back of the boat was making any meaningful forward progress nearly impossible in the water conditions present. I realized the only way to potentially save the third swimmer was to get a motor boat.
I told him I’d be back and he bailed off my boat. I figured I could paddle the 7 km back to the launch in about 40 minutes, where help could be raised and motor boats activated. I was also holding out hope that I might see one of the Algonquin Outfitters water taxi boats in the interim and wave it down.
I’d traveled about ¼ of the way south toward the put in when I saw an occupied campsite on an island. A couple was standing on the beach looking out into Jones Bay. I quickly told them of the dire situation unfolding and asked if they had any emergency communication device. They did – a Garmin In Reach. They were not that familiar with its use, but I told them told press SOS immediately. I didn’t stop long enough to see if they were successful, but rather kept paddling south as hard as possible. I would find out later the SOS worked at 4:20 PM and emergency services began to converge on Opeongo Lake.
Just a few minutes later (around 4:25 PM) I saw the water taxi boat and was able to wave him over. After I briefed him on the situation he was able to contact a second water taxi nearby and within a few minutes both boats were roaring off into Jones Bay to locate the third swimmer.
I turned my kayak around and headed back out into Jones Bay to assist. Jones Bay is literally 4 square kilometers of water – 2 km wide at its mouth, 2 km deep. By the time I arrived 15 – 20 minutes later they were still searching. Within a few minutes of reaching the middle of Jones Bay I located the third swimmer. It was immediately obvious the situation was now exceptionally critical. With the boats nearly a kilometer away searching the eastern reaches of the Bay, I paddled toward them as fast as could. I had closed about half the distance when the boats spotted me, realized why I was probably paddling toward them, and came to me. I immediately boarded the larger of the two boats, pulled my sea kayak on board, and jumped to the front of the boat to act as primary spotter. Both boats began a high speed grid search of the area I had last seen the third swimmer.
At this point I vaguely remember seeing the red sea kayak of my wife Krista enter the scene. She had reached our campsite and returned as quickly as possible knowing my extended absence meant real trouble.
Around 4:45 PM I spotted the third swimmer (unresponsive) and pulled him into the boat. The boat operators had told me previously that the emergency SOS had the ambulance on its way. Given the condition of the third swimmer I felt his only chance of survival was to get to the launch as quickly as possible and into the care of medical professionals. The water taxi was a very large metal boat with a 225 horsepower engine – both meant for high speed work in rough water. We ran the 10 minutes back to the launch under full power. I was unable to administer any first aid during this journey as the ride was extremely rough.
Upon landing at the docks someone (I’m not certain who) jumped into the boat and began to administer CPR on the third swimmer.
There were probably 50 – 100 people scattered throughout the grounds of Opeongo Outfitters. I canvased them to see if any were doctors, nurses, or medical professionals – none were. Shortly after this the ambulance arrived.
The next phase was to ensure the safe rescue of the other 8 people. When Krista had returned she had distributed emergency blankets, etc. to both the 6 people on the northern shore and the 2 people on the eastern shore. With a flotilla of boats now in action all 8 people were safely returned to the launch.
I’m certain this event will spark much conversation around safe backcountry travel.
In the interim, everyone would be well advised to consider these two points.
1) Cold water kills. Even in southern latitudes most of the Canadian boating season corresponds with water temperatures that can kill you if unprepared.
2) Wear high visibility clothing when partaking in outdoor activities. The victim was wearing a black jacket and dark blue PFD. This made it very difficult to spot him from both my kayak and the boat.
In conclusion, both water taxi operators were fantastic. We immediately formed an effective team once I had flagged them down. I didn’t get the name of either young man driving, but they deserve kudos for their efforts. Thanks to Brandon (also of Algonquin Outfitters) who later joined the effort to help rescue the stranded survivors as well.
Thanks to OPP Constable Jason MacDougall for his professionalism while processing the aftermath of this incident.
~Glenn~
We both feel terribly for this group and the tragic loss they have had to endure. Our condolences to the family members of the deceased.
The sad part was that this tragedy was entirely preventable. As an outdoor education teacher, I reflected on this incident and have some important recommendations that could help others in the future.
Krista's takeaways:
1. Learn how to swim. Being able to swim 200m with a PFD on could have saved a life.
2. If you travel in the backcountry or anywhere out of cell range, buy a satellite enabled beacon like the Garmin inReach. Activation enabled emergency services quite quickly in this situation. (I had one with me in my kayak, but it was not at the scene when it was needed).
3. If you own a Garmin inReach know how to use it, especially how to send an SOS message.
4. Wear high-visibility clothing when paddling and wear a PFD. You are easier to spot from a distance.
5. Learn canoeing and canoe rescue skills before backcountry travelling. Take a course through Paddle Canada or ORCKA. Know strategies and tactics for paddling in windy conditions.
6. Outfitters should screen or have a mandatory orientation in cold water conditions in the fall/spring for all canoe renters and possibly should deny rentals based on ability levels.
7. Paddle Canada/ORCKA/Canadian Drowning Coalition need to develop canoe courses and/or educational safety materials that new Canadians can understand (ie different languages).
If anything good can come from this tragedy is that the outdoor community needs to start a conversation about how the users of our parks and backcountry spaces are changing and many of these users don't have the swimming skills, canoeing skills, and water safety knowledge to be in the backcountry. The outdoor community needs to address how we can encourage these citizens to continue to explore our wilderness areas but also in a safe manner. We need to do better. Let's start this ball rolling. Share your ideas below in the comments
Wear your PFD!
Krista and Glenn


 RSS Feed