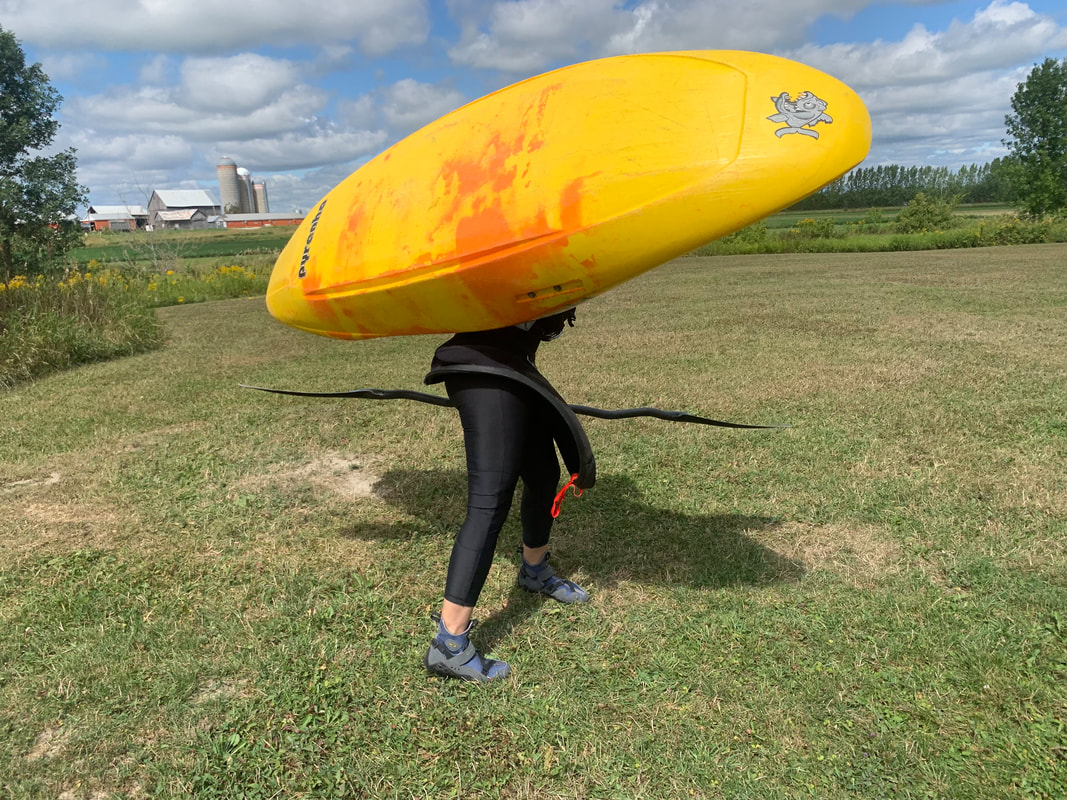
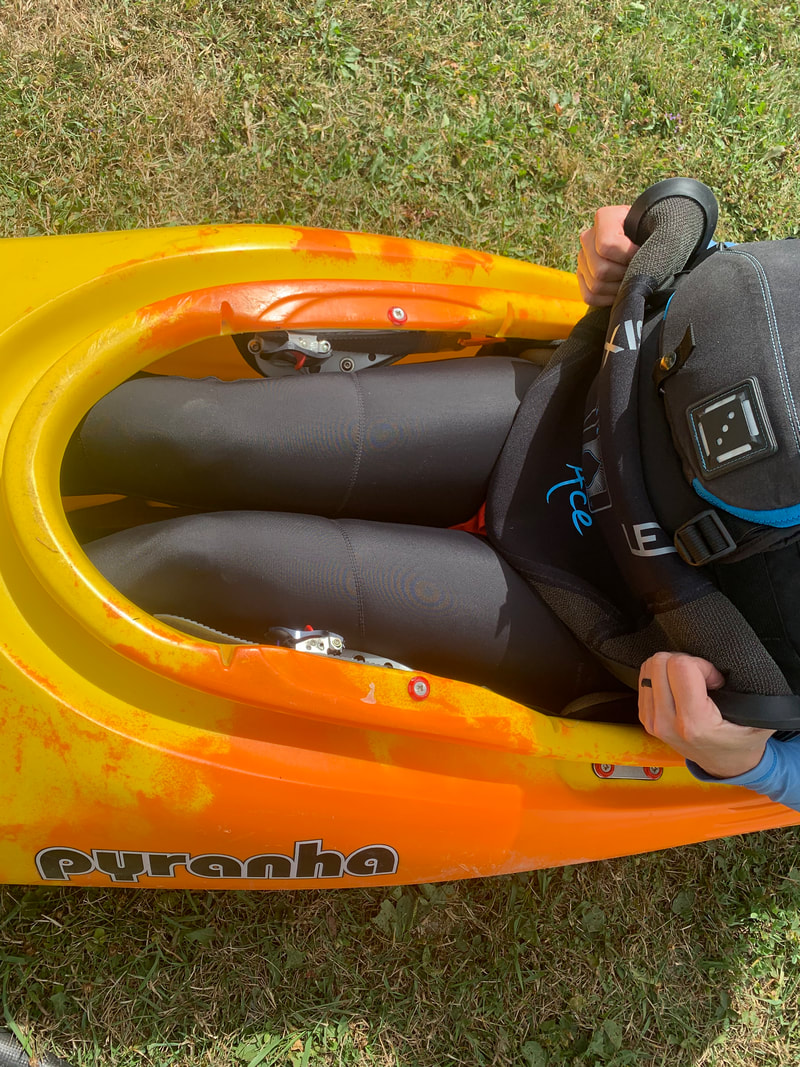
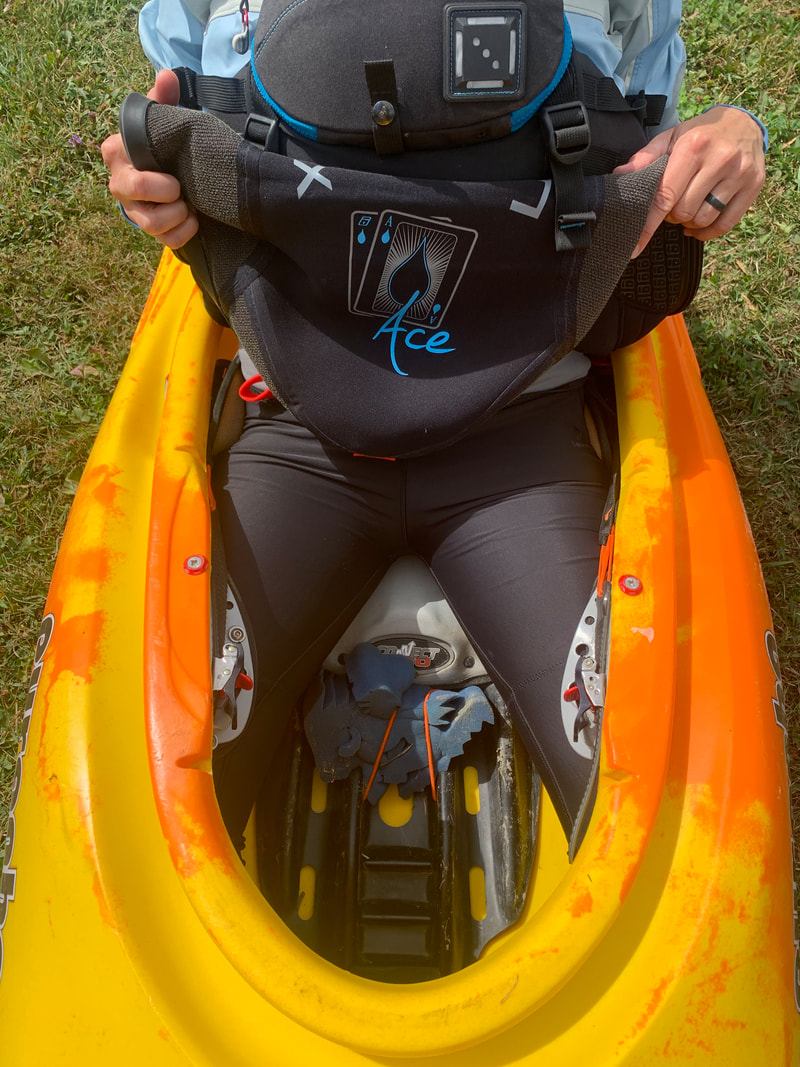
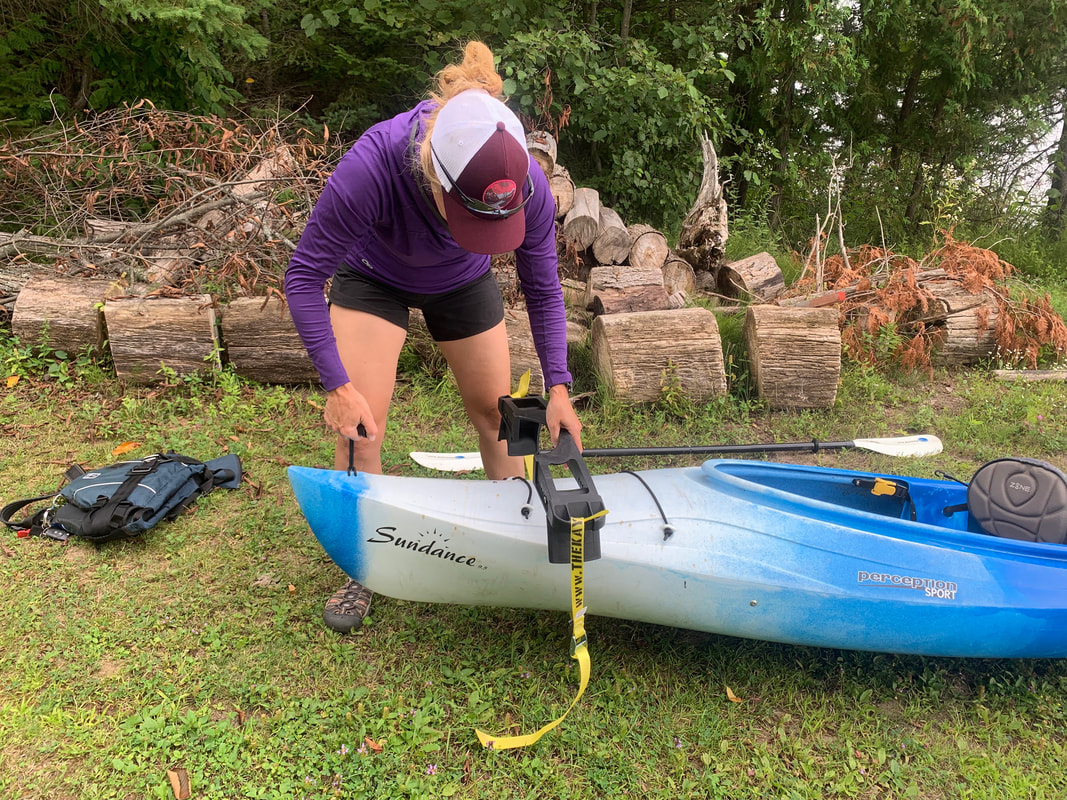
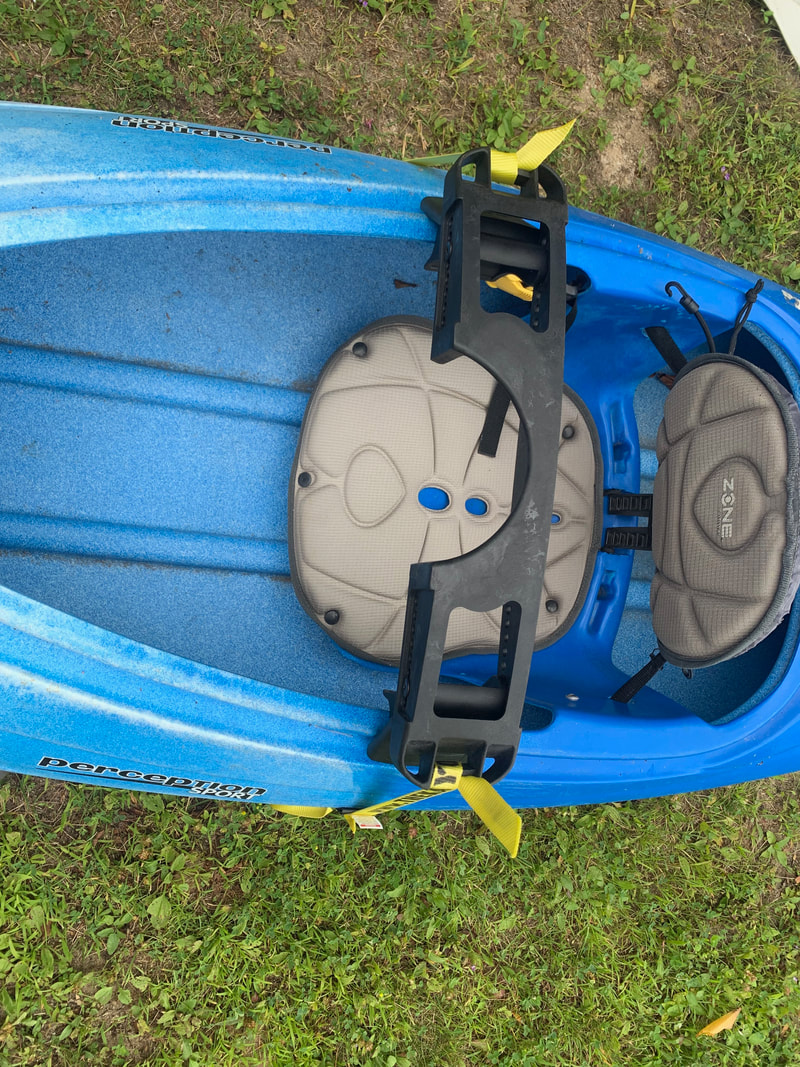
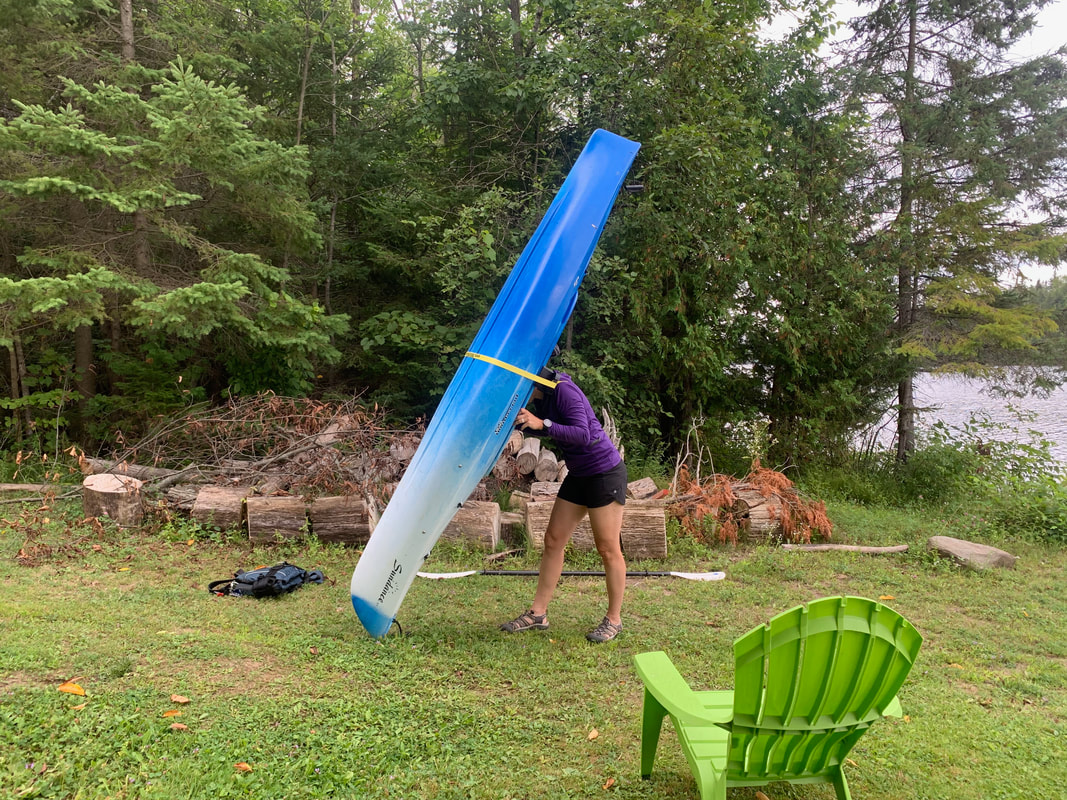
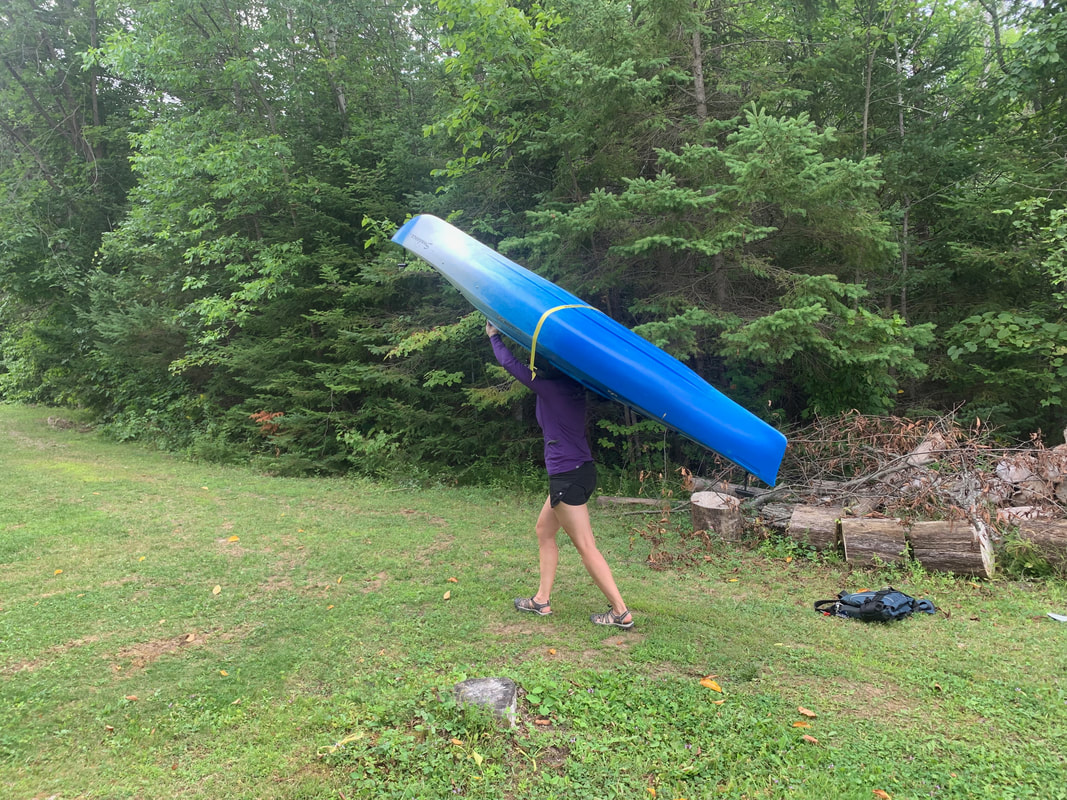
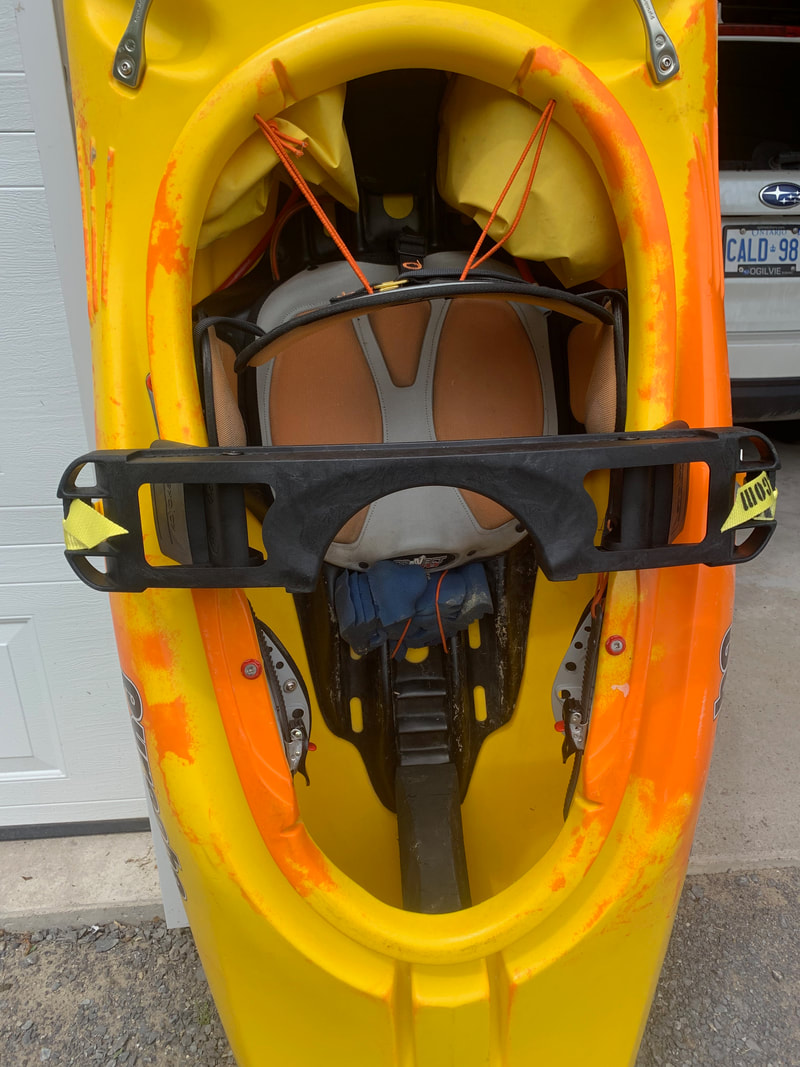
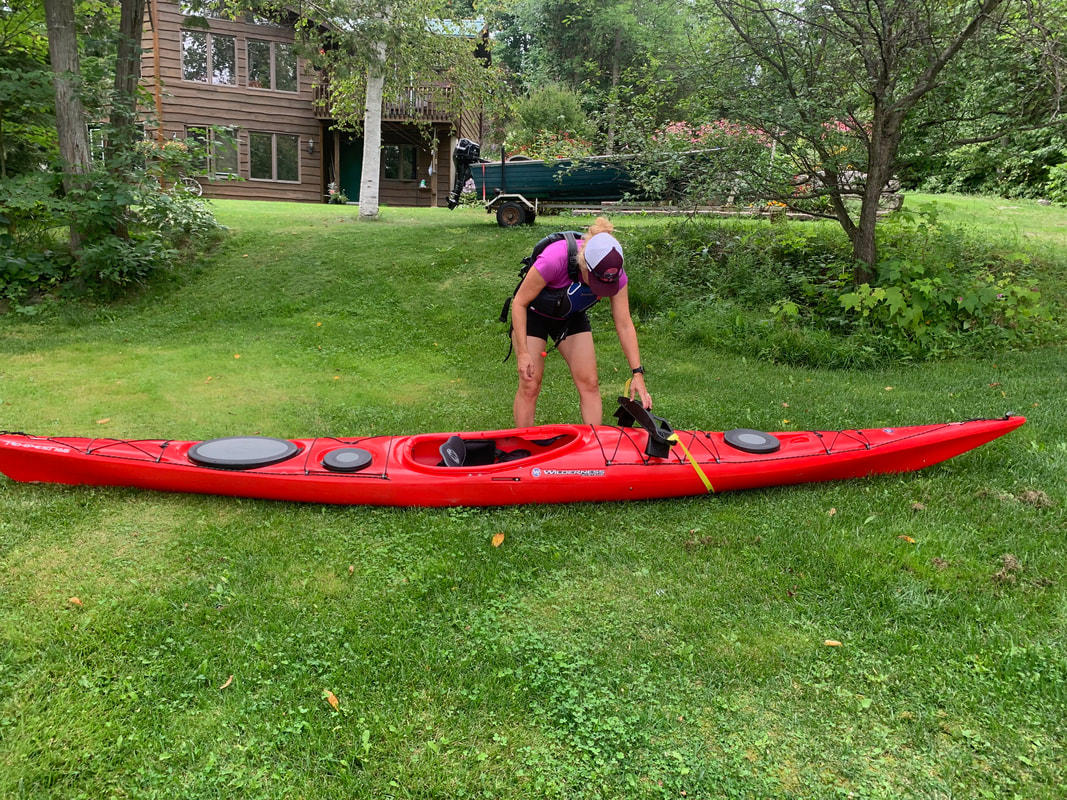
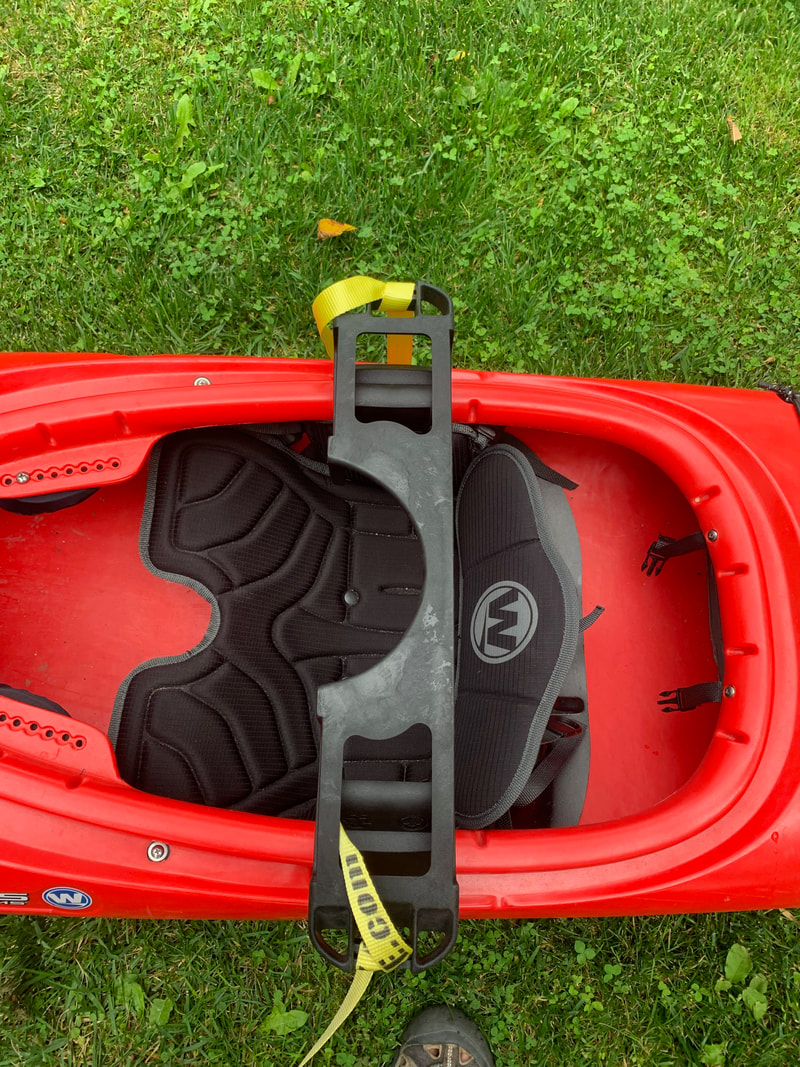
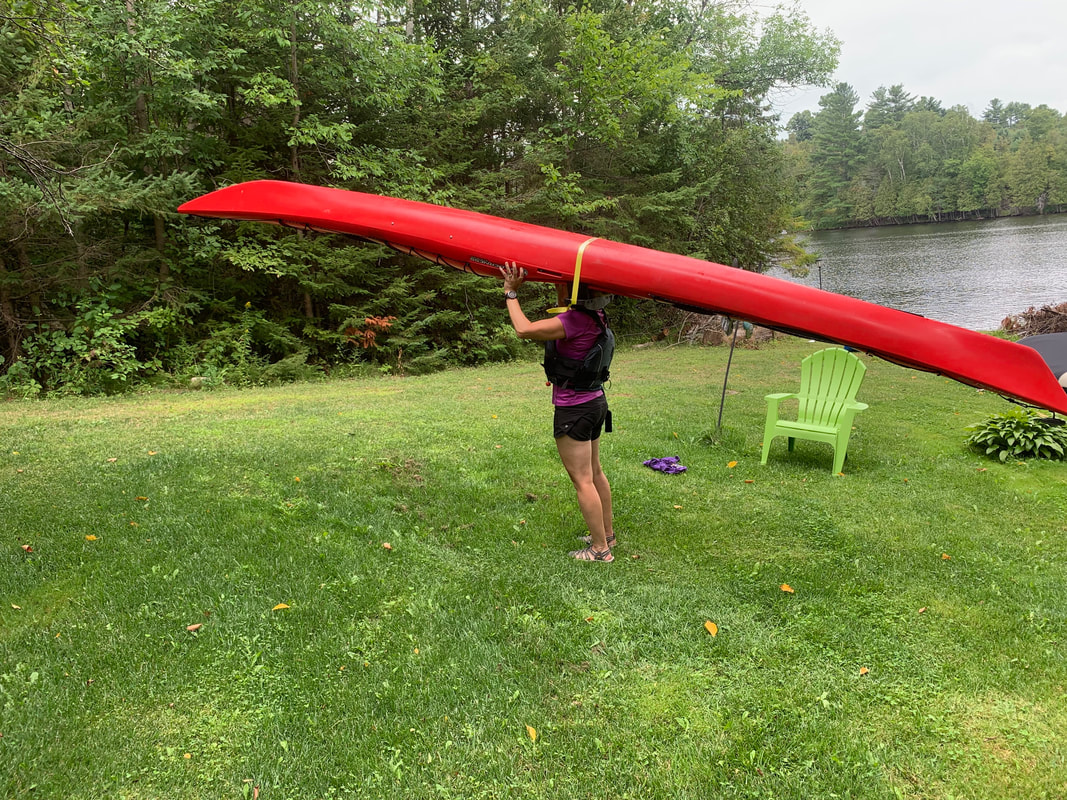
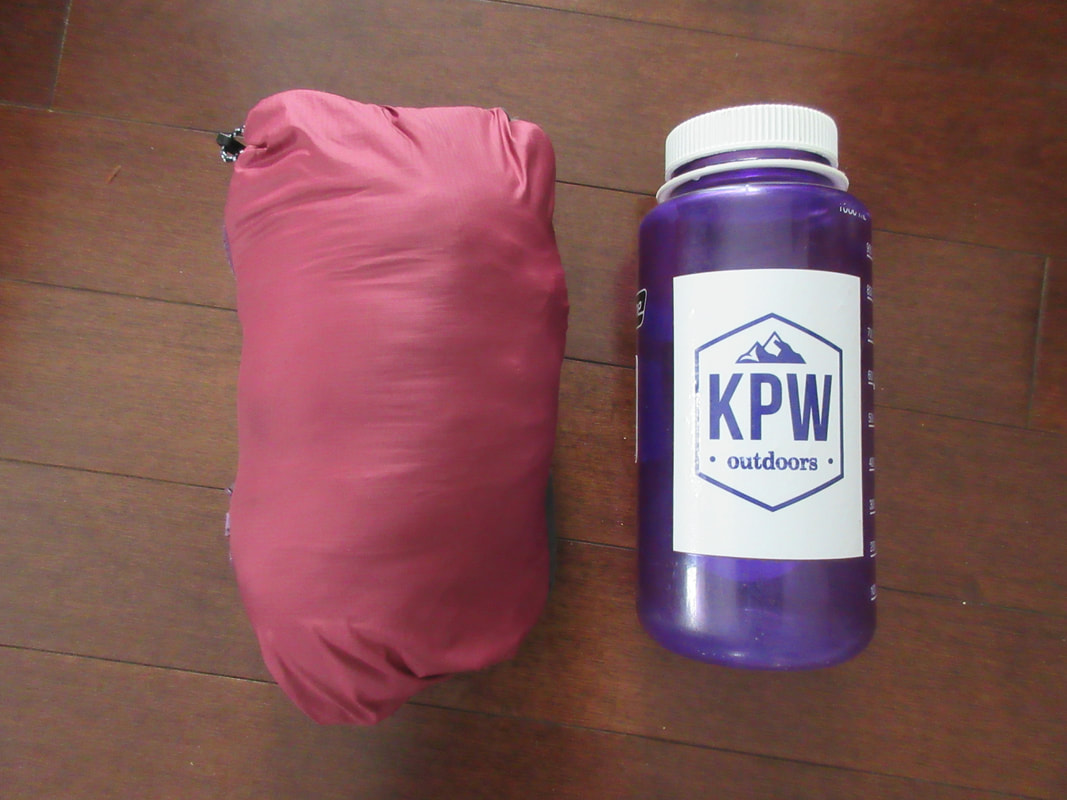
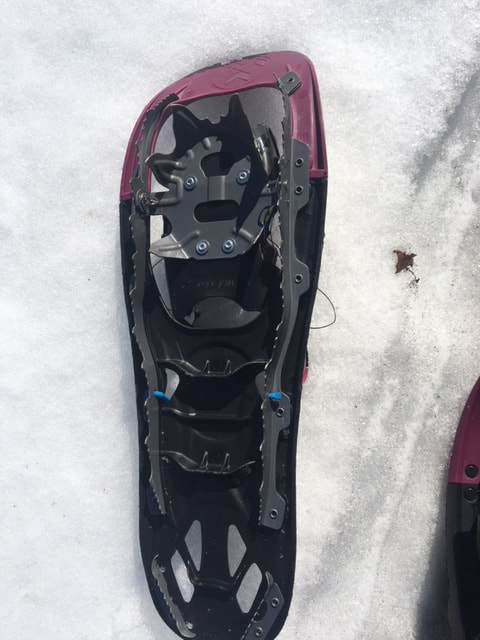
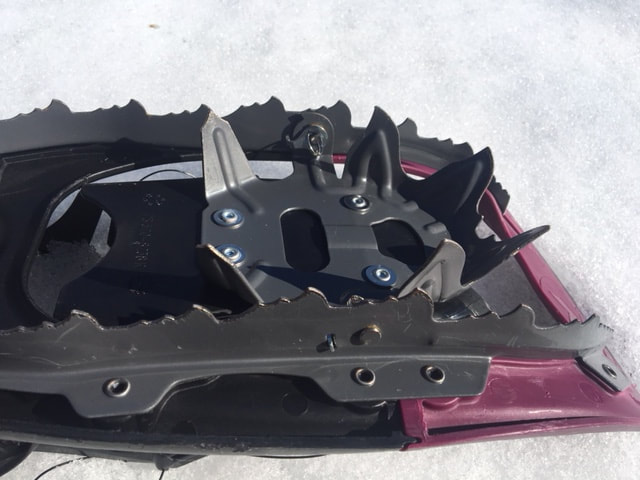
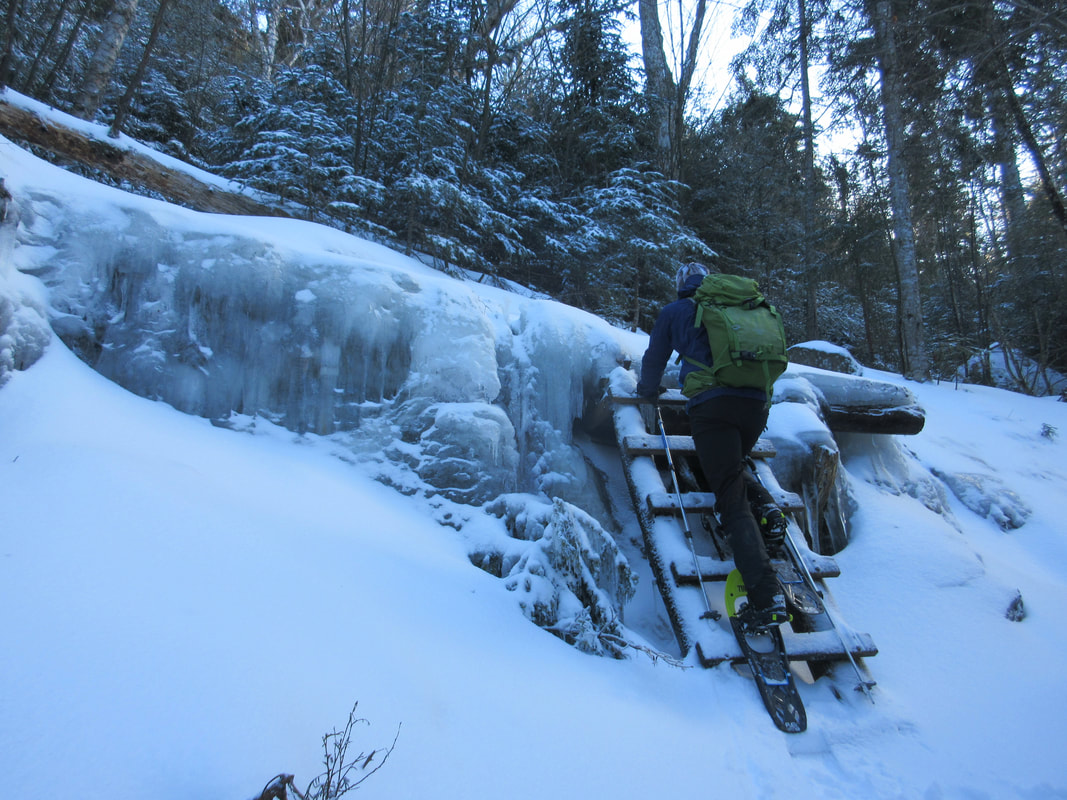
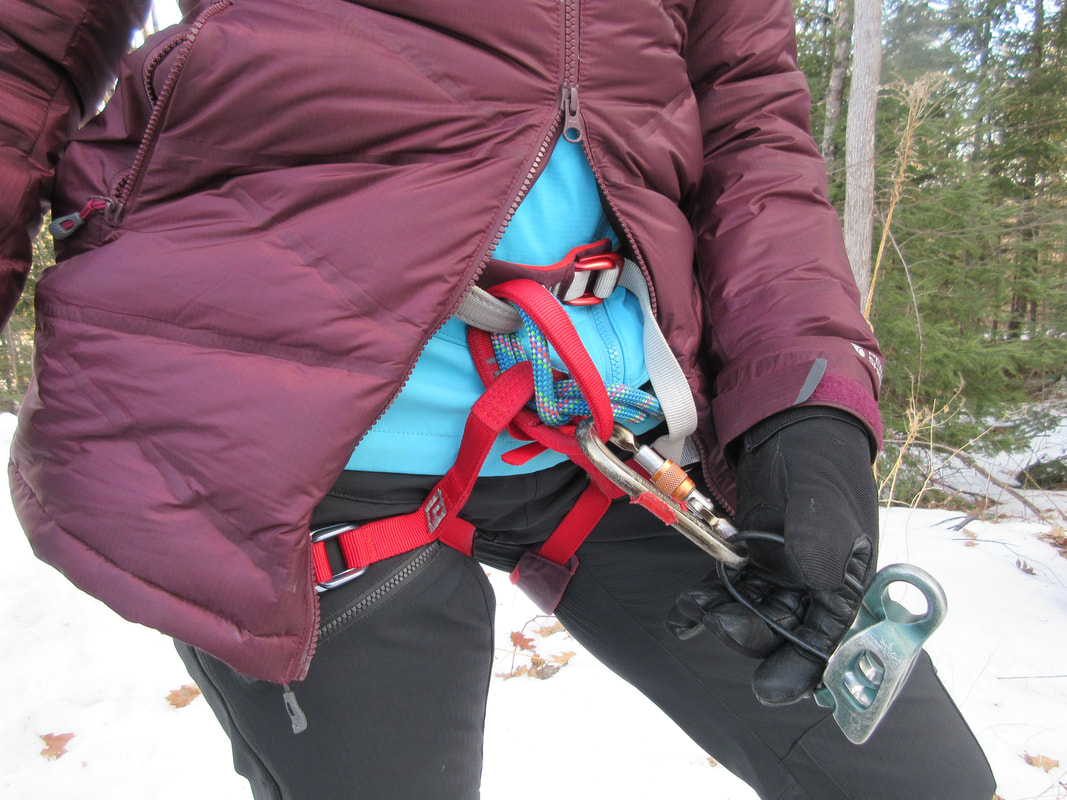
 Level Six Sunseeker Leggings Level six's sun protection collection features a variety of tops and bottoms that combine UPF 50+ sun protection with a functional swim or paddling garment. The Sunseeker leggings are part of the sun protection collection and are found in two forms: reversible and regular. I tested out the reversible leggings over 2 summers while paddling and swimming. Level Six Sunseeker Leggings and Level Six Reversible Sunseeker Leggings: Price: $60 CAD Sizes: XS to XL Colour: Regular: Navy, Juneberry, Silver Pine and Reversible: Kaleidoscope and Black Ripples Features: The Sunseeker leggings are made of quick-drying 82% Polyamide/18% Elastane material that feels like regular women's bathing suit material. The 24" inseam means that they end halfway down my shin on my 5'6" frame. The flatlock seams reduce chafing areas which keep the leggings looking new. The UPF 50+ sun protection means you can skip the sunscreen while wearing them! Pros: There are a number of things to love about these leggings: Fit- The leggings hug your legs well even after getting wet. They are not too loose or too tight around the waist and seem to snug all the right places. The leggings feel like you are wearing leggings made out of thick bathing suit material which feels great dry or wet! Durability- After two seasons of use, I can barely tell they have been used. They seem to withstand the abuse of kayak outfitting, kneeling, sitting on rocks and docks, and all the bending I do in them. Versatility- I seem to grab these leggings more and more. I started off just using them for paddling but then starting wearing them for more general purposes like swimming off a dock when the air temperature dips in August. I am also an open water swimmer and use them to swim in in September when the water temp drops but it's still too warm to wear a wetsuit. Lastly, I have seen others wear these leggings for pool lap swimming, and for SUP yoga. Sun Protection- At UPF 50+, you can be assured that you won't get a sunburn while you are wearing them. With all the concerns over sunscreen in recent years, I have gravitated toward wearing clothing that will protect my skin rather than slathering on chemicals. I am happy to know that these leggings will protect me from the sun even when I recreate outdoors all day in the sun. Kayaking- I really enjoy how well these leggings fit in a kayak cockpit. They are much more comfy than board shorts or neoprene garments. I love the fact that I don't care if I get them wet and they keep me warmer than a regular pair of fitness leggings. Reversible- The reversible version of these leggings are fun as you can wear them multiple ways! Cons: None! I can't think of one! Kudos to Level Six for making an awesome women's product. Best Uses: Whitewater Kayaking, Sea Kayaking, SUPing, Open Water Swimming 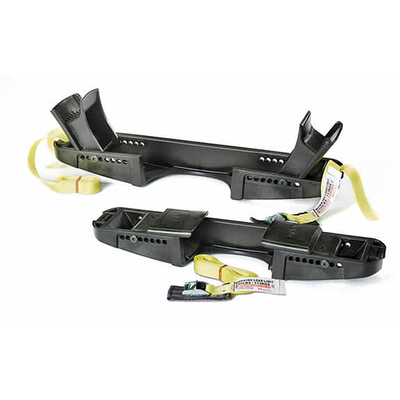 The Kayoke is an innovative device created to improve the carrying capabilities of kayaks on portages and other uses. It was created by Scott Gill, a paddler who wanted to pick up and take his kayak down the portage trail and not be limited by kayak's traditionally poor carrying capabilities. I thought this invention would be an interesting way of expanding one's kayaking range so I offered to test it out on my own fleet of kayaks. I tested the Kayoke out on a variety of watercraft including: whitewater kayaks, recreational kayaks, sea kayaks, solo canoes, and sit-on tops throughout the summer of 2019. As a canoe guide for over 25 years, I was also curious to see how it felt to portage a kayak. Kayoke Price: $119 CDN Weight: 2.4lbs Size Range: 14-21" cockpits Load tested: 150lbs Features: The Kayoke comes with an adjustable molded plastic yoke along with ratchet strap and 2 hex keys. The website has a series of helpful 'how-to' videos to help you put the yoke together and how to attach it to your boat. Here is how it works: Test #1: Recreational Kayaks Kayak: Perception Sundance Cockpit width: 19" Weight: 40lbs Length: 9'5" After watching the YouTube videos on how to set up and use the kayoke, my first test was on a typical recreational kayak. The Kayoke was easy to slip on over the bow and tighten around the hull of the boat. Portaging this boat using the recommended method in the videos (see photos below) was easy to do. I felt that the Kayoke made portaging this empty boat fairly easy I felt I could definitely portage this boat for awhile. That said, portaging a kayak is more difficult than a canoe as there is no balance point an you have maintain consistent pressure on the bow to pull it down. After using the Kayoke on this boat I would definitely recommend it for recreational kayaks. Test #2: Whitewater Kayak Kayak: Pyranha Ammo Cockpit width: 19" Length: 6'9" Weight: 35lbs One of my favourite whitewater kayak runs begins with a 5km portage on a old railbed in Algonquin Park. In past years I have loathed carrying my loaded boat on my shoulder for that length of time and have even resorted to renting boats just so could drag them along this portage. The Kayoke could be the solution to this problem. I set the Kayoke up on my Pyranha Ammo, the boat I would take on this run. The Kayoke fit the wider cockpit without issue and I could pick up the boat and carry it no problem. The only issue I could foresee is maintaining pressure on the bow for that length of time so my solution was to attach a tie-down strap to the bow handle on the kayak and pull it down using one hand while portaging. Unfortunately I wasn't able to try it out before this review was put up but I will update it as soon I do it. I am excited to use the Kayoke with this kayak. I also works on my husband's Pyranha Burn kayak. Test #3: Sea Kayak Kayak Tested: Wilderness Systems Tempest 165 Weight: 55lbs Length: 16'5" Cockpit width: 18" I was eager to try the Kayoke out on my sea kayak to see if it would enable me to carry this boat further afield and possible even help me get this boat on the roof racks of my car by myself (something I can't do alone). After adjusting the jaws, I tried to use the recommended sliding method to get the kayoke on the boat. I had trouble getting the Kayoke on this way when the bow was very long and heavy and I needed a second person to help me out. If this was the case again, I figured out I could simply detach the ratchet strap and feed it around my cockpit so I could complete this process alone. Once on, the kayoke was securely in place. With difficultly, I lifted the kayak up and got it on my shoulders and held it just long enough to take the photo below. The kayak was extremely bow heavy and I struggled to keep it up. There would be no way I could portage this boat in this way even when empty as I could barely take one step. I also can't use the Kayoke to help me get it up on my car roof. There was nothing wrong with how the Kayoke attached to this craft it was just impractical and cumbersome to portage this boat on one's shoulders. 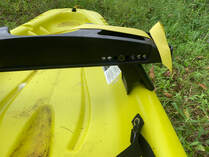 Other watercraft and suggestions: Solo Canoes: I tried to fit the Kayoke on my solo whitewater canoe (an Esquif Zephyr) but it was too wide by 4". Suggestion - if the Kayoke had wider capabilities and the jaws were able to accommodate canoe gunnels I think this idea could work for those who paddle solo flatwater and whitewater canoes where you sit in the middle of the boat and don't have a traditional canoe yoke but still want to portage. There are a few removable canoe yokes on the market but nothing as easy to use like the Kayoke. Sit-on-top and fishing kayaks: One idea I had was that sit-on-top kayaks are annoying to carry as the don't have a traditional cockpit or handles of any kind. I was thinking the Kayoke could come in handy especially with anglers looking to portage their fishing kayak to their backcountry trout lakes. The Kayoke would have to be modified to accommodate wider kayaks, the rails of the boats and the jaws would have to be taller to accommodate head room. Pros:
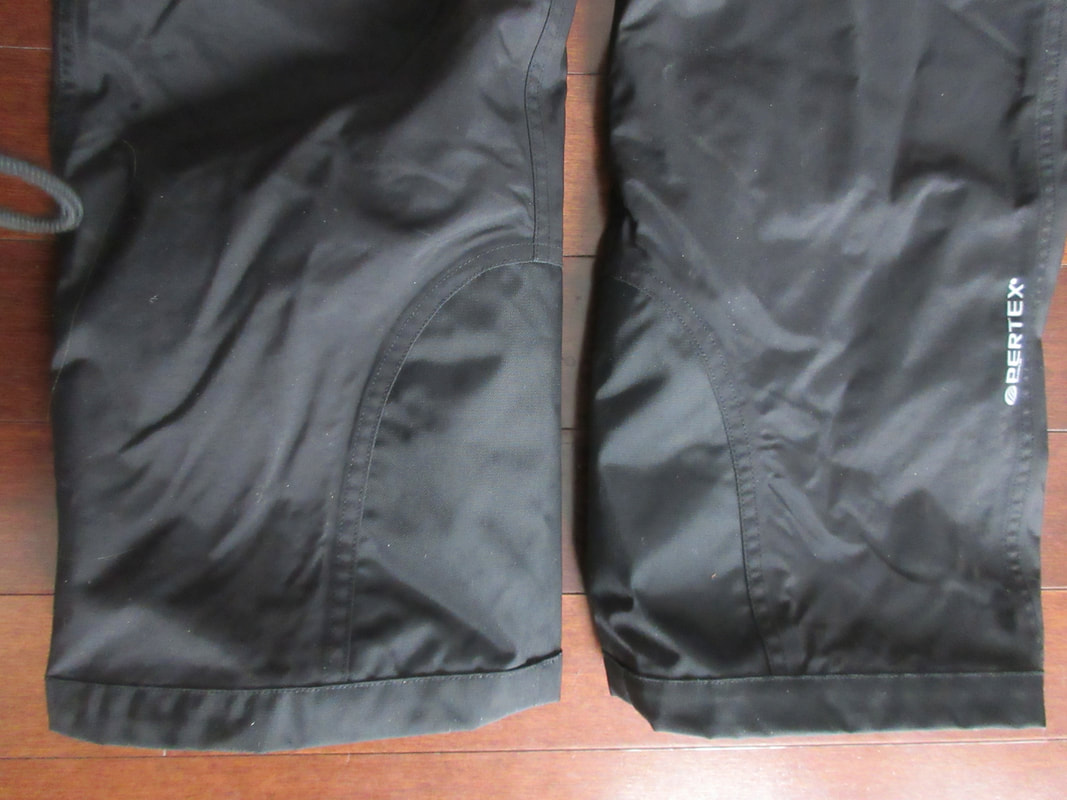
Cons:
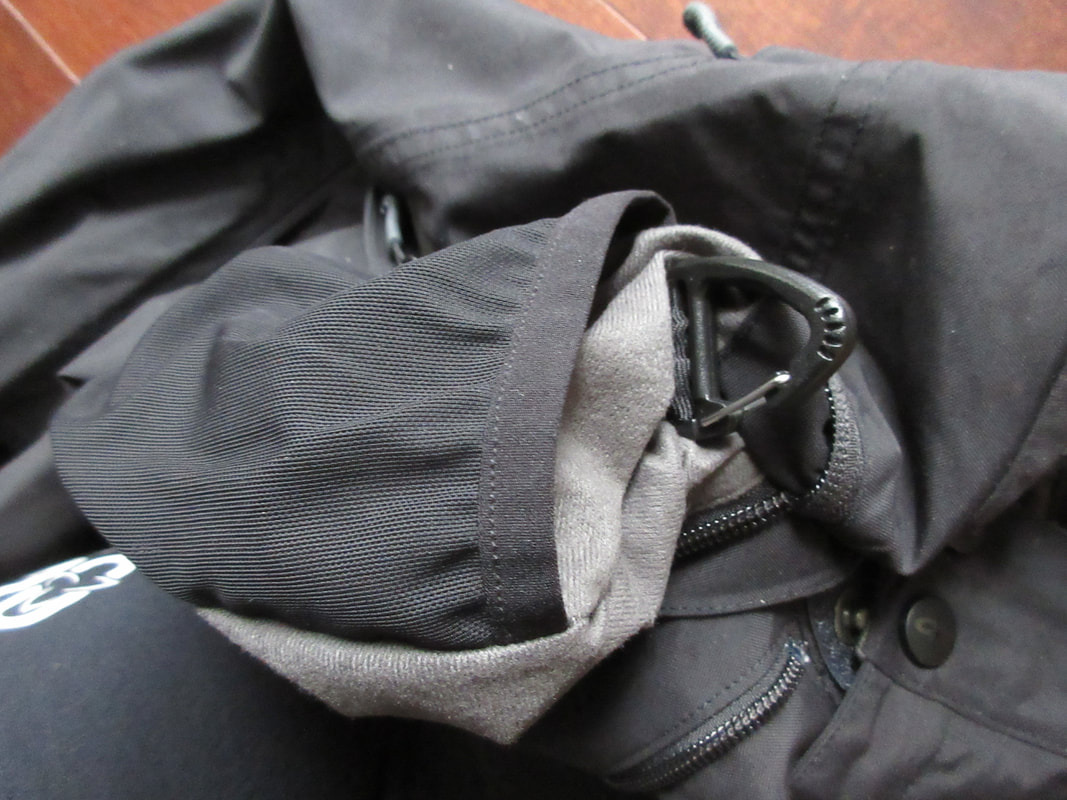
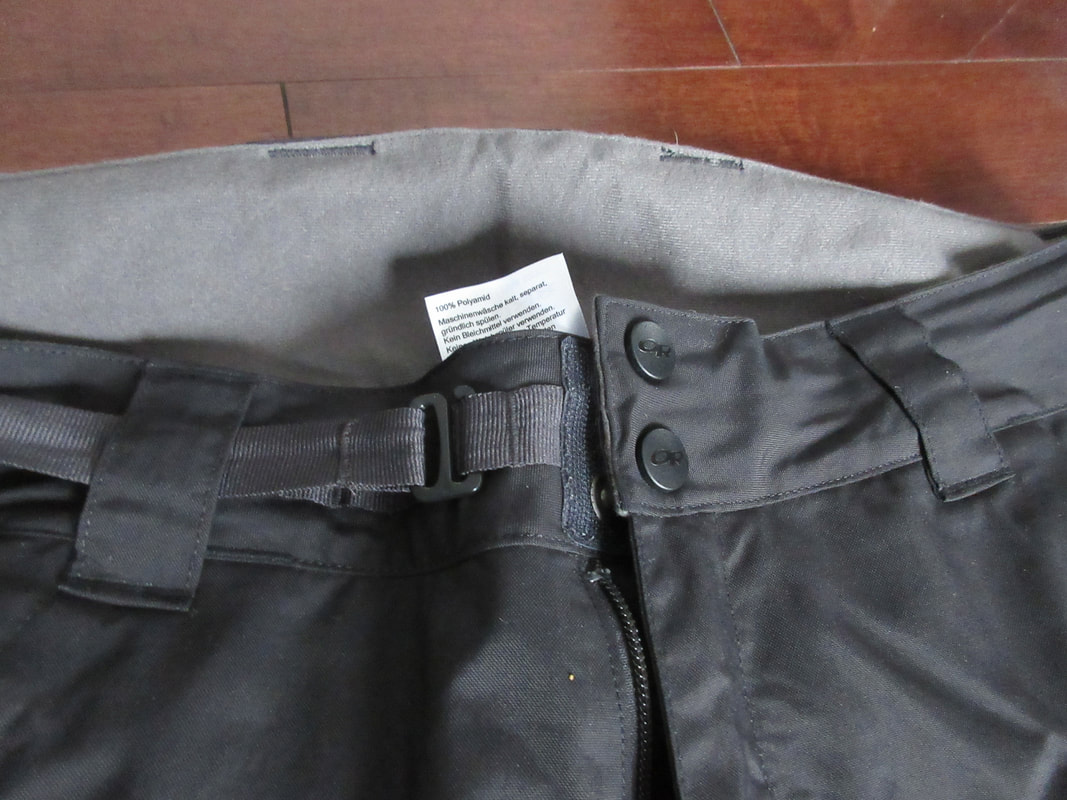
Best Uses: Recreational kayaks 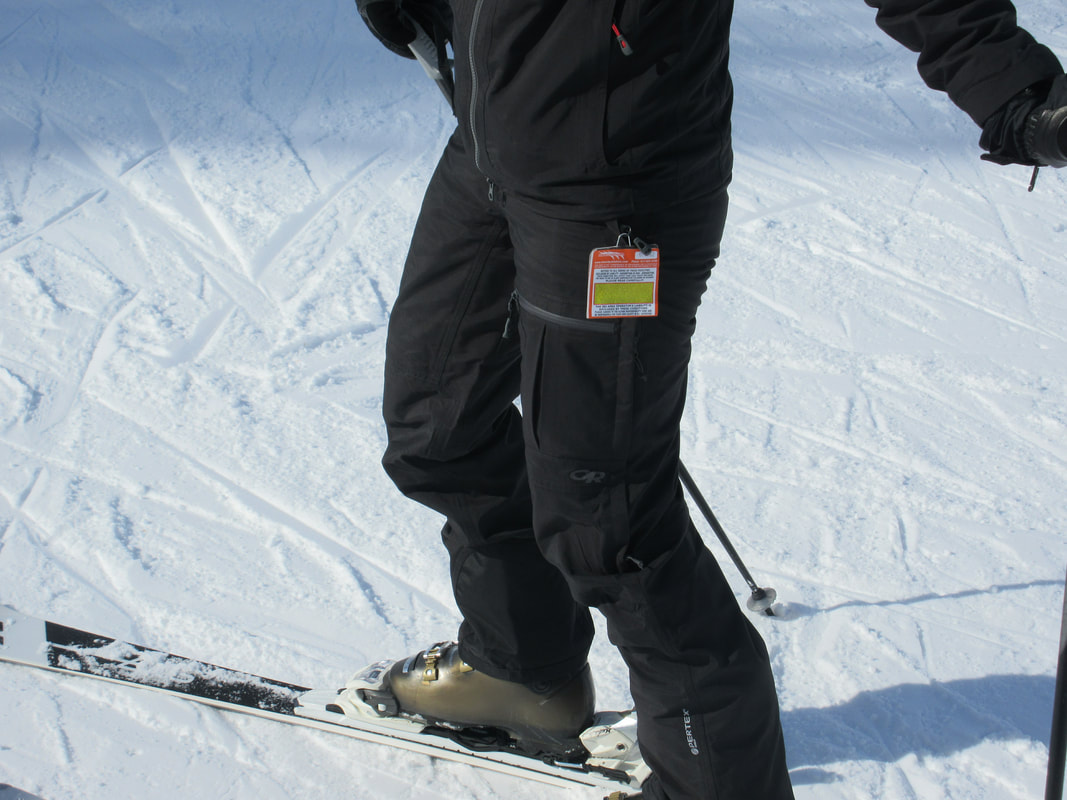 Outdoor Research Women's BlackPowder II Pant New for Fall 2018, the Outdoor Research Black Powder II Pants have been updated to be more streamlined and slimmed down. Outdoor Research Women's Black Powder II Pants Size: XS-L Colour: Black, Saddle Price: $249 USD Weight: 25.6oz/724g (medium) Fit: Standard Features: The Black Powder II Pants feature a waterproof, windproof breathable Pertex Shield 200D 100% Nylon A polyester tricot lining keeps upper legs cozy when you are wearing the pants. Long zippered vents keep legs cool when temperatures rise. A taffeta lower leg lining and 420D Scuff Guard, and internal gaiter Hand pockets (one with an avy beacon clip), thigh pocket and back pocket. Integrated belt system. Pros:
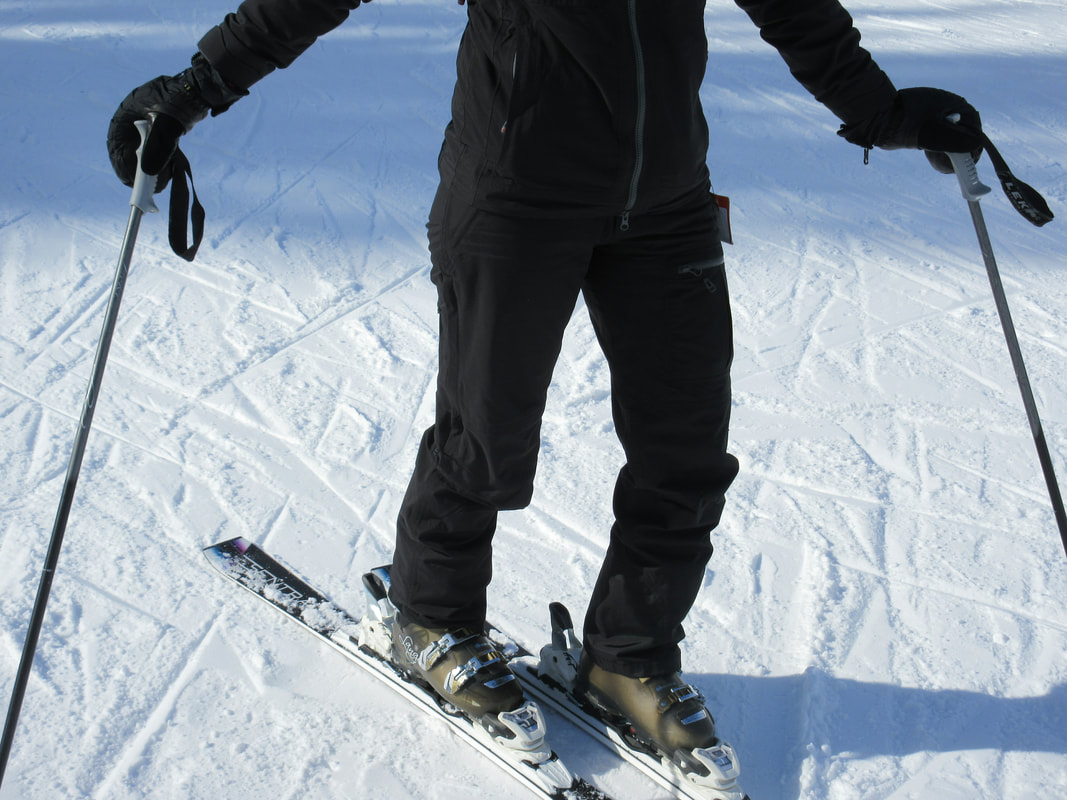
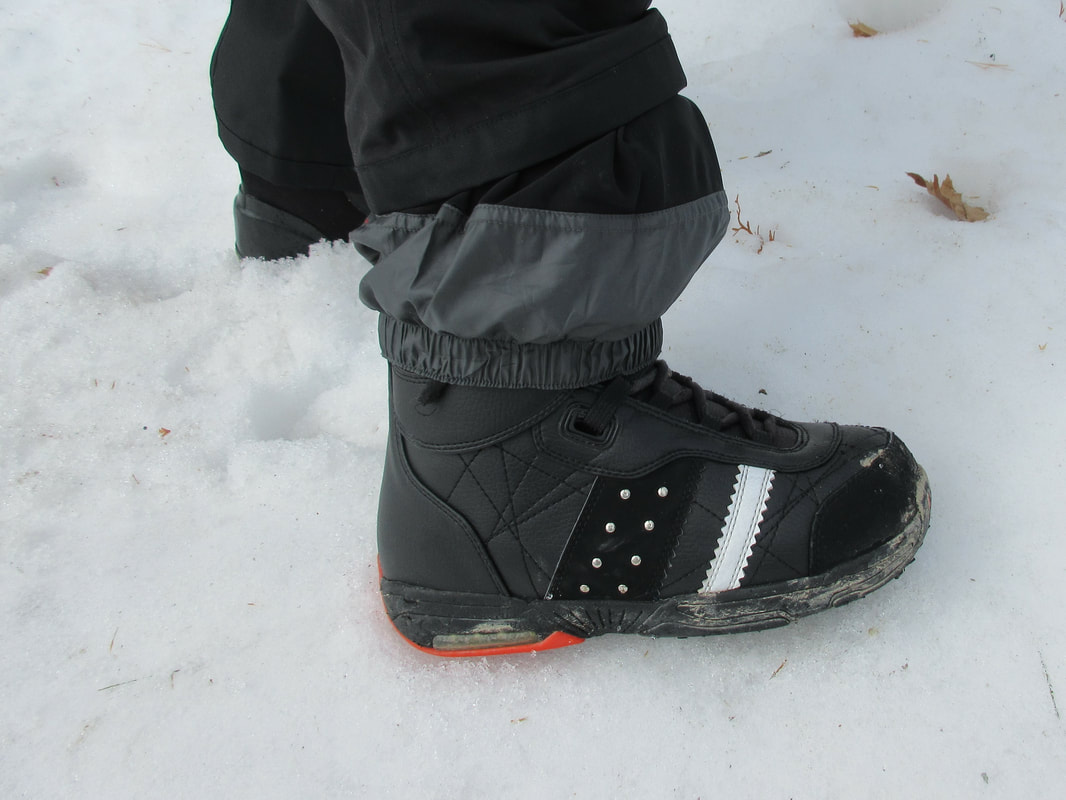
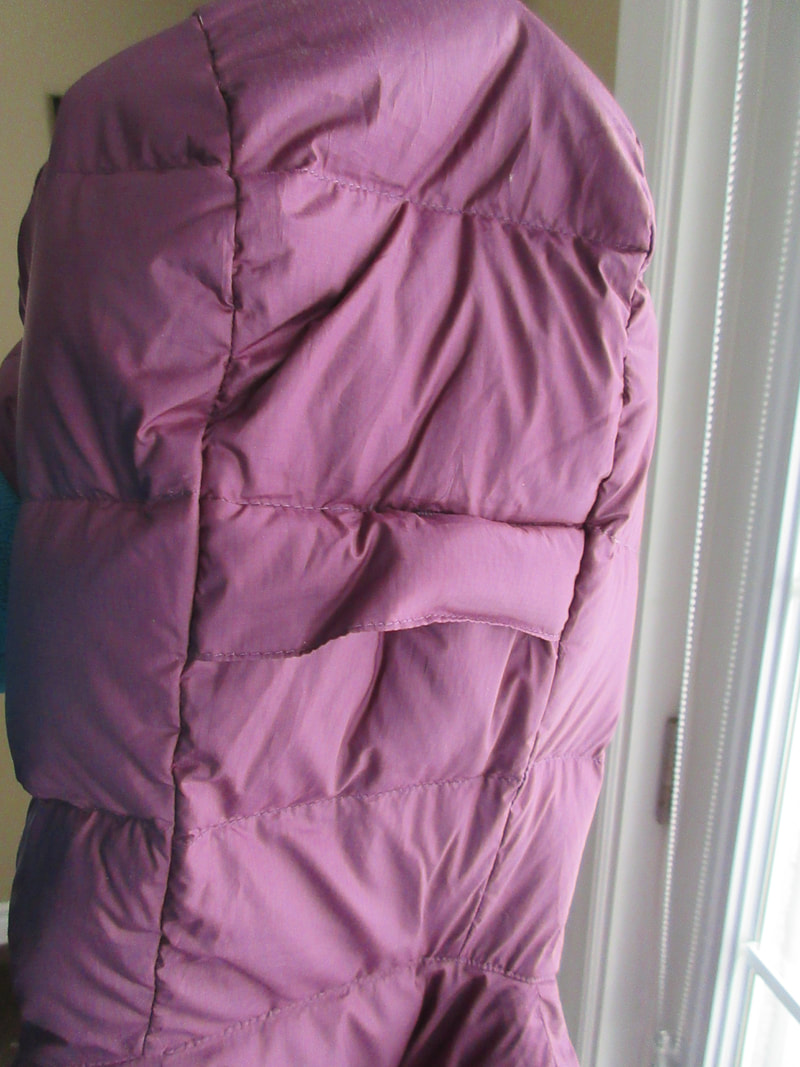
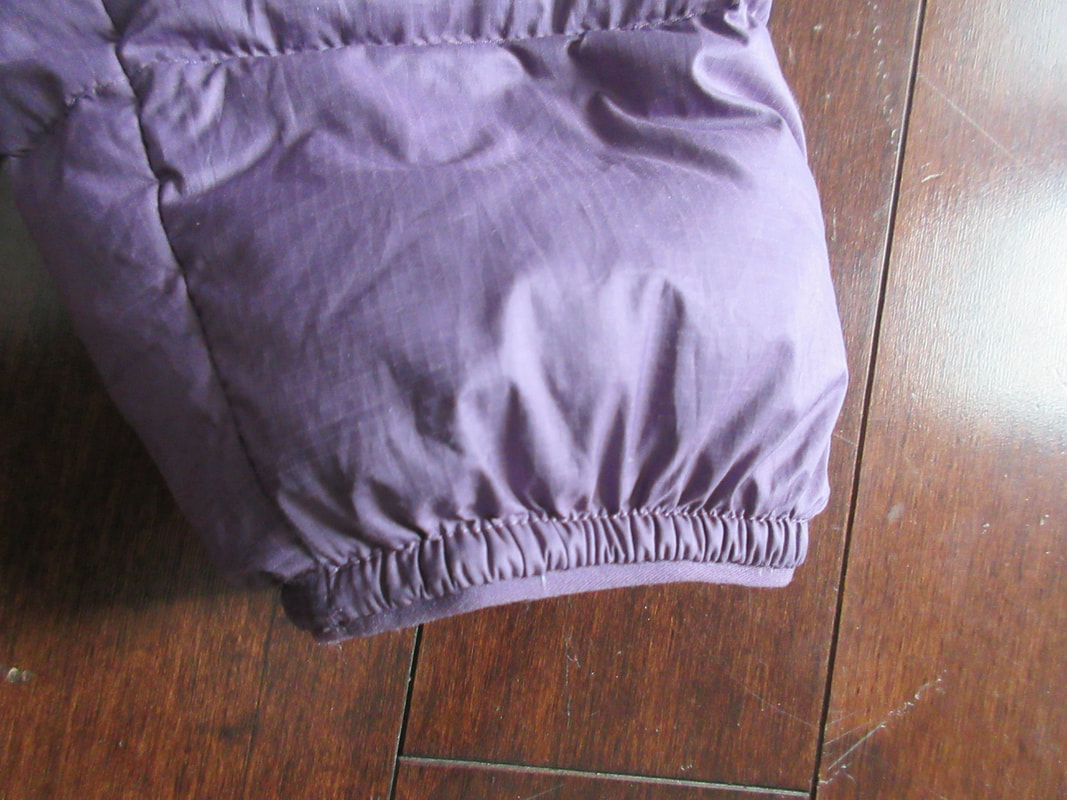
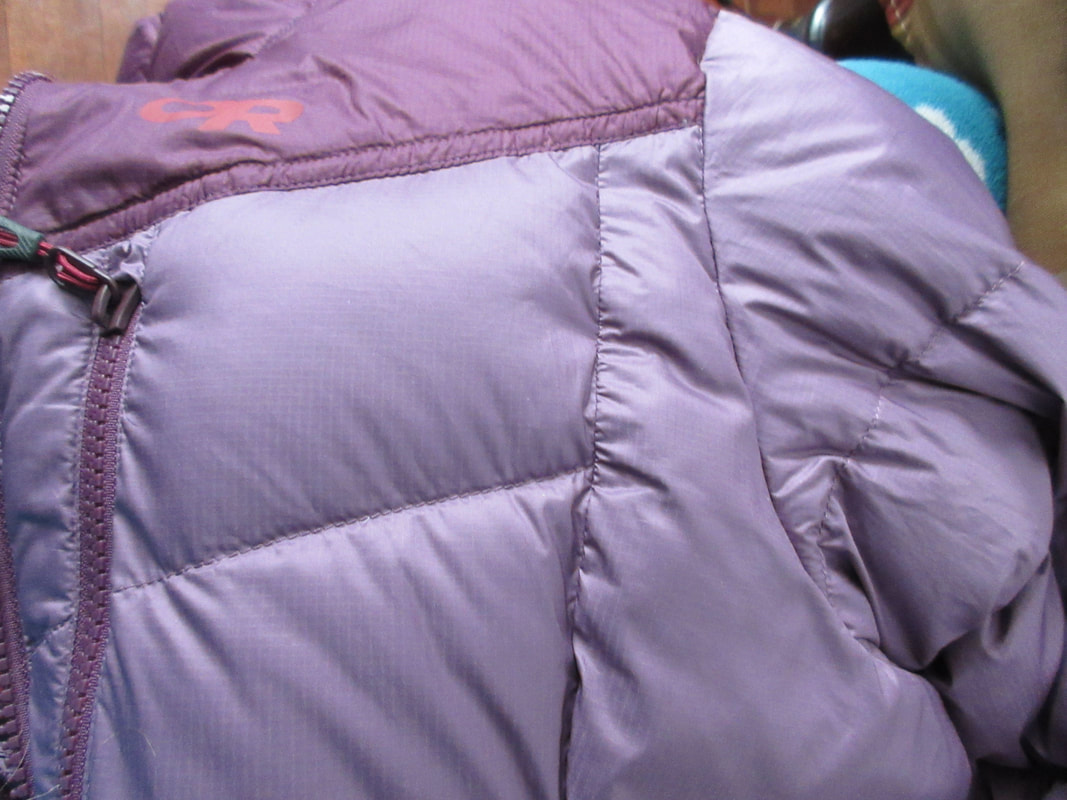
Durability - When the Blackpowder II Pants arrived, you can immediately feel the quality of the material used to make these pants. The 200D Pertex shield fabric instantly boosts your confidence that these pants will be able to withstand attacks from sharp edges and moisture. They feel very durable and no wonder they are popular with lifties and patrollers. Snowboard vs Ski - As a skier and a snowboarder, I actually preferred using these pants snowboarding. The durable Pertex Shield 200 D fabric was great when sitting down on the snow strapping into my board. The fabric shed snow and moisture really well and I felt they worked with my snowboard style better. The internal gaiter fit well over both my snowboard and ski boots in the size medium unlike other reviewers have mentioned. High Waist - OR has raised the fabric to cover part of the low back. I love this feature on some of their other pants like the Iceline Pant but really liked when snowboarding. Bending over is part of the deal snowboarding and I love how these pants had by back covered! Pockets - These pants have 4 usable pockets which come in handy as a ski/snowboard race coach. I could fit tools, extra lift tickets, money, and start lists in these hand pockets. Insulation- I wouldn't call these pants well insulated but the burly outer fabric combined with the inner linings have kept me warm on the coldest of days. The polyester tricot lining feels great in areas where I feel cold the most: the bum and hips. Protection from the elements- I wore these pants in rainstorms and snowstorms this winter. Rain beaded off the Pertex fabric and left me feeling pretty confident that these pants can handle anything Mother Nature will throw at it. Cons: Tight around hips - I found the pants a bit tight around the hips and I would consider myself an average built woman. For a women's specific design I would use or add more of a stretch material that contours around a woman's hips and allows for more freedom of movement flexion and extension of knees and hips. Heavy for touring - Although the Blackpowder II pants have touring features like a beacon pocket and clip, generous side venting options as well as breathable fabric, I would not use these pants for long uphill tours. Heli-skiing, catskiing and short sidecountry forays would be more appropriate. Not really a con per se, but wanted to clarify where I think they would best be used. Belt - I love having belt systems on my outdoor pants. The internal belt system works well on these pants I would most definitely prefer velcro adjustments to this hook in style belt. I have used velcro before on OR's Iceline and Cirque pants and really like how quickly you can adjust it (in case you eat a big lunch!) as well as how well it snugs your sides. The webbing belt system is effective but didn't feel great all the time. A small piece of webbing definitely is less comfortable than velcro. Best Uses: Resort Skiing and Snowboarding, Patrolling, Instructors, Lifties, Racing, Sidecountry Disclaimer: I was given these ski pants as part of OR's #ORInsightLab. The opinions expressed in my review are completely my own.  The Outdoor Research Transcendent Down Hoody  The Outdoor Research Women's Transcendent Down Hoody was completely re-designed for Fall 2018 with a number of big changes. Outdoor Research Women's Transcendent Down Hoody Sizes: XS to XL Colours: Black, Lapis (blue), Slate, Garnet/Zin, Pacific Plum/Amethyst, Seaglass/Washed Peacock Price: $225 USD Weight: 12.9oz/ 366g Features: The Transcendent features water-resistant, wind-resistant 20D lightweight 100% ripstop polyester. It is filled with 650 responsibly sourced goose down insulation.  Two hand pockets lined with cozy fleece lining. The left hand pocket doubles as a compression stuff sack if turned inside out. The left chest pocket features a media pocket inside it. 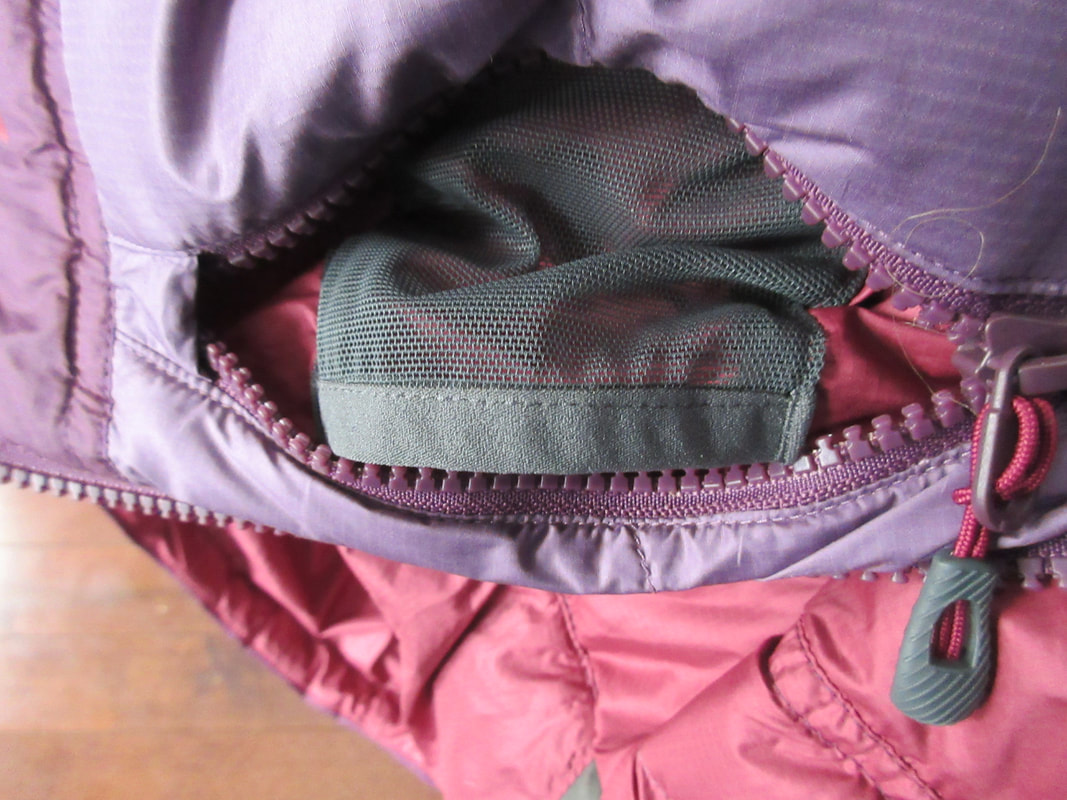 Media pocket inside chest pocket. Perfect for credit cards! Elastic cuffs, elastic drawcord for the hem, elastic drawcord hood cinching x 2 (around the face and around the back of the head). Pros: Women's fit- New for Fall 2018, OR is introducing an all new women's fit. This new design fit is supposed to increase movement, layering, and leave room for expansion due muscle hypertrophy. As I see it, the Transcendent Hoody meets all of the criteria. The hoody allows for ease of movement. I don't feel restricted at all in any plane of movement. Secondly, I can layer the hoody (size small) over multiple other layers including baselayers, insulating layers and shells. The puffy's thin profile also allows it to layer underneath shells seamlessly allowing it to be used for a variety of activities. Lastly, I can spot subtle details like the ruching around chest and upper back areas allowing for expansion in case you carry more size in those areas. Compressibility- The Transcendent Hoody is 650 fill down jacket. Traditionally this means that the jacket is not as compressible as a 800 fill jacket nor as lightweight. I did a quick test to compare against two other jackets and found a striking outcome. The Transcendent jacket compresses smaller than the Patagonia Down Sweater Hoody (800 fill- size small) but larger than the Mountain Hardwear Ghost Whisperer Jacket (800 fill-size medium). I was surprised that this jacket beat out a market favourite 800 fill jacket for compressibility. Impressive! Check out the photos below a scroll over the for captions. Lightweight- According to the OR website, the medium sized Transcendent Hoody rings in at 12.9oz/366g. Comparing it to the Patagonia Down Sweater Hoody at 13.1oz/371g for a medium. This again is a surprising outcome - a 650 fill jacket lighter than an 800 fill?
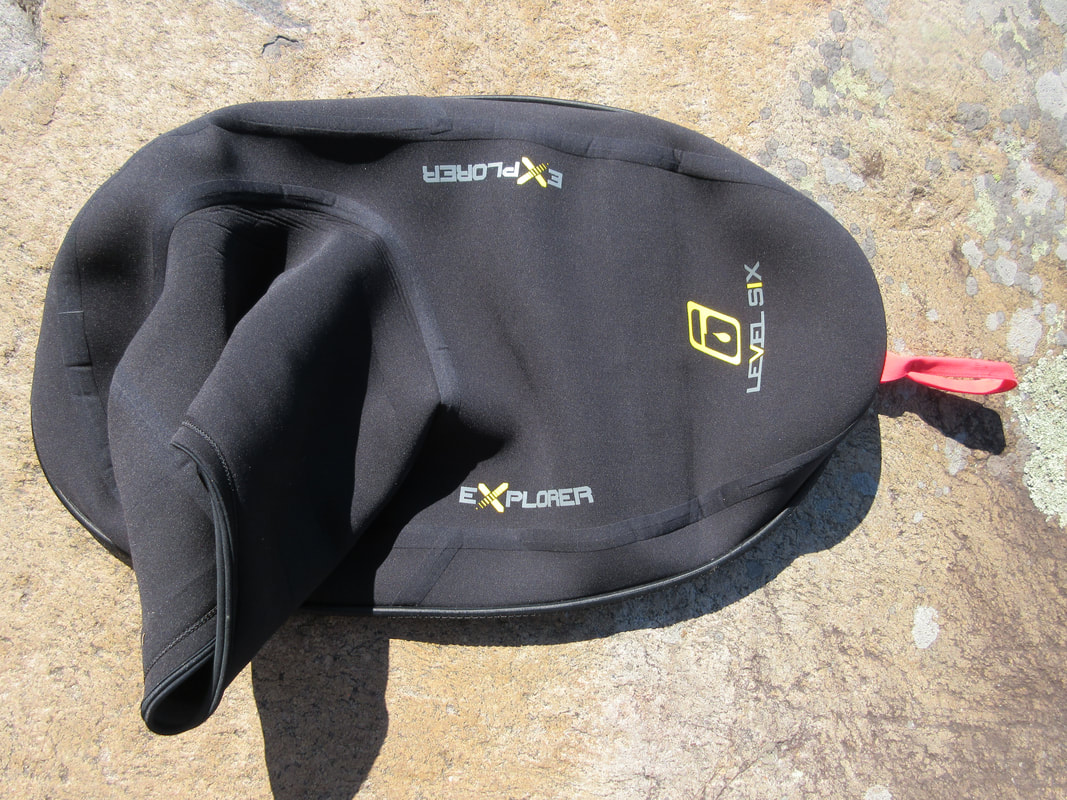
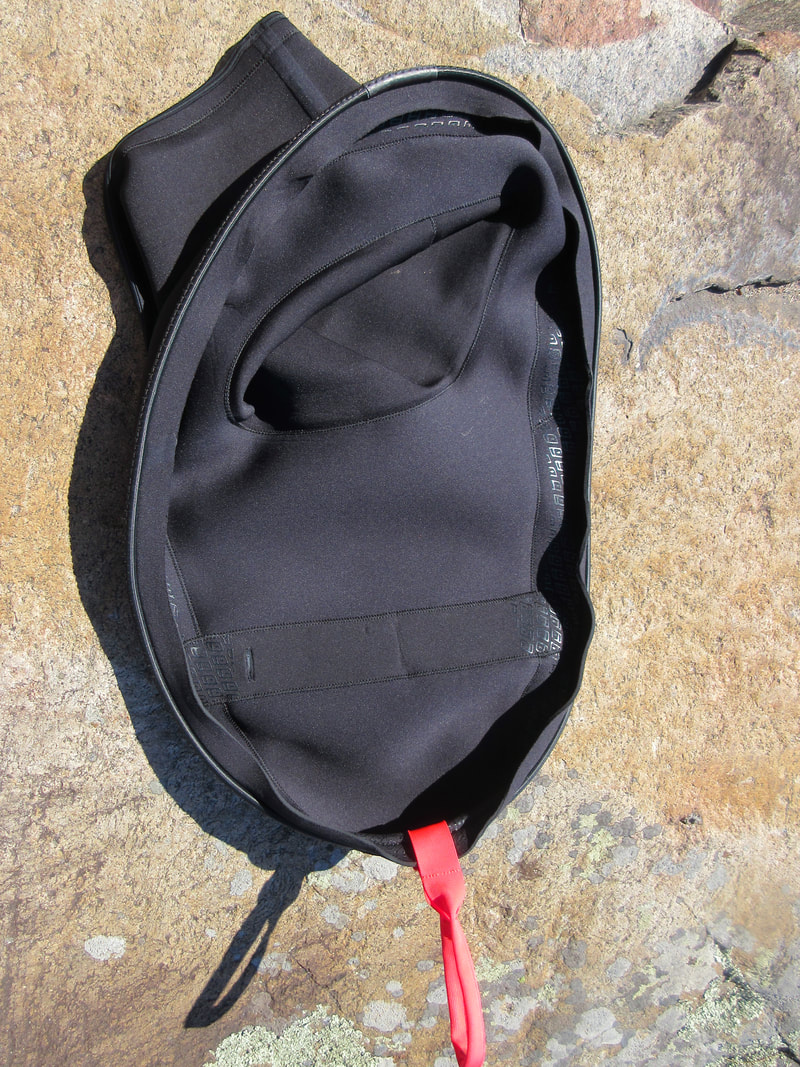
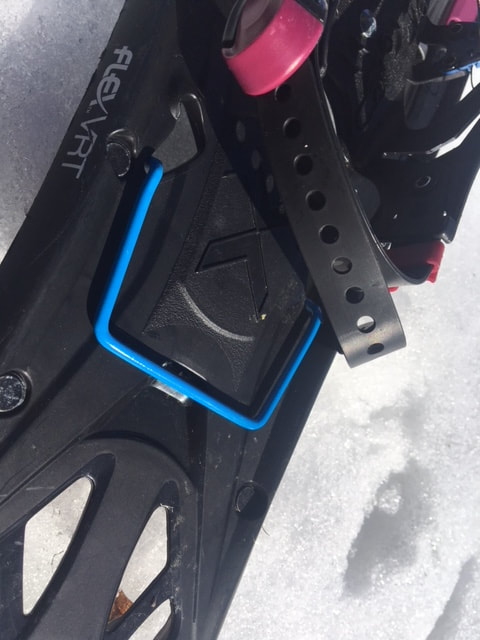
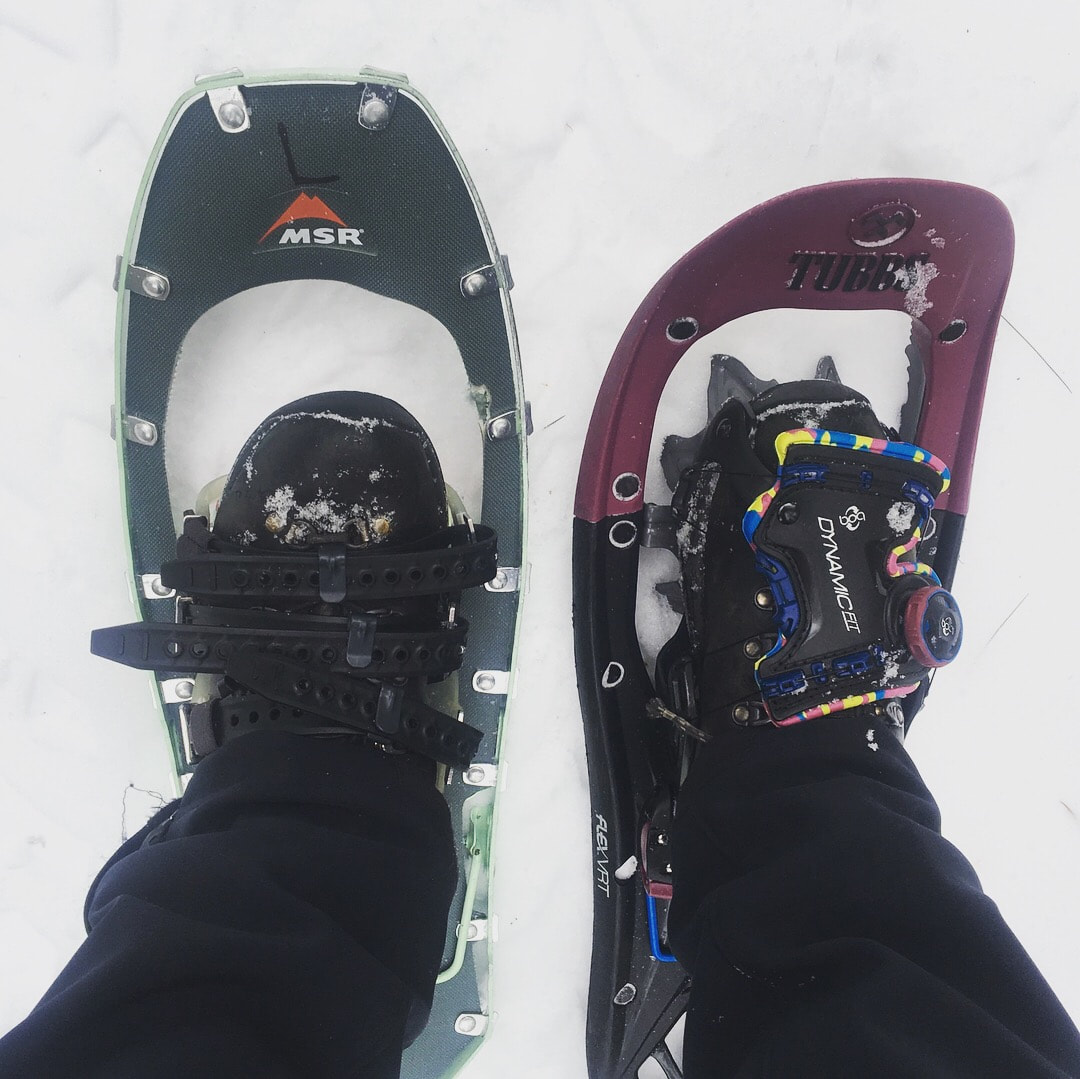
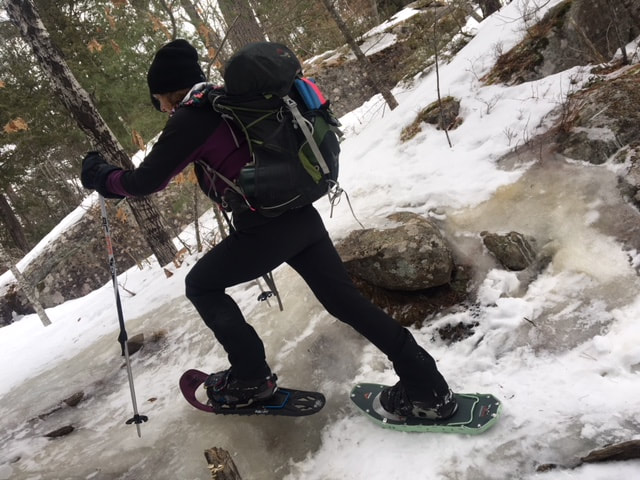
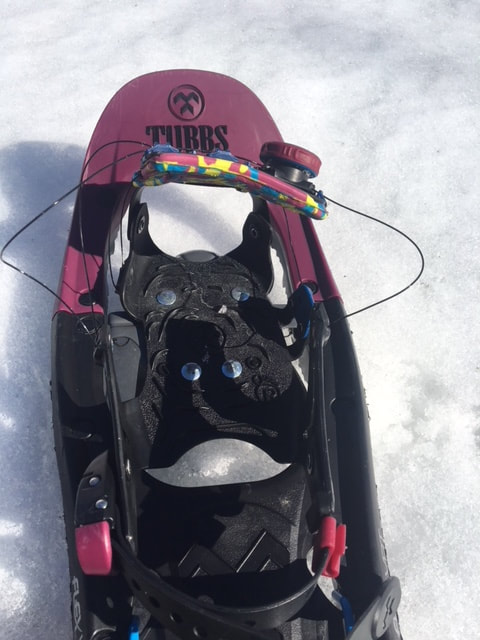
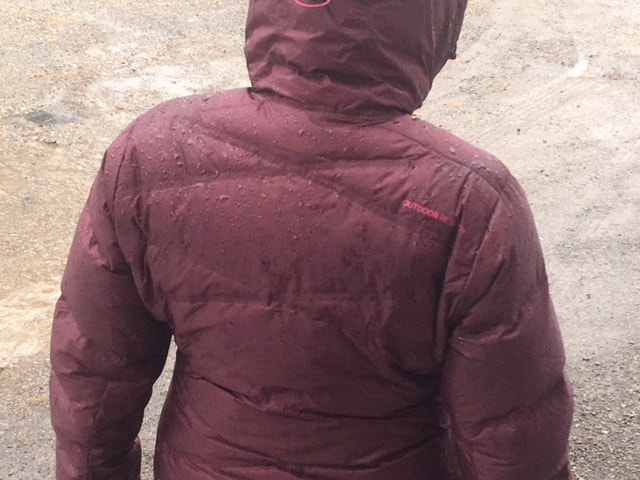
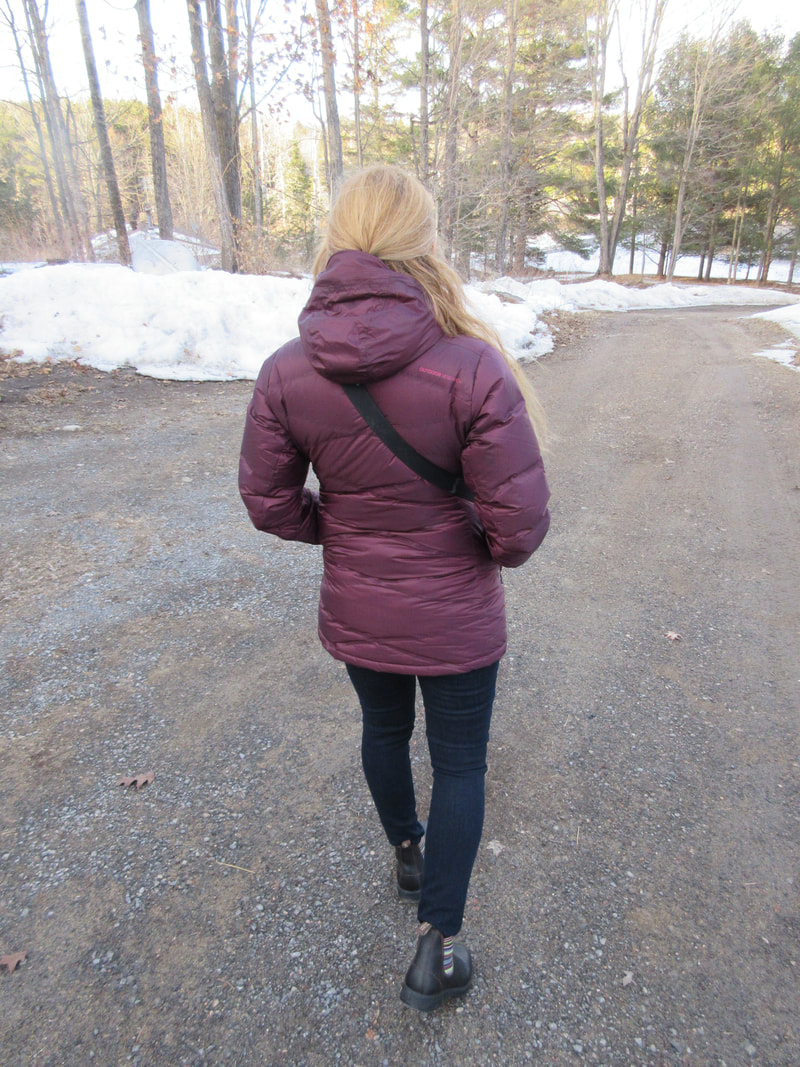
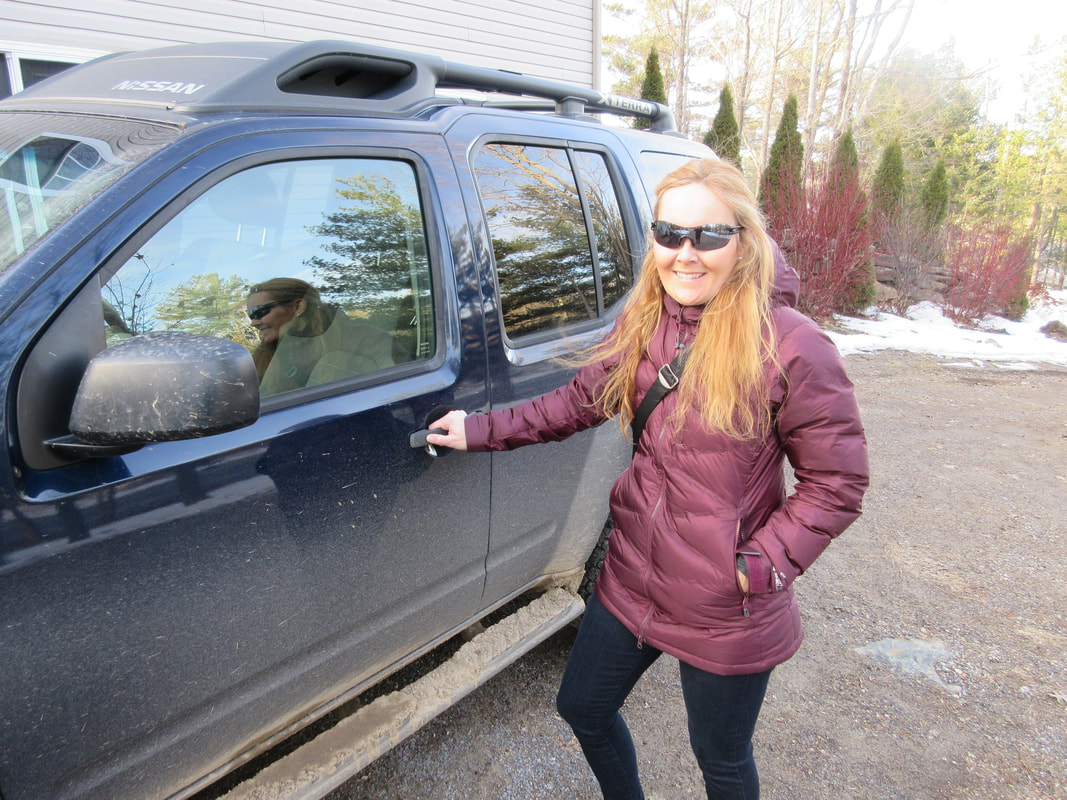
Style- OR has expanded it's colour selection for women in recent years and so the jacket comes in a variety of colours. They have even created a few two-tone jackets such as mine in the Pacific Plum/Amethyst. I am enjoying these new style options for women - I am not a fan of the old way of taking a men's garment and 'shrink it and pink it' for women's outdoor clothing. I also like the new fit of the women's clothing...not too tight and not too loose. Warmth- I have used the Transcendent Hoody the entire winter which had temperatures from above freezing to -30 below. I generally used the jacket as a mid-layer for resort skiing under a shell which worked fabulously. I also used it to throw on and off before and after cross country skiing and snowshoeing in the car. I can't say that I was ever cold in the jacket - it performs well for warm and is not lacking warmth by any means but I didn't use it as an outer layer when standing around in the winter. I am looking forward to using it this spring as a hiking lunchtime layer and as a stand along when spring camping. It hasn't replaced my belay parka and winter camping expedition down jackets but does the job for an in between layer. Weather Resistance - The 20D ripstop nylon feels lightweight and slippery. It has been able to handle some light moisture (moist snow and light rain). It protects me from the wind well and the hood is great at bumping up warmth and protection if the weather is not agreeable. Cons: Baffle fill-When I saw the Transcendent online, the wide baffles and photo made me think that jacket would be a mid-poof-sized down jacket landing somewhere between my expedition size down jacket and my lightweight thin down jacket. When it first arrived I was disappointed to see the baffles weren't completely stuffed resembling more of a lightweight thin down jacket. I'm not sure what the ratio of down to feathers is in the baffles but they seem to be evenly filled and puff out somewhat but not to the degree I was imagining. I would recommend that it be distinguished a bit more from the Outdoor Research Illuminate 800 fill (which is competitive with the top 800 fill lightweight jackets on the market) and an expedition puffy, even if it decreases compressibility and increases weight. I would fill the baffles and fatten the jacket out a bit more. Sure it might mean that it doesn't work as a mid-layer anymore, but that's what the jackets like the Illuminate are for. I would love a puffy that works as an outer layer for non-expedition temperatures. Durability - The 20D nylon fabric has stood up to all the use and abuse I have put it through this winter. While wearing it I threw my alpine skis over my shoulder, leaned the metal edges of my xc skis against it and even got it caught a couple times in doors and backpacks. So far it has stood up to the test of time unlike my 10D Ghost Whisperer puffy that has multiple holes in it. I do hope it continues to shine but if this is what has given the puffy it's lightweightness, I have to question it's long term durability. Best Uses: Mid-layer for resort skiing, an overlayer for aerobic winter activities, hut puffy, casual. Disclaimer: I was given this puffy as part of the #ORInsightLab. The opinions expressed in this review are completely my own. 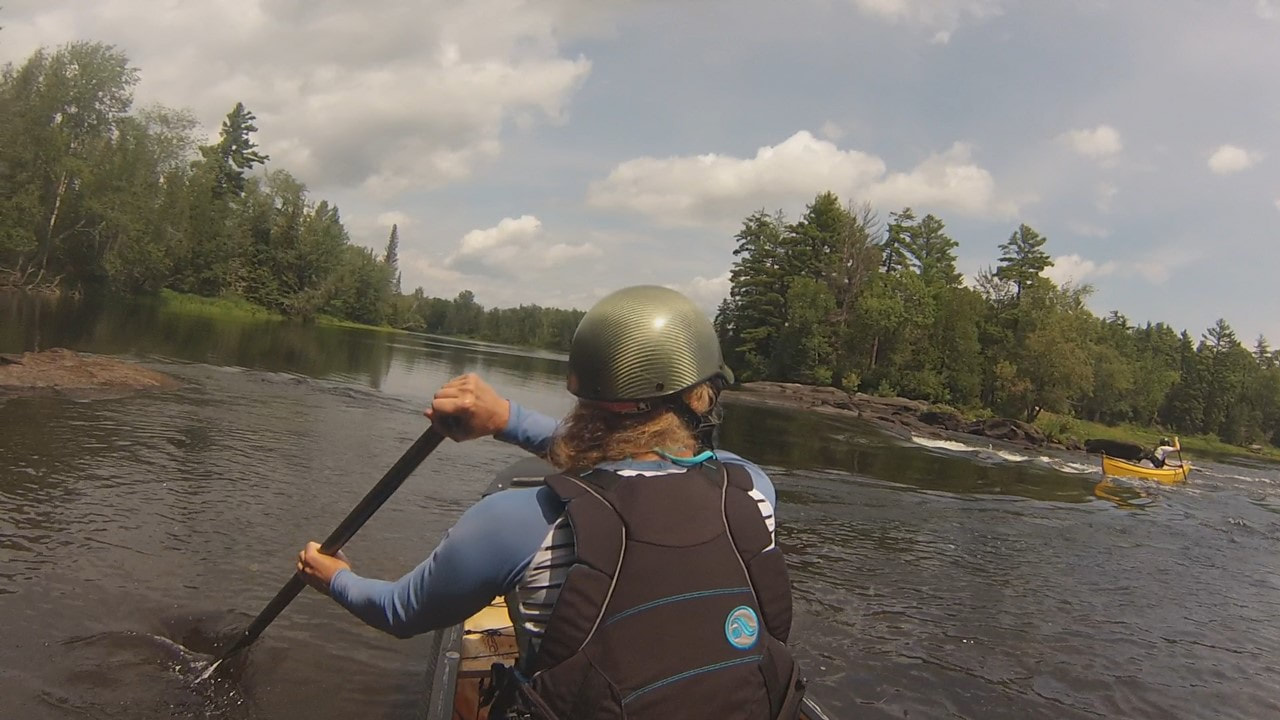 Level Six Venus Longsleeve Rash Top The Level Six Venus Longsleeve Rash Top is a practical paddling sun protection garment. I tested this top out over two summers (2017 & 2018) while sea kayaking, whitewater kayaking and canoeing. Level Six Venus Longsleeve Rash Top Sizes: XS to XL Colours: Black Ripples, Laguna Ripples, White, Dark Purple (2018 colours) Price: $54.99 CDN or $41.99 USD Features: The combination elastane/polymide fabric provides a snug athletic fit over the user's body. The fabric also provides a UPF50+ sun protection rating. The fabric seams are sewn together by flat stitching to protect the user against chafing. Pros: Comfort/fit - The snug but athletic fit of this top is one of it's best features. It fits close to the body which works extremely well under a PFD or other drytop layers. It feels comfortable on and the flat seams prevents any chafing. I love wearing it! UV Protection - One of the best shirts I have ever owned for sun protection. In 2017 I primarily used this shirt on whitewater rivers but on a 2018 trip I used it on Georgian Bay, a large body of open water. I was on the only one with a longsleeve UPF top and the only one that didn't get sunburned. Even in hot weather the shirt doesn't feel hot and I would highly recommmend it for summer paddling of all kinds. Style- This Level Six top comes in a variety of colour combinations that are both eye catching and coolio. I have a 2017 top, but I love the 2018 colours as well. I have received many compliments and jealous looks from other paddlers! Cons: The darker blue areas of my shirt have faded slightly over the past two summers of use. The difference is noticeable to me but isn't to others. It's just a sign the top has been used - and used a lot! I may need to get another one! Best Uses: Watersports of any kind!  Level Six Explorer Bungee Rand Touring Skirt The Level Six Explorer Bungee Rand Skirt is a neoprene touring skirt made for sea kayaking. I tested this skirt out on multiple day trips and one multi-day camping trip during the summer of 2018. Level Six Explorer Bungee Rand Touring Skirt Tunnel Sizes: XS-XL Kayak cockpit compatibility: Vary, check this link Colour: Black Price: $159.99 CDN or $122.99 USD Features: The Explorer features a flexible neoprene deck with a bungee seal that can fit a wide variety of boats. The tunnel features 2mm thick neoprene and comes in 5 different sizes. The skirt has a red nylon pull loop for quick wet exits. The underside of the skirt is home to two interesting features. One is a removable implosion bar that is used to give your skirt some extra structure and security if a large wave were to crash down on it. Secondly, the underside has a urethane grippy layer beside the bungee enabling the skirt to seal more securing on your kayak rim. Pros: Seal- The Explorer Touring Skirt has one of the best seals that I have ever tried. It kept me dry in 3 foot swells when waves crashed down over the cockpit. I have rolled the boat (for fun) a few times and the seal works perfectly. I enjoy how I don't get wet out kayaking flatwater from drips from the paddle as well. The quality of this product is outstanding. Tunnel sizing- I opted for a larger-than-normal tunnel size (large) so that I would be comfortable on long days touring as opposed to my whitewater kayaking tunnel size of medium. It also gives you the opportunity to vent more if in hot weather. My husband also upsized and we both thought it was a great idea, especially for those with a whitewater kayaking background who are unlikely to flip in waves. Neoprene- I have used coated nylon and Gore-tex touring skirts in the past but prefer the security of the neoprene skirt. Why? I intend on kayaking into late fall and again early spring in cooler water temperatures and I know this product will enable me to keep warm, dry, and secure in those settings. Neoprene also sheds water better than nylon/Gore-tex in big waves and keeps you drier. The implosion bar and neoprene fabric combined gives the skirt even more structure, preventing water from collapsing your skirt. Overall impression- A high end touring skirt for those intending on visiting bodies of water with swells or surf. I would definitely recommend it to anyone looking for skirt they never want to have to upgrade. Cons: The biggest con for this skirt is the 'break-in' phase. Both my husband and I own Wilderness Systems Tempest kayaks (165 and 170) and we both had difficulty initially getting the skirt on the boat. The first time we tried it in our garage it was a two person job and we probably could have used a third set of hands it was so difficult. We weren't sure at all it would even fit. We did eventually get it on and let it stretch out on the boat for awhile. The first few times I used it to actually paddle I needed a second person to help me get it on. Once on and eventually wet, it was easier for me to do myself. I haven't asked for help for months now! If you can get through the initial phases without being frustrated, the spray skirt is fantastic! Best Uses: Sea Kayaking in areas with swells or surf. Early or late season kayaking anywhere. 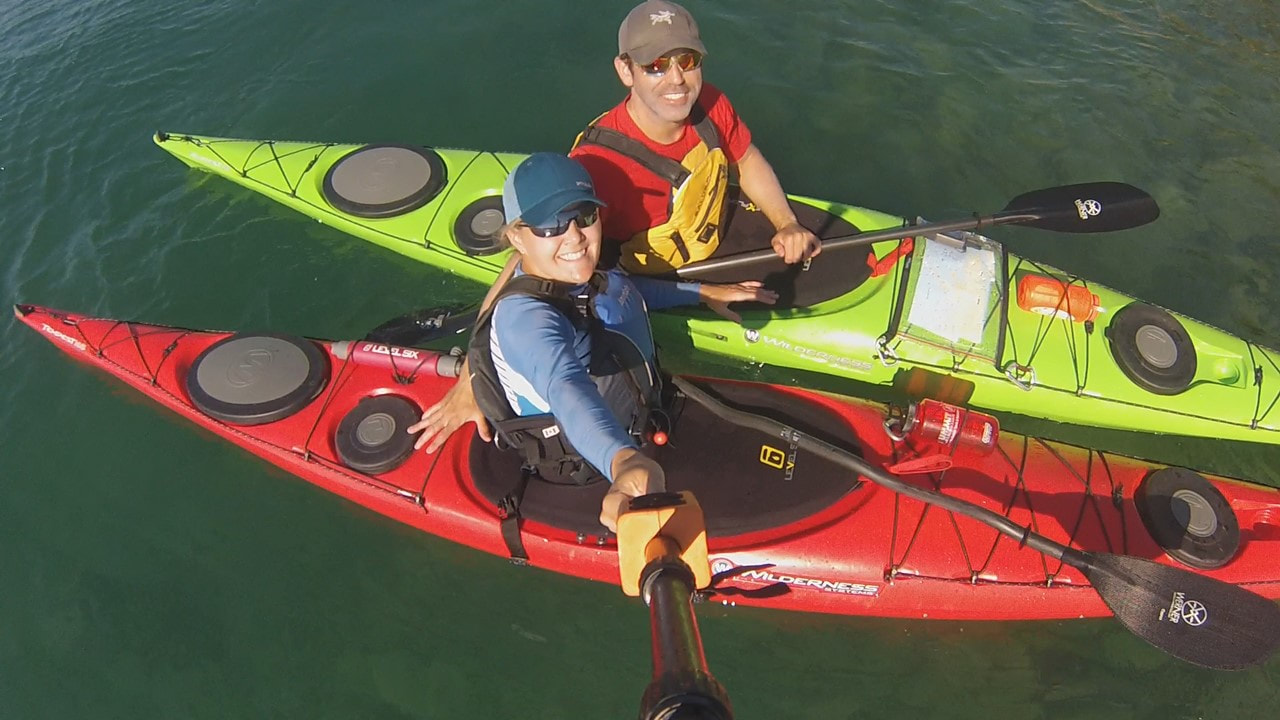 Georgian Bay sea kayaking 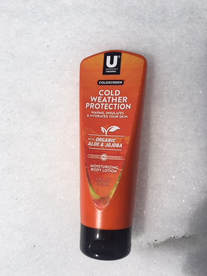 UThermic Coldscreen UThermic Coldscreen As an avid cold weather female adventurer, I struggle with keeping my hands from freezing. If you're like me you carry multiple pairs of gloves and mitts with you on outings, use chemical hot packs and have spent the big bucks on battery operated gloves. The struggle to keep my hands warm and dry is real, and if mismanaged leads me to have frozen fumbly fingers that can't manage to do up a zipper. The thawing out process can bring tears to my eyes and can take 15 minutes of straight walking just to re-gain circulation. Another option was presented to me recently that I was desperate to try: UThermic Coldscreen. UThermic is a heat-producing moisturizing body lotion that I tested out over the winter of 2018 while hiking, cross country skiing, ice climbing, and downhill skiing. UThermic Price: $24.99 for 5.1oz My results: Reading the instructions for use of the UThermic Coldscreen product is key to its use. Here are my best tips in order to maximize its effect: Tip #1: Apply before going outside I found the product worked best by applying about 15 minutes before use. If you are travelling by car or handling gear, wear handwear so that the coldscreen doesn't come off. The best way I can describe the warm sensation is that it is similar to a tingling hot cinnamon candy in your mouth! Tip #2: Wear your insulated, windproof handwear A rookie mistake I made is anticipating your hands will get hot and wearing thinner gloves or mitts. I suggest wearing your insulated windproof handwear until the product heats up. If the warmth becomes too hot, then switch out to your thinner handwear. Tip #3: Don't touch sensitive areas with bare hands Habits are hard to break . I wiped my nose one day and transferred some of the lotion on to my face by accident. Big mistake! A male friend of mine had to urinate and transferred some Coldscreen on a sensitive area! I found you had to be consciously mindful of where you are touching! Tip #4: Move! I found more rigorous the movement the better the product worked. Higher aerobic intensity winter activities like cross country skiing produced the greatest warming effect while downhill skiing and ice climbing were less. That said, even in activities that are more sedentary, I still found the lotion prevented my hands from getting to the freezing level they normally do. Tip #5: Pack your tube in a Ziploc I mistakenly packed my Coldscreen tube in my luggage on one winter hiking trip. Some residue must have still been on the outside of the tube and was absorbed by the clothing I packed. I had one hike that I suffered annoyingly very hot inner elbow and collarbone as a result of lotion getting on my baselayer! I now pack it in a plastic bag. Tip #6: Wash your hands in cold water After exercising it's normal to hop in the shower which I did the first time I used UThermic Coldscreen. It didn't take long before I regretted the feeling of hot water on my hands, which amplified the heating effect. Make sure to wash the lotion off in cold water thoroughly before entering a shower or hot tub! Pros: UThermic Coldscreen works. My hands never got to the point this winter full on freeze and painful thaw. I ditched my battery operated gloves and chemical hand warmers and fully committed to using the product. I continued to pack multiple sets of handwear like normal and swapped out gloves and mitts depending on my output and how hot my hands were. I like the idea of not producing so much waste as there is with chemical hot packs and spending less money than battery operated gloves. The 5.1oz/150ml bottle lasted me a whole winter and I have some left over for next year! UThermic Coldscreen is made from 98% natural ingredients. This is important to me as I don't like putting unnecessary chemicals on my body. The bottle is recyclable and so is the box it came in. The lotion is fragrance free and its not tested on animals. It is safe for all skin types. The product's effects lasts 4-6 hours. I never had to re-apply even on longer days in colder temperatures. When sweating the lotion doesn't come off or lose intensity. I felt like it worked as hard as I do out there! In fact, I felt the product reduced the normal amount of sweat moisture that gets absorbed in my handwear. Thank you UThermic for making such a great product! Cons: I spent most of the winter trying to find consistency while using this product. Some of it was user error (not reading the instructions carefully) but also I found that the product varied depending on how much I put on and what I was doing. Hopefully next year I will follow my tips above and find the consistent pattern. I will update this review with any further tips! While using the product, I found myself in a couple awkward situations in the ski lodge when meeting someone for the first time. I had to explain why I couldn't shake their hand as per social custom. Lastly, I had some concerns when it came to eating outdoors with the lotion on. I wasn't sure if I should eat my lunch with my bare hands (ingestion concerns?) so I had to wear thin liner gloves to eat. That proved difficult in some situations (ie opening packaging, etc). Best uses: Active winter wear. If you are prone to cold hands and feet and/or have Raynaud's Syndrome. Full disclosure: I was given this product for the purpose of this review. The opinions expressed are completely my own.  No gloves at -15C/9F! The Tubbs Flex VRT is an aggressive backcountry snowshoe made for mountain use. I tested these snowshoes over the course of 3 months during winter 2017-2018, putting on 62 miles/100km in a variety of snowy environments. As a previous owner of the MSR Lightning Ascents and Atlas Elektra's, I feel I can accurately gauge the performance of the Flex VRTs in comparison to its competitors. Tubbs Flex VRT- Mens and Womens Price: $259 USD Size: 22 (womens), and 24 and 28 (mens) Weight: 4lbs (22), 4.5lbs (24), and 5lbs (28) Features: The Tubbs Flex VRT features a flexible plastic decking with a flexible tail area, heel lifter bar, aggressive Viper 2.0 toe crampon and traction rails, and a hinged dynamic fit binding system. The binding system uses BOA cinching technology, used in helmets as well as footwear for golf, hockey, snowboarding, hiking and running. Pros: Climbing ability- Upon first glance at these snowshoes, you can't help but notice the aggressive crampon under foot as well as the gnarly side traction rails. After months of testing one thing is for sure: these snowshoes are made for climbing. Hard pack, powder, ice- these snowshoes are amazing at ascending and descending the steepest terrain. My favourite place to use them is the Adirondacks! My husband bent the crampon on his MSR Lightning Ascents (they have now changed the material as this was common) but has yet to have any issues with Flex VRT carbon steel crampons. Binding system- I am in love with this simple to use binding system. The harness opens up so easily that I can step my foot in and be ready to go in no time. For people like me with cold hands, I don't even have to take off my mitts to get my foot in or out of the shoe. My husband and I both appreciated not having to do up 8 individual rubber straps each time we put on and took off our snowshoes like we did with our MSRs. The BOA system is very easy to use but the cables are exposed and I worry about the longevity in the backcountry and worry if one broke while adventuring. You can buy replacement cables if one does break and so far I have not had any issues. The binding system is hinged, allowing for freedom of movement unlike my old Atlas Elektra snowshoes, which recoiled like a flip flop sending snow up my backside. Lastly, I used the binding with mountaineering boots, hiking boots, and winter boots and the binding fit well on each type without an pressure points. Stride- The Flex VRT snowshoes have one of the most natural stride feelings I have ever had in a snowshoe. Both my husband and I love how you can just walk normally and not have to adjust how you walk. Efficiency when moving in snow is important and I feel like these snowshoes do not feel clunky or awkward. Decking- The flexible plastic decking especially in the tail area is useful on uneven terrain. In the Adirondacks, roots and rocks are covered but snow makes travel sometimes awkward on snowshoes except for the Flex VRTs. The torsional decking adapts to the terrain and allows for ease of travel. The only issue I had with the decking is on hard pack terrain when the decking creates a lot of noise making it somewhat difficult to have a conversation with your buddy. Float- In deep powder I found the float sufficient for my weight. The decking was able to displace my body weight with a pack and lifting my foot wasn't arduous. Durability- After putting these snowshoes through some tough environments, the Flex VRTs are showing very little signs of wear. I am very optimistic that these snowshoes will pass the test of time and be able to withstand the abuse that backcountry travel inflicts on them. So far they are bomber! Price- Tubbs Flex VRT wins the price comparison- The Tubbs Flex VRT MSRP: $259 USD, MSR Lightning Ascent $299 USD, and Atlas Aspect $289 USD Cons: Weight- As a woman who travels in the backcountry I count every gram I carry. The Tubbs Flex VRT 22 inch long snowshoe pair weighs 4lbs vs the MSR Lightning Ascent 22in snowshoe weighs in at 3lbs 12oz. Believe it or not, you can really feel the extra weight- one of my test days involved wearing one of each. If the snowshoes could drop an ounce or two it would make a big difference on long days. Packability- I carried these snowshoes on a backpack a few times. Due to the bulky binding system, they don't pack together as well as the MSRs but they are better than my old Atlas pair. Heel Lifter Bar- Although I loved the heel lifter bar and its height, I found it difficult to raise while wearing thicker mitts. To lift it, you had to slide your finger along the a depression in the decking (see photo above) which worked using thinner handwear but not thicker. I would suggest using a bar with a curve it in or creating an easier way to lift the bar up. Best Uses: Steep mountain terrain where grip is essential. Full disclosure: Tubbs provided me with these snowshoes for the purpose of this review. The opinions expressed are completely my own. The 2017-2018 Outdoor Research Floodlight Jacket is marketed as a waterproof and windproof down jacket made for a variety of outdoor uses. I tested this jacket out during the 2017-2018 winter both personally (casual and belay use) as well as professionally as an outdoor education teacher. Outdoor Research Women's Floodlight Jacket Price: $395 USD Size: XS-XL Colours: Black/Charcoal, Night/Ultraviolet, Pinot/Raspberry Weight: 20.2oz or 572g for Size Medium Features: The Floodlight jacket features Pertex Shield+ 2L 30D ripstop nylon which provides a waterproof, windproof breathable shell protection. The durable water repellant (DWR) finish enables both snow and rain to shed easily from its threads. The jacket is packed with 650 fill goose down with a wire-brimmed helmet compatible halo hood. It has 3 external pockets and 2 internal pockets, velcro cuff closures, 2 way zipper openings, and stretchy underarm panels. Pros: After wearing the Floodlight jacket over the past few months the number one thing I love about it is that I can wear it in almost all conditions. Our winters in the northeast have become extremely volatile including weekly changes in precipitation: snow, rain, and freezing rain. I love how I can wear this jacket in any weather and not have to worry about the forecast. As an outdoor education teacher, I spend a lot of time outdoors facilitating outdoor activity and do more standing than I do moving. This jacket was the perfect solution: warm, waterproof, windproof, and durable. I would totally recommend this jacket to anyone who is an outdoor professional who needs a bombproof warmer layer for sedentary phases of instruction. The cut and style of the jacket is another reason to love this jacket. I really enjoyed it's longer bum-covering length especially when belaying, teaching, and wearing skinny jeans or leggings! I found myself grabbing this jacket over my shorter length ones in colder weather. It's very flattering and I get many compliments. When belaying I really liked the two way zipper feature and halo hood. The zipper opens from the bottom of the jacket (while the top is still closed) allowing you to belay using a harness while keeping your bum warm at the same time! I also enjoyed the halo hood feature - it grabs your helmet and allow you to turn your head more naturally with a hood on. As for sizing, the medium fit me perfectly. I am normally between sizes in OR gear (small and medium) but for this jacket I recommend to select the bigger size if you are in doubt. Cons: My biggest con with this jacket is its weight. At 20.2oz (572g), it is almost double the weight of my other down jackets. I couldn't bear to pack this jacket for my longer distance adventures as it simply weighs too much. My second con with this jacket is that I could not wear it in very cold temperatures as it was too thin and not warm enough. The 650-fill goose down kept me warm until about -15C/5F but any colder I would have select a different jacket. I would suggest upping the level of insulation so it could be used in colder environments for sedentary use. Best Uses: Casual, Guiding, Short-distance adventuring. Full disclosure: The Floodlight jacket was given to me from OR for the purpose of the review. The opinions expressed in this review are completely my own. |
AuthorCanadian gal hooked on pursuing outdoor adventures, testing outdoor gear, and a passion for outdoor education. Archives
April 2023
Categories
All
|


 RSS Feed