Welcome to KPW Outdoors
  • Home
  • About
  • Blog
  • Gear Reviews
  • Trip Reports
  • Media
  • Contact

KPW'S 2020 TOP 10 FAVOURITE PIECES OF WOMEN'S GEAR

15/11/2020

0 Comments

 
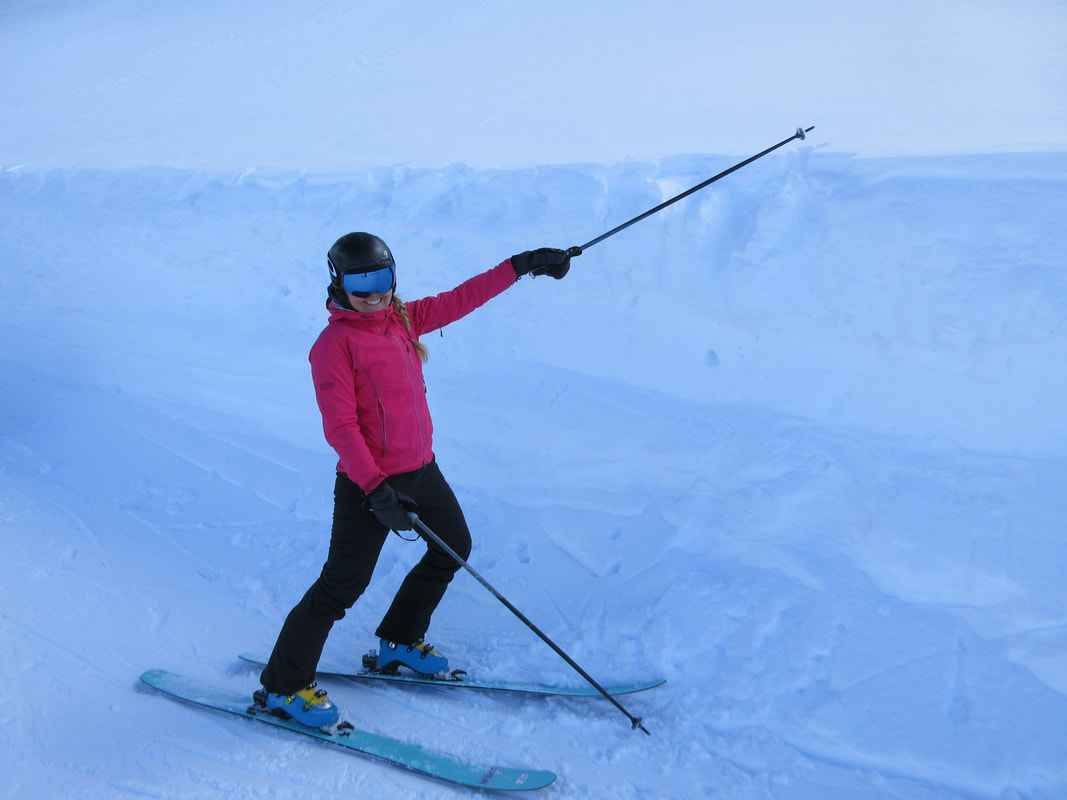
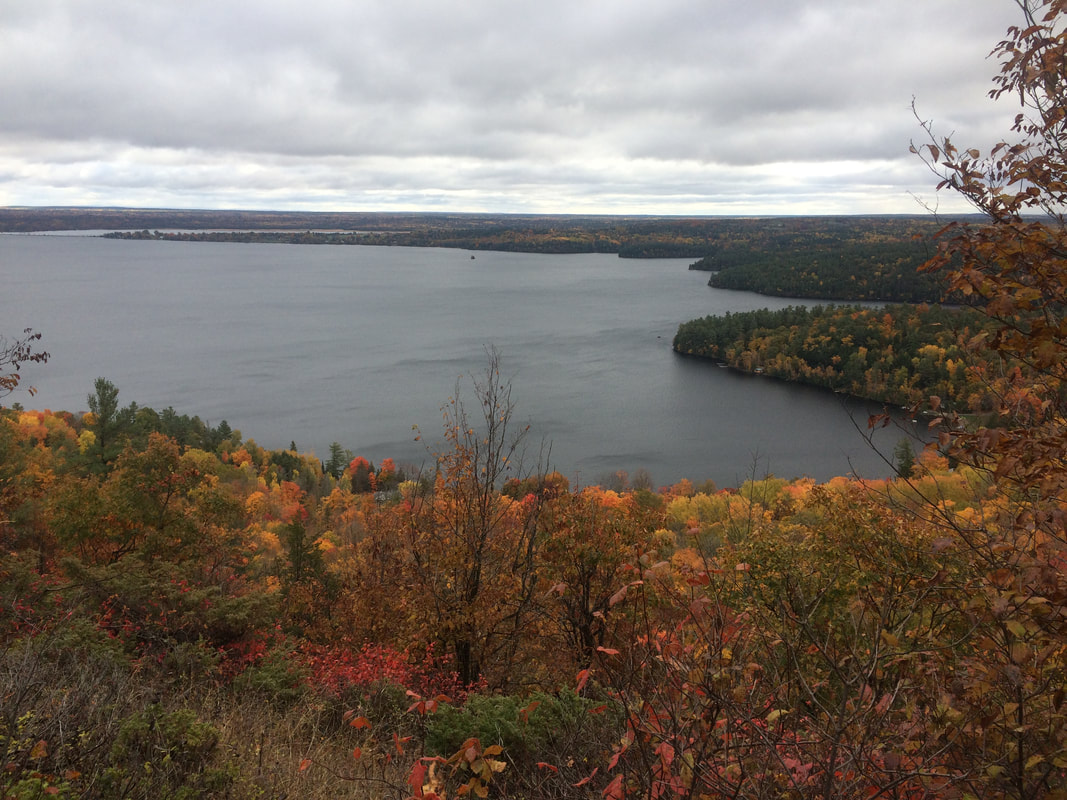
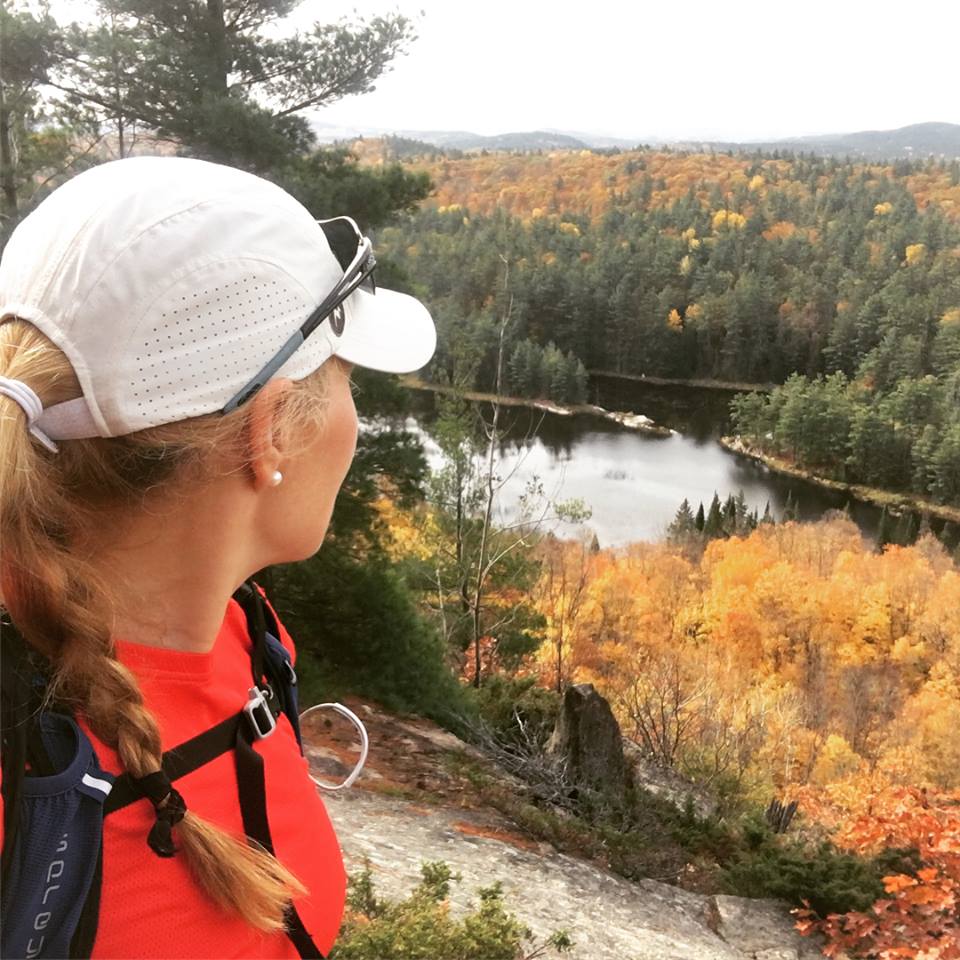
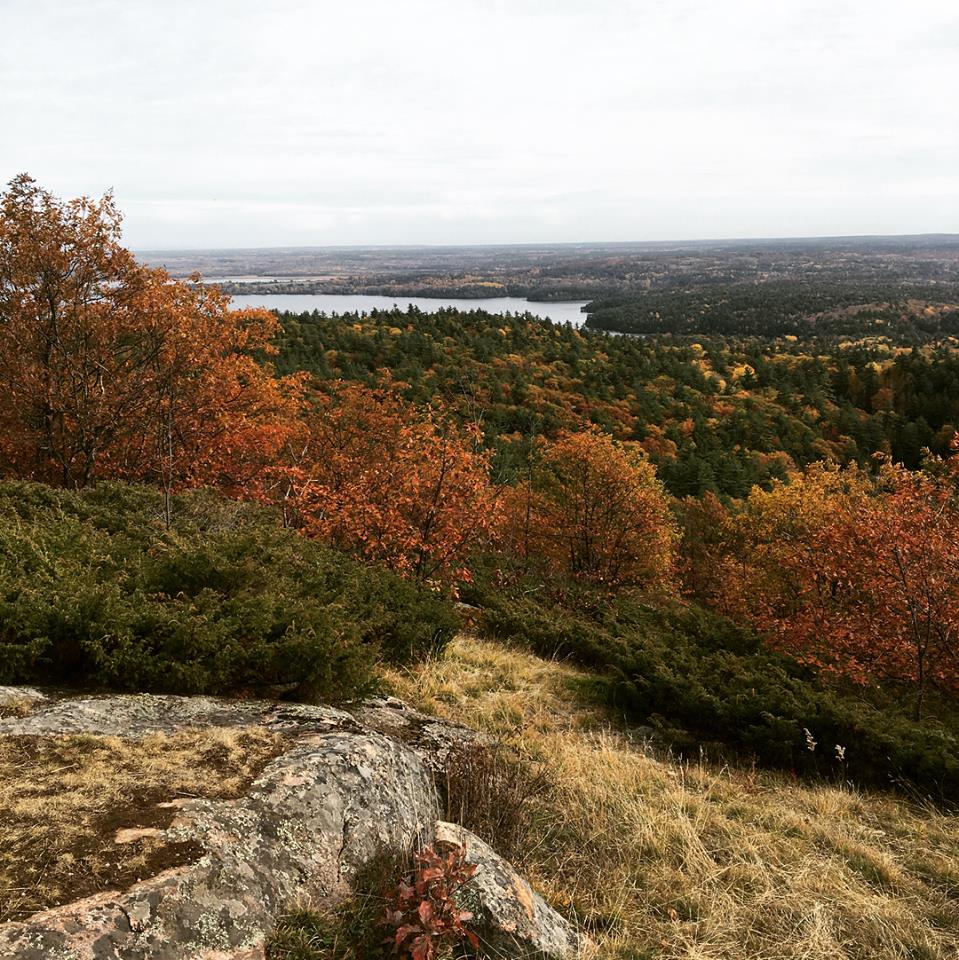
2020 has been an interesting year for gear testing. In some ways I had more time to get outside, but in other ways, there wasn't a whole lot of travelling or epic adventures. I did a few backpacking trips and a few canoe trips this year as well as did lots cycling, climbing, and hiking. Here is my compilation of my favourite pieces of women's outdoor gear from 2020:

1. Purple Rain Hiking Skirt
Over the past few years I have tried a number of hiking skirts from companies like Mountain Hardwear, Indygena and Mont Bell. Hands down my favourite of them all is the Purple Rain Hiking Skirt. An A-line designed skirt with just the right amount of flare to not inhibit range of motion while still looking stylish and slim. It doesn't stick to sweaty skin, does not ride up, and dries quickly. I love the extra air flow it provides in humid conditions and the side pockets to stash your phone or other gear. I might have to get a second one!

2. Outdoor Research Refuge Air Jacket
A big move in the outdoor industry are these synthetic fleece fibers (ie Polartec Alpha) that are capable to dumping and trapping heat for you so that you don't have to thermoregulate by layering up or down.  I have tried a several jackets made with this type of active insulation and it has been pretty amazing but I have to say that the Outdoor Research Refuge Air Jacket has hit the nail on the head. The VerticalX Air insulation is amazing. I absolutely love that jacket. Worn with only one synthetic baselayer underneath, it 's all I need for aerobic winter conditions whether it's -2C or -25C. 

3. Patagonia Barely Bra
This thin stretch breathable bra has been my new 'go-to' for hiking and backpacking. Lightweight, easy to dry and super comfortable, this bra is going to be coming on more trips with me in the future. 

4. ExOfficio Give-n-Go Sport Mesh Underwear
My favourite underwear for hiking, backpacking and travelling. Lightweight, easy to wash and dries quickly. I love these underwear for all my active sweaty pursuits. I need more pairs!

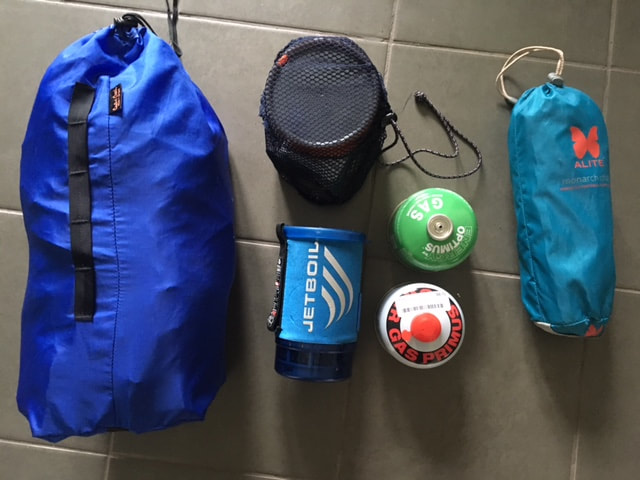
5. Trekology Camping Pillow 2.0
My new favourite camping pillow! Very affordable, and very comfortable, this pillow weighs in at 3.4oz or 100g! It packs down super small. What is great about the 2.0 version is that it comes with anti-slip dots to keep the pillow in place on your sleeping mat. Comes in multiple colours and takes no time to inflate. I like mine about 75% inflated. Great value for some that is $17.

6. Patagonia Duck Bill Trucker Hat
Tired of replacing sweat-stained trucker and running caps? Enter the Duck Bill Trucker. No sweat stains, breathable and weather resistant. This hat is highly-packable and has some really cool features. The underside of the bill is black in colour which prevents glare from searing your eyeballs. When going uphill in forested terrain, you can flip the bill up so that your line of sight is longer so that you don't hit your head on any low branches. I love how bomber this hat is - I don't worry at all about taking it with me on any summer adventures.

7. Arc'teryx Beta SL Hybrid
Arc'teryx is known for making high quality goods and this Gore-tex hard shell did not disappoint. It has been an excellent all-round shell be in a summer downpour or as a windshell backcountry hiking or skiing. At 10.6 ounces, it is my lightest hard shell and one that I don't mind carrying in my pack most of the time. 

8. Two Books: ROAR and The Hungry Spork
I don't really consider books 'gear' per se, but these two have really revolutionized my approach to training and fueling. ROAR, by Stacey Sims, breaks down female physiology and how it relates to training and performance. With this knowledge, I have completely changed my perception of training and how women can maximize their performance based around their physiology. This is fascinating for someone like me who studied Exercise Science in Uni. The second book is The Hungry Spork by Inga Aksamit who has created numerous DIY dehydrated meals for backcountry pursuits. After trying these recipes this summer, I won't go back. I felt like I never had to snack between meals and has changed the way I eat and fuel while backpacking. Both AMAZING!

9. The North Face Campshire Hoody 2.0
This cozy hoody pullover is made with Sherpa Fleece. It's like a little heater engine I put one when I have a chill or just want to be warm and cozy.  I love the hand pockets and hood - I could live in this garment this winter - and probably will! It is one of the only pieces of clothing I put on when temps drop that I instantly feel warm in.

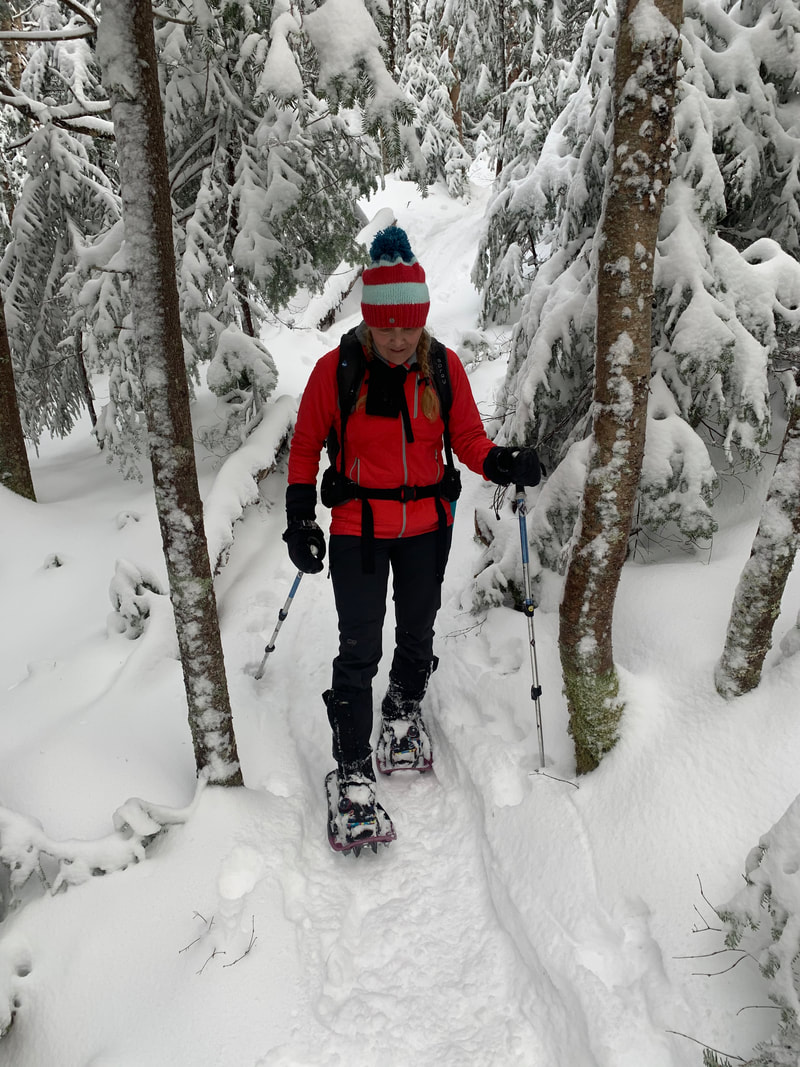
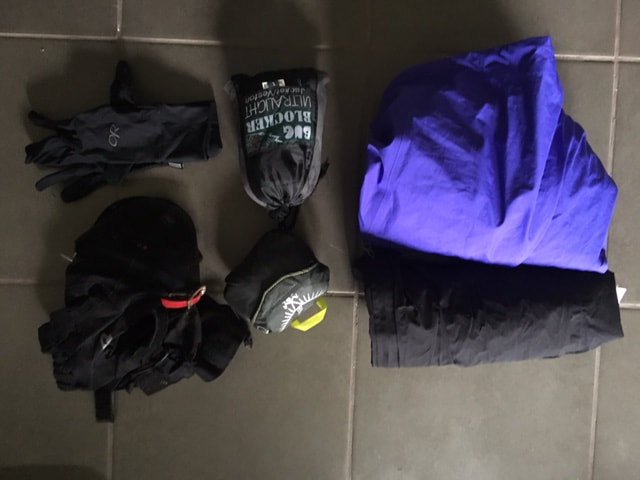
10. Outdoor Research Methow Pant
The OR Methow pant is an insulated softshell pant made for winter adventuring. What I love about these pants is that they have movement mirroring stretch and never feel bulky or stiff. They have two kinds of fleece inside them with the warmer of the two where women need it the most - around their butt. It has two leg pockets also fleece lined that are large enough to fit my iPhone XR. I wear these pants snowshowing, xc skiing, and cool weather hiking. I love how these pants are not baggy around the ankles.  I did have size up one size from my normal OR bottom sizing.

Need more ideas? Check out my top ten lists from 2019, 2018, 2017, 2016, & 2015
0 Comments

OPEONGO LAKE RESCUE OCTOBER 10TH, 2020

13/10/2020

114 Comments

 
My husband Glenn Wallace and I were involved in a canoe rescue on Opeongo Lake in Algonquin Provincial Park on October 10th, 2020. 

The press release to the media can be found here.

The media release has some inaccurate facts that my husband and I would like to correct. As he was the main rescuer in the situation, I have (with his permission) posted his account of the incident below.

My husband's account:

On Saturday I was involved in an incident that I believe should be shared as a learning experience for all. Krista Petrie-Wallace and I were planning to spend a relaxing Thanksgiving weekend camping in Algonquin Park with Rodney Wilson and family. We were to sea kayak into the East Arm of Opeongo Lake and enjoy a three day excursion into the Park.

We launched at the Opeongo Lake access point/Algonquin Outfitters location in early afternoon and had paddled uneventfully to the head of the South Arm. We then began to work our way across the most exposed section of the lake, where all three “arms” converge.

Opeongo Lake is the largest in the Park and has a reputation for rough waters in windy conditions. The wind (from the W/NW) was a steady 25 km/h with gusts that were significantly higher. Once in the exposed area of the lake our group broke into two groups. Krista and I were with the youngest member of our group and trailed the first three members of our group by a few hundred meters.
About 2:20 PM Krista commented that she thought she saw an overturned canoe and two upright canoes in the distance to our east. It was difficult to tell with the distance and 2 foot wind swell. After a quick conversation it was agreed she would continue on with the young paddler and I would break off to investigate. Little did I realize this would be the start of a 2.5 hour stretch of nearly constant maximal paddling effort for me.

The three canoes were about 1 km from our location, near the entrance to Jones Bay. Paddling hard I covered the distance in minutes and approached the scene. As I closed the distance I could see 6 people in two upright canoes and 3 people swimming alongside the third canoe.

Upon arriving to the group I immediately could see a catastrophe was unfolding. My instant assessment revealed:
a) none of the three people in the water could swim with any competence, although they (and all in the group) were wearing PFDs.
b) none of the three people in the water were dressed for cold water immersion
c) none of the 9 people involved had the skills to affect a rescue
d) language barrier was a very real issue
e) there were no other people, boats, etc. anywhere near to help me
I knew that if the three people were not pulled from the water in a timely fashion they would all die. At this point the shore was about 200 meters away, but the strong wind was pushing the swimmers out into the middle of Jones Bay.

I ordered the six people in two canoes to paddle to the northern point of Jones Bay, start a fire, and prepare dry clothes for the three people in the water. I also asked if the two strongest paddlers in the group could return to help me in one of the canoes. Having a second craft would open up additional rescue possibilities.

I got the weakest swimmer of the group (she could not swim at all nor kick her legs to assist) hanging onto the stern handle of my boat and headed for shore. After 20 minutes of maximum effort paddling I had battled through the wind and towed her to shore. I told those waiting on shore to get her into dry clothes immediately.

As I started out for the second swimmer, the canoe I had asked to assist me suddenly blew by. The two paddlers were completely unable to control the boat in the conditions and immediately blew eastward into the bay, removing the possibility of any help for me. Those two paddlers were eventually blown by the wind onto the eastern shore of the bay and remained on shore until rescued.

The second swimmer had been able to kick his legs aggressively, allowing him to hold his position against the wind. I returned for him, got him holding my kayak, and paddled the 200 meters back to shore as quickly as possible. This person was able to help significantly by kicking his legs aggressively as I towed him.

At this point 6 people (including 2 swimmers) are on the northern point that marks the beginning of Jones Bay and another 2 people are in the boat that has blown onto the eastern shore of Jones Bay. The third swimmer is still in the water and has been immersed for about an hour at this point.
The third swimmer had been unable to hold his position and is now 500 – 600 meters from shore. I race out to get him, locate him, and get him on the back of my kayak. By this point we are in the middle of Jones Bay, the wind has picked up even more, and the waves are 2-4 feet high. For 20 minutes I paddle as hard as I can toward the northern shore of Jones Bay where I have taken the others. After 20 minutes I realized that it was physically impossible to pull him directly into the wind. I shifted to Plan B, which was to try to run with the wind and hopefully make the eastern shore. It was further in distance (over 1 km likely), but I was hoping the strong wind/waves would help drive me. After another 20 minutes of maximal paddling it was clear I was not making progress. The inactive swimmer hanging from the back of the boat was making any meaningful forward progress nearly impossible in the water conditions present. I realized the only way to potentially save the third swimmer was to get a motor boat.

I told him I’d be back and he bailed off my boat. I figured I could paddle the 7 km back to the launch in about 40 minutes, where help could be raised and motor boats activated. I was also holding out hope that I might see one of the Algonquin Outfitters water taxi boats in the interim and wave it down.

I’d traveled about ¼ of the way south toward the put in when I saw an occupied campsite on an island. A couple was standing on the beach looking out into Jones Bay. I quickly told them of the dire situation unfolding and asked if they had any emergency communication device. They did – a Garmin In Reach. They were not that familiar with its use, but I told them told press SOS immediately. I didn’t stop long enough to see if they were successful, but rather kept paddling south as hard as possible. I would find out later the SOS worked at 4:20 PM and emergency services began to converge on Opeongo Lake.

Just a few minutes later (around 4:25 PM) I saw the water taxi boat and was able to wave him over. After I briefed him on the situation he was able to contact a second water taxi nearby and within a few minutes both boats were roaring off into Jones Bay to locate the third swimmer.

I turned my kayak around and headed back out into Jones Bay to assist. Jones Bay is literally 4 square kilometers of water – 2 km wide at its mouth, 2 km deep. By the time I arrived 15 – 20 minutes later they were still searching. Within a few minutes of reaching the middle of Jones Bay I located the third swimmer. It was immediately obvious the situation was now exceptionally critical. With the boats nearly a kilometer away searching the eastern reaches of the Bay, I paddled toward them as fast as could. I had closed about half the distance when the boats spotted me, realized why I was probably paddling toward them, and came to me. I immediately boarded the larger of the two boats, pulled my sea kayak on board, and jumped to the front of the boat to act as primary spotter. Both boats began a high speed grid search of the area I had last seen the third swimmer.

At this point I vaguely remember seeing the red sea kayak of my wife Krista enter the scene. She had reached our campsite and returned as quickly as possible knowing my extended absence meant real trouble.

Around 4:45 PM I spotted the third swimmer (unresponsive) and pulled him into the boat. The boat operators had told me previously that the emergency SOS had the ambulance on its way. Given the condition of the third swimmer I felt his only chance of survival was to get to the launch as quickly as possible and into the care of medical professionals. The water taxi was a very large metal boat with a 225 horsepower engine – both meant for high speed work in rough water. We ran the 10 minutes back to the launch under full power. I was unable to administer any first aid during this journey as the ride was extremely rough.

Upon landing at the docks someone (I’m not certain who) jumped into the boat and began to administer CPR on the third swimmer.

There were probably 50 – 100 people scattered throughout the grounds of Opeongo Outfitters. I canvased them to see if any were doctors, nurses, or medical professionals – none were. Shortly after this the ambulance arrived.

The next phase was to ensure the safe rescue of the other 8 people. When Krista had returned she had distributed emergency blankets, etc. to both the 6 people on the northern shore and the 2 people on the eastern shore. With a flotilla of boats now in action all 8 people were safely returned to the launch.

I’m certain this event will spark much conversation around safe backcountry travel.
In the interim, everyone would be well advised to consider these two points.
1) Cold water kills. Even in southern latitudes most of the Canadian boating season corresponds with water temperatures that can kill you if unprepared.
2) Wear high visibility clothing when partaking in outdoor activities. The victim was wearing a black jacket and dark blue PFD. This made it very difficult to spot him from both my kayak and the boat.
In conclusion, both water taxi operators were fantastic. We immediately formed an effective team once I had flagged them down. I didn’t get the name of either young man driving, but they deserve kudos for their efforts. Thanks to Brandon (also of Algonquin Outfitters) who later joined the effort to help rescue the stranded survivors as well.
Thanks to OPP Constable Jason MacDougall for his professionalism while processing the aftermath of this incident.

​~Glenn~


We both feel terribly for this group and the tragic loss they have had to endure. Our condolences to the family members of the deceased.

The sad part was that this tragedy was entirely preventable. As an outdoor education teacher, I reflected on this incident and have some important recommendations that could help others in the future.
Krista's takeaways:
1. Learn how to swim. Being able to swim 200m with a PFD on could have saved a life.
2. If you travel in the backcountry or anywhere out of cell range, buy a satellite enabled beacon like the Garmin inReach. Activation enabled emergency services quite quickly in this situation. (I had one with me in my kayak, but it was not at the scene when it was needed).
3. If you own a Garmin inReach know how to use it, especially how to send an SOS message.
4. Wear high-visibility clothing when paddling and wear a PFD. You are easier to spot from a distance.
5. Learn canoeing and canoe rescue skills before backcountry travelling. Take a course through Paddle Canada or ORCKA. Know strategies and tactics for paddling in windy conditions.
6. Outfitters should screen or have a mandatory orientation in cold water conditions in the fall/spring for all canoe renters and possibly should deny rentals based on ability levels.
7. Paddle Canada/ORCKA/Canadian Drowning Coalition need to develop canoe courses and/or educational safety materials that new Canadians can understand (ie different languages).

If anything good can come from this tragedy is that the outdoor community needs to start a conversation about how the users of our parks and backcountry spaces are changing and many of these users don't have the swimming skills, canoeing skills, and water safety knowledge to be in the backcountry. The outdoor community needs to address how we can encourage these citizens to continue to explore our wilderness areas but also in a safe manner. We need to do better. Let's start this ball rolling. Share your ideas below in the comments

Wear your PFD!
Krista and Glenn
114 Comments

WESTERN UPLANDS GEAR LIST

17/8/2020

2 Comments

 
Picture
I have been doing some research on how to reduce my backpacking weight as in recent years there has been a huge jump in products that are more compact and lightweight. The Western Uplands trail will be a good test to see if I’ve learned anything!  My pack weighed in a 27lbs when we left and 21 pounds when I returned home. I have also been doing some experimenting with food which I will post in a separate blog.

Here is my gear list for the Western Uplands:
  1. Osprey Exos 58L pack size small (actually 55L) - 40oz or 2.58lbs
  2. Western Mountaineering Summerlite Sleeping Bag - 18oz or 1.1lbs
  3. Big Agnes Q Core SLX pad - 17oz or 1.1 lbs
  4. Outdoor Research Compression bag silnylon 8L - 2.4oz
  5. Osprey Rain Cover for pack - 30oz
  6. Trekology 2.0 Inflatable pillow - 2.0 oz
  7. Blue foam rectangle bum seat - 2.0 oz
  8. Outdoor Research drybag for food - 2.6oz
  9. MSR spoon - 0.35 oz
  10. Swiss Army Knife - 3.8oz
  11. JetBoil Flash - 13 oz
  12. Large Fuel container - 13.2 oz
  13. MSR Autoflow Gravity filter 4L - 11oz
  14. Lighter - 3oz
  15. GSI Fairshare cup with lid - 7.5oz
  16. GSI Infinity coffee mug with lid - 3.5oz
  17. Smart Water bottle empty - 1.4oz  x 2 bottles
  18. iPhone XR - 5.1 oz
  19. Garmin inReach Mini - 3.5oz
  20. Black Diamond Spot Headlamp - 3 oz
  21. GoPro Hero8 Black with handle - 6oz
  22. First Aid Kit - Meds, ace bandage, bandages, gauze, antiseptic, blister - 3oz
  23. Toiletries (toothbrush cut off, paste, sunscreen, lip balm, hair elastic, ear plugs) -3oz
  24. Toilet Paper and Hand sanitizer - 4.50oz
  25. Kula Cloth - 0.5oz
  26. Bug repellent - 2.38oz
  27. Outdoor Research Ferrosi convertible pants - 11.1oz
  28. Marmot Driclime Windshirt with hood - 7.3 oz
  29. Arcteryx Beta SL Hybrid Shell - 10.90z
  30. Mountain Hardwear rainpants - 8 oz
  31. Smartwool PhD Light Hiking socks - 2.50oz
  32. Patagonia capilene t-shirt - 3oz
  33. Patagonia Active Underwear - 1.1 oz
  34. Food - 6ish lbs
Wearing
  1. Patagonia Duckbill Trucker Hat - 2.2 oz
  2. Smith Pivlock V90 Sunglasses - 0.88oz
  3. Darn Tough Light Hiking socks 2.2oz
  4. Purple Rain Hiking Skirt - 4.5oz
  5. Outdoor Research Echo Tee - 2.3 oz
  6. Patagonia Barely Bra - 1.2oz
  7. Thigh Society The Cooling under shorts - 1.37
  8. Arcteryx Bora Mid GTX boots - 35oz
  9. Black Diamond Carbon Cork Poles - 17oz
  10. Garmin Fenix 5S - 2.36oz

My husband carried our MSR Hubba Hubba tent and tarp. Our other group mate carried a GPS and map.

Check out my full trip report HERE.
2 Comments

KPW'S 2019 TOP 10 FAVOURITE PIECES OF WOMEN'S GEAR

10/11/2019

0 Comments

 
Here we go again! My fifth annual top ten favourite pieces of women's outdoor gear from 2019 is out! These pieces I have used, abused and tested to be bomber pieces that I can't live without. Here's what made the list this year:

1. Kula Cloth 
The Kula Cloth is a piece of gear every outdoor woman should own. It's an intelligently designed anti-microbial pee cloth that is re-usable! It's super easy to clean and dries very quickly especially when hanging from your pack using the different snap features. I find myself packing this highly absorbent 0.5 oz piece of gear all the time. The best part is that less toilet paper gets left in our environment which makes our planet happier!

2. Arc'teryx Oriel Leggings 
For years I looked for a pair of leggings that can withstand the abuse that rock climbing demands of them. The number one issue with previous pairs was the fraying of the thread on the seams in the inner knee area. This spring I found what I was looking for: Arc'teryx made climbing specific legging designed without seams on the inner knee. Add to that the abrasion resistant fabric, large phone pocket (it fits my iPhone XR),  3 fab colours, and comfortable waistband makes this product a slam dunk. I used my one pair all climbing season in super hot and super cold conditions and they were perfect through it all. I may need a second pair of the Oriels!

3. Nemo Hornet 1P
After searching far and wide for a lightweight solo tent I ended up selecting the Nemo Hornet 1P. If you're a female counting grams looking for double walled tent (no condensation), that is partially free standing (better for pitching on rock and tent platforms) and is lightweight (2.0 lbs) then this is your tent. Yes there are lighter ones out there (without poles and cost $$$) but this little tent has been fantastic so far and I am looking forward to spending more nights in it.

4. Outdoor Research ActiveIce Sun Sleeves and Gloves
​
As a hiker, cyclist, and paddler, I often find myself being pounded by UV rays. I also find I need to adjust my layering often to suit wind and temperature swings. My favourite go-to solution this summer was to use the OR ActiveIce Sun sleeves and gloves. They saved my arms not only from getting sunburned, but also from getting bitten by bugs during bug season. They are super quick to take on or off (I can keep hiking as I do this) and stuff easily into a hip pocket or stashed in the back of my bike jersey. The ActiveIce crystals keep the fabric feeling cool next to your skin on hot days, and the gloves gripped my hiking poles and paddle well. Fantastic product!

5. Montbell Wickron Stretch Trail Skirt
​
A trend in women's hiking (and for men too!) is to hike in a skirt. I was curious about this trend so I tried it out this summer and fell in love with the idea. Much cooler than shorts, skirts allow a freedom of movement I had never experienced before. After trying out a few different brands, my favourite was the Montbell Wickron Stretch Trail skirt. Super fast-drying, stretchy, and weighs only 2.8 oz. An added bonus when wearing skirts occurs when nature calls and you don't have to bare your bum to the world!

6. Garmin Fenix 5S Watch
The Garmin Fenix Multisport watch series is a dream for any multi-sport outdoor gal. Jam-packed with features such as GPS tracking for a number of different sports including everything from pool swimming, to downhill skiing, to triathlon, to hiking, to golfing this watch can do it all. It has regular fitness tracking features like steps, stairs, and heart rate as well as sports watch features alarm clocks and sunset times. It also has a barometric altimeter as well as a barometer and has the ability to receive text messages from cellphones and inReach devices. The best part about it is that the watch face isn't huge like other brands and fits well on my small girly wrist.  

7. Outdoor Research Cirque Pants
I own waaaay too many pairs of softshell pants. The OR Cirque pants are among my favourite softshell pants for winter adventuring be it ice climbing or winter hiking/mountaineering. They withstand abuse, are super comfy and stretchy, breathable, and have an awesome waistband that keeps the pants in place. I had to go down one size compared to my normal OR pant size for these ones, but they fit well even allowing me to fit a baselayer underneath. I will be using them on several mountain days again this winter I'm sure. 

8. Patagonia Nano Puff Vest
​
One garment I keep grabbing over and over again is the Patagonia Nano Puff Vest. This thin vest is insulated with Primaloft Gold Eco and made from 55% post-recycled content. The quilting pattern is style-y and super warm which is why I almost can't leave home without it. So far it's been super durable and I've had no issues with and of the manufacturing. As with all Patagonia products you can be sure it's made in the most earth-friendly way possible and your money helps support their environmental initiatives.

9. Arc'teryx Sentinel LT Jacket
​
Gore-tex shell ski jackets are not something new, but the Arc'teryx Sentinel LT jacket has feminized their design by lengthening the hem to cover the hips. This jacket has now become a favourite of mine on the slopes. With features like a helmet compatible storm hood, powder skirt, pit zips, numerous pockets and 3L Goretex, this jacket has all you need to freeride in deep powder or slide on groomers. I love that on rainy or wet days my butt is covered on the chair ride and the longer design is warmer and slimming. I fit into the small in this jacket but went with the medium so I could fit a down puffy underneath for colder days.

10. Kong Panic Quickdraw
​
Climbing a route with a hard-to-reach bolt? Enter the Kong Panic Draw. A friend of mine had one on a recent climbing trip and I instantly fell in love with it. Like a mini-stick-clip and quick draw in one, this draw helps manage risk by extending your reach (by 30cm or 45cm lengths) to clip into that hard-to-reach bolts. Recently a rock fall at my local crag made one of my favourite routes super risky with two less hand holds and a bolt that's now 2 feet too far. The Kong Panic Draw lessened my anxiety. I saw 3 women have one at the crag that day and I can see why they are so handy, especially when some routes are set for those 6 feet tall!

Need other ideas? Check out my top ten lists from 2018, 2017, 2016, and 2015.
0 Comments

KPW'S 2018 TOP 10 FAVOURITE PIECES OF WOMEN'S GEAR

18/11/2018

0 Comments

 
Here we go again! My fourth annual top ten favourite pieces of women's outdoor gear from 2018 is out! These pieces I have used, abused and tested to be bomber pieces that I can't live without. Here's what made the list this year:

1. La Sportiva Ultra Raptor Trail Runners
These trail runners are bomber. I use them to teach Phys Ed and Outdoor ed on a daily basis as well as use them for approach shoes for climbing, travelling, and on lighter hiking endeavors. I used to use them for trail running but have switched to using the La Sportiva Bushidos. I put them through the wringer and they always seem to past the test of time. Super supportive, grippy, and durable. 

2. Level Six Venus Longsleeve Rash Top
Spending several weeks of each summer paddling sea kayaks, canoes and whitewater kayaks, I am in need of clothing that can get wet but also protects me from sun exposure. Enter in the Level Six Venus Longsleeve Rash Top. The form fitting fabric allows you to stay cool and protected at the same time. I love this piece and high recommended it for anyone who paddles.

3. Outdoor Research Women's Ferrosi Jacket
I can't believe it has taken me four years to add this staple piece of gear onto this list. This softshell jacket is amazing. I wear it year round while hiking, teaching, climbing, paddling, and backpacking. It's my 'go-to' layer for almost anything. I own four of them and recommend them to everyone. A must-have.

4. DPS Nina Alchemist 99
I upgraded my backcountry ski kit in 2017 and fell in love with the DPS Alchemist Ninas. Hands down the most fun I have ever had on skis, these alpine sticks really can do it all: ski powder, groomers and even soft ice. I love the feeling of control these skis offer as well as their playful nature. I chose the 99s as I live in the east where our powder stashes aren't too deep and at the 99 width they are still very light for the uptrack. 

5. Salomon Women's IceGlory Ski Pant
Looking for a resort ski pant that fits well, looks good and comes in a variety of colours? Look no further than the Salomon IceGlory Pant. I have worn these pants for 2 seasons and love the fit thanks to the adjustable velcro waist strap and motionfit fabric. I liked my first pair so much I bought a second pair. Still available from most stores it looks like Salomon may have re-named them to the Icemania pant for 2019.

6. Osprey Exos 58
After loving my Exos 38 pack, I decided to upgrade my mid-size pack to the Exos 58. This is by far the most comfortable loaded pack I have ever owned (and I have numerous back and knee issues). I can fit way more gear in the pack than I thought it could hold and love the way the weight is carried while on my back. I can totally see why people love it for thru-hiking. In 2018 Osprey came out with a women's version called the Eja 58. I own the 2017 version which is lighter than the 2018 and has hip belt pockets.

7. Uthermic Coldscreen
I had the opportunity to try a lotion that is aimed at keep digits warm in cold environments. This heat-producing moisturizer kept my hands from getting into the frozen-white-numb zone all last winter. You need to follow the instructions carefully as outlined in my review here. Recommended for anyone who struggles to keep their hands warm in the winter.

8. Patagonia Women's Down Sweater Hoody
I have tried several light down jackets but I keep coming back to this tried and true standby. The Patagonia Down Sweater jacket is popular and for good reason - durable, warm, and comfortable. Yes some other competitor's jackets are less heavy but this jacket will outlast those flimsy lightweights. I love using this piece as a stand alone or as a layer while skiing resorts.

9. Outdoor Research Overdrive Convertible Gloves
This little gloves have become a 'go-to' on my aerobic pursuits in cooler weather. They have become a staple while hiking, cross country skiing, and running in the winter. I love the fact you can covert them from a thin glove to a windproof mitt which comes in handy when the wind starts to howl. I love how easy it is to tuck in the mitten part when just using the glove. Great design.

10. Tubbs Women's Flex VRT Snowshoes
Looking for a snowshoe that can grip almost like a crampon? Then check out the Tubbs Flex VRTs. They are the most aggressive snowshoes I have ever used: They can handle any icy, steep Adirondack trail. They have a very easy-to-use slip on harness system that you can ben in and out of in seconds. On top of that they offer a very natural stride while in use...no awkward steps. Check out my full review of these snowshoes here.

Need other ideas? Check out my top 10 lists from 2017, 2016, and 2015.
Level Six Venus Rash Top
Tubbs Flex VRT Snowshoes and Outdoor Research Ferrosi Hoody
Salomon IceGlory Pant and DPS Nina Alchemist 99 Skis
0 Comments

KPW'S 2017 TOP 10 FAVOURITE PIECES OF WOMEN'S GEAR

19/11/2017

0 Comments

 
My third annual list of my top ten favourite pieces of women's gear is out! 2017 was less adventurous than my epic 2016 year but included several backcountry trips perfect for testing new gear. Here is my list of 'go-to' gear:

1. Black Diamond Women's Mercury Mitts
Those of you that know me know that my hands freeze in the winter time. I need a pair of go-to mitts that I can pull on easily when my fingers are frozen and fumbly. The BD Mercury mitts are my favourite - kept in my pack until I need them, and when I do they don't disappoint. I bought my second pair in 2017.

2. Outdoor Research Women's Ascendant Hoody
Brand new Polartec Alpha Direct active insulation technology is one of the best jackets I have ever worn. Keeping your temperature regulated by dumping heat in active mode or trapping heat in sedentary mode, I can wear this jacket over a wide array of temperatures. This jacket also cuts wind, and is water resistant. Mine weighs only 10.9oz making it a one-of-a-kind all purpose jacket in my books. 

3. Enso Silicon Rings
Being an adventure-seeking outdoorswoman, I often have to leave my wedding rings at home. Time spent paddling, backpacking, climbing, travelling and weight lifting can now be done with a ring on! Enso silicon rings are flexible, durable, stylish, and so comfortable you don't know you have one on! I bought two in 2017, and they have been incredible.

4. Mountain Safety Research Autoflow Gravity Filter
After using a manual pump filter for 20 years, I am now a convert to the gravity filters. There are a few companies that make gravity filters but after doing some research and having a longstanding, trusting relationship with MSR products I chose the 4 Litre Autoflow Gravity Filter. I used it on 4 trips this summer and found the MSR filter easy to use, easy to backwash, and easy to maintain post-trip. I love how this filter makes thinking about filtering water so much less of a hassle on canoeing and backpacking trips. 

5. Mont Bell Women's Wind Gloves
Mont Bell has made a fantastic product with it's Wind Gloves. Think of a nylon shell gloves with a super grippy synthetic leather palm with a polyester brushed interior to wick moisture. I wear these gloves in windy alpine environments, canoeing in cold rain storms (they work well in the rain), and can always be found in my rain coat. Weighing in at 1.1oz, these gloves are so light there is no excuse not to pack them! Buying tip: The gloves are Asian fit, so I had to size up to large.

6. Osprey Exos 38
A new addition to my Osprey pack quiver in 2017, the Exos 38 is a feature-filled, superlight day hiking pack. While not women's specific in design this pack (in the appropriate frame size) is super comfortable and perfect for it's intended use. The mesh Airspeed Suspension makes high output ascents a breeze and the ExoForm hipbelt is padded and has 2 hip pockets. The fliptop pack top is removable shrinking volume for missions that don't require the extra space. There are two pockets on the shoulder straps perfect for carrying GPS and two side water bottle pockets as well as well thought-out water bladder compartments. It's amazing that Osprey can jam pack so many features into one lightweight package.

7. Big Agnes Q Core SLX
As a side sleeper I often get pressure points on my hips from sleeping on standard camping mattresses. Not any more! The Big Agnes Q Core SLX is a super compact, lightweight, quilted sleeping pad that is 11cm (4") thick! I love how it packs up to the size of my Nalgene bottle. This 3 season pad is rated down to 15F and after using it for three seasons it passes the test. What I like best is the I-beam technology that creates a comfortable, consistent shape so that I can get comfortable backcountry sleep. 

8. Werner Carbon Bandit Canoe Paddle
As whitewater paddling ladies we need a paddle that will grab and move water with one powerful stroke. The aggressive spoon face and carbon construction provide the perfect performance when whitewater canoeing as a female. Upgrading from a plastic version, this paddle has brought my paddling to a new level. After having a Werner carbon whitewater kayak paddle since 2004, I know Werner makes durable products.

9. Marmot Women's Variant Jacket
This midlayer is one of the warmest insulation layers I own. With stretch fleece on the back and sleeves and Thermal R insulation on the front, this layer has kept me toasty for years ice climbing, and downhill skiing. I loved my hoody that I bought a few years back so much that in 2017 I bought the hood-less version. It's no surprise to me that Marmot keeps selling year after year.

10. Outdoor Research Stormtracker Heated Gloves
Hands down my favourite gloves for winter. Windstopper softshell outer with a goat leather palm, these Primaloft insulated battery heated gloves are the only reason I can ice climb in the damp cold in the east. I can't say how much I love these gloves. No more screaming barfies, no more issues with Raynaud's syndrome. Worth the investment if you can't wear gloves in the winter.

Need other ideas? Check out my lists from 2016 and 2015.
0 Comments

LOCAL TRAINING PART 3: SELECTED HIKES AT CALABOGIE PEAKS MANITOU MOUNTAIN TRAILS

30/10/2017

4 Comments

 
Picture
Hiking at Calabogie is one of the best places to hike in Ontario's Highlands. These trails are found behind the Calabogie Peaks ski hill on the thousands of acres of crown land that surround the area. The well-marked network of trails provides options for hikers of all types and can be used year round. Several junctions have trail map signs and trees have been painted or marked with signage. I have described four of my favourite hikes on the trails that focus on four different themes: social, elevation, distance, and traverse. I have included links to .gpx files for GPS use and a link to the trail map and a link on hiking gear.

Printable Manitou Mountain Trail Map link
Printable Four Season Hiking Gear List for Day Trips link

Hike #1: Social Hike Loop (1 lookout)

Distance: 7.5km
Elevation gain: 750ft
Time: ~ 2 hours
Difficulty: Easy to Moderate
.gpx file

Description: Park at the base of the ski hill near the main ski lodge. Start your hike up the Ole K & P ski run (run on the far right if looking up hill from the lodge) up the gravel road. About 400m up the hill, look for a large Manitou Mountain sign facing you, signalling your exit onto the trail on the right. This trail is wide and can allow for people to walk side by side the entire loop (hence the 'social' part of the hike name). Soon after you are on the trail you will hit two intersections on the logging road and you will need to veer left both times. Continue on and up the logging road joining the blue Manitou Traverse trail markers. At the next major intersection of the logging roads (where the word Manitou is on the trail map above), turn right and continue following the blue trail markers. Continue along the logging road until you see the Eagles Nest signs and climb the short but steep dirt path to the beautiful lookout. Once you've seen the view, return down to the logging road and turn left and walk the towards Calabogie Road. Just as you see the road and parking area (don't go all the way to the road) keep on the logging road by veering right and complete the loop soon after by staying straight on the logging road and re-joining the ski hill run. The last part of the logging road is not drawn on the current Manitou Trail Map. Alternatively, you could go straight to the road and walk back down to the ski hill.
Manitou Lookout
Eagles Nest Lookout
Ski Hill Top Hut
​Hike #2: Elevation Gain Loop (4 lookouts)

Distance: 7.8km
Elevation Gain: 1411 ft
Time: ~ 3 hours
Difficulty: Moderate to Hard
.gpx file

Description: Instead of turning into the ski hill parking off Barrett Chute Road, continue to the next lane names Mary Joanne that leads up to a set of condos. Park at the obvious dead end  turn around point. Leave the end of the turnaround on a newly made dirt logging path to join the red Bear Claw trail. Note that in 2017 there is active logging in this area (not normally an issue on weekends). Once on the Bear Claw trail (red trail markers) you will make a short and steep 400ft ascent. (Note: Don't attempt this trail in winter unless you have traction devices). At the top of the hill you hit a junction in the Lost Valley Loop and need to turn left (if you hit a small lake you have gone too far). Follow this trail and soon after you will hit another junction and need to turn left (easy to miss Fall 2017 with a fallen tree laying over the junction) that heads up a short steep out-and-back trail to the Juniper Ridge Lookout (#1). Returning to the main trail, bear left on red on trail that trends downward to a junction with a Manitou Trail Map. Here, take the Wendigo trail and follow the blazes that for a short time will be on a double-track cart path. At one point the trail will abruptly turn right and cross a water fall stream instead of going further along the double-track path. Follow the Wendigo Trail blazes as the trail trends up a hill to the intersection with the blue Manitou Trail. Here, turn left and follow blue for a minute or two until another trail junction with the Red Arrow trail (Manitou Trail sign found here). Turn right and follow red to the Red Arrow Lookout (#2). The trail leaving this lookout goes down to the left and trends downward into a valley before bottoming out and trending back upward again up a ravine to the junction with the blue Manitou trail. Here turn left and hit up the Manitou Lookout (#3) before joining the Indian Pass junction at Wolf Howl Pond. Turn left here and stay on blue but before you know it you will hit a junction with with the a steep connector ascent trail (marked in orange) to head up to the Skywalk trail at the top of the ski hill. Turn right onto this steep dirt trail. Huffing and puffing at the top, turn right onto the Skywalk loop taking in lookout (#4) before arriving to the top of the ski hill. I like to use the Top Hut and outhouse for lunch (open year round), and then descend back to my car using the Black Donald Ski run (on the far right as you look down the hill). Note: Logging activity has been present in the area as they are cutting new ski runs (Skywalk hiking trail no longer exists). Turn right towards the condos on Mary Joanne Lane before hitting the bottom of the ski run where the main lodges and hotels are.
Skywalk Loop Lookout
Looking over Wolf Howl Pond
Black Donald Ski Run
Hike #3: Distance Loop (4 lookouts)

Distance: 13km
Elevation Gain: 1650ft
Time: ~ 4 hours
Difficulty: Hard
.gpx file

Description:
​Ready for a challenge? I love this loop for it's distance, elevation gain, and the fact that it you never have to re-trace any part of the trail. Park at the ski hill and head up the Ole K & P ski run (far right if you're looking up the ski hill) up the gravel path. About 400m in look for the hiking trail sign post on the right facing you that exits the ski run and enters the forest. Follow this path which soon comes to an intersection which you will need to go straight. Follow the logging road (this section is not drawn on the map) to the where you will meet an large intersection. Going right here will take you to the road, but left will take you to Eagle's Nest lookout (#1) in about 1.5km. After visiting Eagle's nest, return to the logging road and turn right. Not long after you will pick the blue tree markers that you will follow on the logging road and eventually turn right back into the forest. Continue following blue past Wolf Howl Pond and turning right before ascending to the Manitou Mountain Lookout (#2). Leaving the lookout, not too far later is an easy-to-miss T-intersection that takes you down into a valley and up again to the Red Arrow Lookout (#3). Turn right onto red here. After visiting Red Arrow, continue straight on red to the blue junction. Turn left here and a couple of minutes later pay attention to turn right onto the orange Wendigo Way trail that will trend downward, across a river, and up to a junction with the Lost Valley Loop. Turn right onto the Lost Valley loop and right again soon after to head up to the short steep roped fourth and final lookout of the day Juniper Ridge (#4). Retrace a few steps from the lookout back to the Lost Valley loop and turn right here. At the next red intersection turn right and descend a steep path (Bear Claw trail) where you may find your way on trail (bear left)  back to the bottom third of the Black Donald Ski run and descend to your car.
Juniper Ridge Lookout
Manitou Lookout
Skywalk Loop Lookout
Hike #4: Manitou Traverse (2-3 lookouts)

Distance: 9km
Elevation Gain:
Time: ~ 3 hours 
Difficulty: Moderate
.gpx file

Description:

Follow Blue tree markers this entire hike.
Park on 6573 Calabogie Road at and the blue sign post indicating the Manitou Mountain Trail. Park a second car at 342 Barrett Chute Road in order to complete the traverse.  Beginning with a steep uphill, stay left at the first junction (other trail leads to the rock climbing and ice climbing cliffs). Follow the blue markings on the trees along the top of the cliffs (sometimes right on the edge) all the way to the popular Eagle's Nest lookout spot. From here, do not descend down to the road rather look right and re-gain the blue blazes. Follow the trail until it eventually meets up with the logging road for over a kilometer before joining the trail again. Trending up wards, the trail rolls over some hardwood terrain before passing by Wolf Howl Pond. At the end of the pond, the trail turns right and heads up to the beautiful Manitou Lookout. This is approximately the half-way point of the trail and I often stop here for a break (and to enjoy the view). From here on you are past the halfway point and the trail generally trends downward. From the Wendigo junction, there is only 3km to descend back to the Barrett Chute Road. The trail heads down through some drainages and over a couple of ridges before dropping again and crossing a bridge. Nearing the end, the trail crosses over an ATV path (continue straight) and walk up one last time before a final downhill to the road and return to your shuttle vehicle. Note: If you have time and wanted a bit more of a challenge, the Red Arrow Lookout extension is a great addition to this hike.

​​Have questions? Contact me using the form below for more information. 
4 Comments

SO YOU WANT TO BECOME AN ADIRONDACK 46ER?

3/9/2017

6 Comments

 
Picture
"A 46er is not something you can buy or join, it's something you become" - Jim Weeks
So you've visited Lake Placid, you've hiked a 46er, and you've fell in love with the Adirondacks. Many people have become hooked to the High Peaks Region this way and once you do, it's hard to stay away. I know -  it happened to me too. 

The High Peaks region of Adirondack Park is a hiking mecca. It is a massive area containing over 6 million acres and over 2000 miles of hiking trails. According to historical measurements, there are  46 peaks over 4000 feet in height and the goal of many is to summit all of them and belong to a club of members that have done the same: The ADK 46ers. There are now over 10,000 members of this club dating back to the 1920's when many of the peaks had no access trails and hikers had to bushwhack their way up. I completed my first round in 2012, but have returned to hike most of the 46 again. I have attained summits in all months of the year. I firmly believe that if you can hike the 46, you can hike anywhere in the world.

For some it's a walk in the park, for others it tests your every limit. Some share time with old friends, some make new friends, and some go solo. According to Grace Hudowalski #9:  "There is something spiritual in it. The mountains mean something different and special to each person. They are what connect us as a group. But the journey is an inward one, learning about yourself".

If you're up for the challenge here are my tips:

1. Recording Your Hikes

Print off a list of the peaks to check off as you hike them. Many can be grouped together and done in the same day. After your hike, you need to record details of your hike like: date, time, weather, what you saw, photos, and other interesting info. These records are what helps you prove that you have accomplished the summit in order to approved by your correspondant at the ADK 46er organization. Some people make a simple written journal on paper, some create a blog, some use a spreadsheet. Personally I created a blog and then printed it off as a keepsake book afterward! To submit your record, head to the ADK 46er webpage and begin the process listed there. They used to only correspond by mail, but have begun an electronic version.

2. Trail Information

a) Each Thursday the Department of Environmental Conservation (DEC) releases an updated trail condition report for hikers hiking the High Peaks. This is an important report to read before your trip as it gives up to date information on things like: flooded areas, bear reports, closed sections of trail, seasonal information, etc.

b) Here are some other links to find out recent trail info:
TrailsNH.com - compilations of most recent trip reports from the internet for each peak
Adirondack 4000 Footer Hiking Group on Facebook - Recent photos and a community willing to answer questions
The Mountaineer- This Keene Valley store is great for speaking to someone about local conditions as well as picking up any rentals you may need (snowshoes, skis, crampons, etc). They also sell plastic coated topo type maps with hiking trails of the entire High Peaks region which you will need for your goal.

c) An excellent website for trail descriptions and timing is Andrew Lavigne's ADK website. He has multiple trip reports from every peak including photos, distance, elevation gained, hiking time, etc. He also has .gpx files that you can download and load on your GPS for those winter unmarked trail hikes. A valuable resource that sure that helped me when I did my 46.

3. Where to Stay

a) Backcountry camping in the High Peaks Wilderness areas at Lean-to's and campsites is free. These sites are first come, first served, and most require you to hike in 3 miles to reach the site. The sites normally have an outhouse and are close to a water source.  There are a couple of spots that you can essentially drive to and camp for free. One is South Meadow road on the Loj road, but it has limited sites and are almost always full. Another one is along Corey's Road near the Seward Range. There are also 2 hike-in cabins along John's Brook that have to be reserved in advance.

b) State Parks and other car campgrounds: There are numerous paid campgrounds that include campsites with picnic tables, showers and flush toilets, and running water. Popular ones include: 
Lake Harris State Campground
Wilmington Notch Campground
Adirondack Loj Campground (also have lean-to's and canvas cabins for rent)
KOA Lake Placid/Whiteface

c) Cheap Lodging
I try to camp in the summer months, but tend to gravitate to lodging in the winter months (sometimes I winter camp!). Here are some of my favourite places to stay on the cheaper end of the spectrum:
Keene Valley Hostel
TMax-n-Topos Hostel
Cascade Motel
Roostercomb Inn, Keene Valley
Adirondack Hotel in Long Lake
Cloudsplitter Cabins in Newcomb

4. Weather and Equipment

a) Make sure to check out the weather forecast for your hike. Checking the Keene Valley weather however may not give you an accurate prediction of what's going on 3500 feet above so check the National Weather Service's Mountain Forecast before you go.

b) Dress for the LOW. If the nighttime low is 25F, and the daytime is 40F, dress for the LOW. As you ascend, the temperature gets cooler. I find if you start your hike early, head up to the top and descend late afternoon, your average hiking temp all day will be around 25-30F depending on the wind. Never dress for the daytime high, and always bring multiple layers.

c) What to bring? Here is a printable list of equipment you should be bringing with you on your day hikes for all four seasons in the ADKs. Dress in layers: Baselayer (polyester,merino wool, polypropelene), Insulation (fleece, wool, down), Wateproof-Breathable Rain and Wind Shell (Goretex Paclite, Hellytech, Entrant, Pertex). Many of the hikes are remote, so if you don't have map, compass and GPS skills go with someone who does (or learn yourself!). Many hikes start and end in the dark, so a headlamp is mandatory on every hike. Many DEC ranger reports cite rescues caused by people getting caught out at night without a headlamp. Survival gear is also important as cell service is rare while hiking and shouldn't be relied on for Ranger rescues. Be prepared! Winter hikes require snowshoes, microspikes and crampons. Don't skimp on equipment! Here is the link to my list.

5. Training
For anyone who has done any ADK hiking, undoubtedly they would be characterized as 'steep', 'rocky', 'rooty' and 'wet'. Showing up without a doing some work beforehand is a recipe for failure. Here are a few recommendations:
a) Aerobic training: Swim, cycle, run, nordic walk, or hike at home on a regular basis in order to prepare your heart and lungs for the 3-12 hour long hike. High intensity intervals really help get your body ready for the steep sections when the heart is really pumping. Try 5 x 1 minute of upping your pace the next time on your run, swim, cycle, or walk.
b) Strength training: You need to prepare your legs for hiking, and your arms for pulling on roots or pushing on hiking poles. Here is what has worked for me:
- Weighted pack ascents: Find a local ski hill, or staircase, or any and load a pack with weight (waterbottles  or medicine balls work great) up to 15-30lbs for day hiking. Your body will be used to carrying a pack and weight.
-Strength training: Lunges, squats, step ups, calf raises are 4 key lower body exercises. I lunge with 2 x 20lbs x 3 sets for weeks before hikes. Triceps, lats, biceps and shoulders are also good muscle areas to train for poling or scrambling as well core training for balancing on logs, snow spines and rocks.
c) Flexibility- Stretching out your muscles and maximizing your joint range of motion is important in hiking. Scrambling up rocky sections, high steps, and jumping over brooks requires flexibility. Preventing injuries is important, and flexibility is key.
d) Additional skills - Having a background in rock climbing, ice climbing, and/or mountaineering is an asset in the High Peaks. Scrambling up rocky cliffs becomes less scary as does your footing on icy slopes if you have had training in this area. Consider this an positive addition to your hiking skillset.

6. Becoming Official
Once you have completed your 46, there are a few things left to do. One, is to submit your hike logs and join the ADK 46er organization. You will be notified of your acceptance and awarded a certificate at a banquet the following May at the Crowne Plaza in Lake Placid. Membership privileges include the ability to order official 46er swag, and receive the PEEKS magazine mailed to you home. Two, is to summit the unofficial 4000 footer mountain McNaughton! CONGRATULATIONS!!! 

What's next? If you still have the hiking bug and want another challenge, check out these other hiking challenges:
Winter 46er
Saranac 6er
Northeast 111er  (115)


See you on the trail! 
KPW
6 Comments

GEAR LIST FOR PUKASKWA COASTAL TRAIL

14/8/2017

1 Comment

 
Picture
Pukaskwa Coastal Trail Gear List
Gear List for Pukaskwa National Park Coastal Backpacking trail from summer 2017. We planned on 7 days to do the Coastal trail and Mdaabii Miikna Trail. Temps for early August are lows of 5-10 degrees celcius and highs of 18-25 degrees celcius. The trail does not gain that much in elevation, and we plan to move 10-12km per day. 

Before a backpacking trip I weigh everything. I make decisions on what I am bringing based on weight. For example, I will weigh three shirts and decide which one to bring based on which one is lighter. 

For a full detailed trip report of the Pukaskwa Coastal Trail, click here.

Here is what I'm carrying on my back:
1. Osprey Ariel Women's Backpack 75L size small (4lbs 14oz/ 2.1kg)
2. Osprey pack rain cover size large (3oz/ 0.9 kg)
3. Western Mountaineering Summerlite sleeping bag (1lb 7oz/525g)
4. Outdoor Research Compression Bag for sleeping bag 8L (2.4oz/66g)
5. Jetboil Flash stove (14oz/397g)
6. Two large fuel cans for stove (12.5oz/356g each)
7. MSR Gravityworks Filter (11.1oz/320g)
8. GSI Ultralight Nesting Bowl/Mug (4.3oz/121g)
9. Alite Monarch Chair (20oz/566g) **luxury item**
10. MSR foldable spork (0.35/10g)
11. Lighter 
12. Small container with Campsoap, J-cloth
13. SPOT Generation 2 emergency beacon (7.4oz/209g)
14. Small First Aid Kit (blister, athletic tape, medications, bandages, etc)
15. Toque (2.5oz)
16. OR Base Sensor gloves (1.2oz, 35g) and Mont Bell waterproof over gloves (1.1oz/32g)
17. Toiletry Kit: toothpaste, toothbrush, lip chap, ear plugs, etc.
18. OR dry stuff sack for clothes 10L (1.9oz/54g)
19. Black Diamond Liquid Point Shell Goretex Paclite rain shell (12.6oz/356g)
20. Mountain Hardwear Dry Q elite  full zip rain pants (8oz)
21. Big Agnes Q Core SLX Sleeping Pad (16oz/ 465g)
22. Sea to Summit Ultralight Pillow Regular SIze (5.3oz/60g)
23. Garbage Bags x 3 (for lining pack, wrapping a wet tent in, etc)
24. Food (8 breakfasts, 8 lunches, 7 dinners) (10lbs)
25. Black Diamond SPOT headlamp (3.1oz/90g)
26. Canon Powershot camera, extra battery and SD card (5 oz/141g)
27. Iphone 5S for nighttime reading and possibly useful in emergencies (5.1oz/144g)
28. 1 roll of toilet paper and small bottle of hand sanitizer
29. Sunscreen (0.63oz/17g)
30. Bug jacket (4.5oz/127g)
31. Crocs (7oz/198g)
32. OR Salamandar Gaiters (6oz/170g)
33. Amazon Kindle Paperwhite (7.2oz/205g)
34. Buff (1.1oz/31g)
35. Swiss Army Hiker knife (3.3oz/94g)
36. Nalgene Bottle, 1L (6.2oz, 175g)
37. Platypus Bladder, 1L (1.2oz, 35g)
38. Clothes: OR Ascendent Jacket (10oz/283g), OR Deviator top (6.3oz/178g) Woolx Midweight bottoms (4.8oz/136g), OR Ferrosi Hoody (11.5oz/326g), Bathing Suit, Smartwool light hiking socks (2.5oz/70g), Patagonia Button Sun Shirt (5.5oz/156g)

I will be wearing the Women's MEC Sandbagger Pant, OR Gauge Tee , Marmot ball cap, Smartwool PHd Outdoor Light Cushion socks, Patagonia active briefs and Brooks sportsbra. I will also be using Black Diamond Alpine Carbon Cork Trekking Poles, Arcteryx Bora Mid GTX hiking boots, and Smith Pivlock V90 sunglasses.

My husband is carrying our MSR Hubba Hubba Tent while I carry the stove, fuel, and water filter. Other group members are carrying other group gear like: GPS, batteries, rope, siltarps, compass, map, etc. My group gear portion is the SPOT beacon.

Approximate weight: 36lbs

**Post-Trip: I used everything I brought except my bug jacket (yay!), my first aid supplies (yay again!) and my second can of fuel (one large can was sufficient for 2 people).
Food, bowl/mugs, spoons, stove/fuel, chair
Sleeping bag, pillow, mat
Gaitors, gloves, bug jacket, pack cover, rain gear
1 Comment

HOW TO SURVIVE CAMPING IN ONTARIO BUG SEASON WITHOUT EVER BUYING BUG SPRAY

27/5/2017

2 Comments

 
Picture
Coghlan's Bug Jacket from MEC
Bug season. I can hear the groans now. From mid-May to early July, many Ontarians hide away in their homes and cottages waiting for bug season to end. Mosquitos and Black Flies prey in hordes on any exposed flesh. For years way back in the 90's I returned home from camping with blood stained clothes, wet DEET covered skin, and looking like I had acquired the measles. DEET, Muskol and other repellents do work, but sometimes not good enough. 

I have spent the last 15 years working as an Outdoor Education teacher and have spent the second week of June deep into the wildest swamps and portages in Algonquin Park (along with dozens of teenagers). By the way, high school groups are the only people in the park at that time of year. Why? It is the epi-centre of bug habitat (BONUS: It's also a great time to see moose, as they survive by standing in pools of water). I once counted 600 mosquitoes on the outside of my tent on one trip.  And I haven't use bug spray in over 10 years! How do I do it? Read on to find out:

Here are my tips for making bug season more bearable:

1. Buy a bug jacket

Bug jackets have revolutionized surviving bug season for me. I bought a jacket 10 years ago and it's still going strong (pick one up for $13.75 from MEC). Avoid buying the screen/cotton combination jackets (too hot!) and ones that have a black or dark coloured screen over the face (grey is the best). Buy a jacket if you can that is one size larger then you would normally wear as the baggy screen fabric is a key to keeping the bugs off your skin especially when wearing a t-shirt). Larger sizes make wearing it an outer layer over a fleece or hoody easier as well, and you can retract your hands in the sleeves when you have more room. These jackets are worth their weight in gold. I make them mandatory equipment on all my trips. 

2. Wear long pants

Long pants are essential during bug season. It might be 25C degrees out, but if you are in the backcountry they are a massive barrier to keeping your skin away from the bugs. Choose pants that are light enough to stay cool in, but thick enough to deter bites. Avoid pants with holes in them, or for ladies, avoid leggings as bugs can eat right through them.
​
3. Wear long socks

Ankle socks are a favourite of most people, especially during summer weather. My rule during bug season is to wear longer socks. When camping, I will wear synthetic or merino wool hiking socks and tuck my pant ends into them so that bugs can't travel up the leg of my pants and feast on my legs. It looks ridiculous, but it works!

4. Wear a baseball type hat

Wearing a brimmed hat makes sense for many reasons, but in bug season it's also advantageous. I wear a baseball hat with a solid brim under my bug jacket. This keeps the bug jacket hood and face cover off my face, and allows me to breathe without sucking in the screen fabric. Also, avoid trucker hats in bug season, as bugs will be able to bite through the mesh fabric at the back of the hat. For women with longer hair, tie hair in a ponytail and keep the bug jacket hood off your neck.

5. Wear running shoes

As soon as the snow melts, some people immediately switch to wearing flip flops, Crocs, Birkenstocks and Keen sandals. All of these should never be worn during bug season. I normally wear old running shoes in the backcountry when paddling or camping, and hiking boots when backpacking.  Camping in August? Bring the sandals then.

6. Wear gloves

Hands are the hardest part to cover during bug season. Consider bringing a thin liner glove to use when cooking or doing other tasks. When portaging a canoe, I retract my hands into the sleeves of my larger size bug jacket and watch the bugs land on the fabric, not my flesh.

By taking these tips into consideration, bug season becomes completely manageable. I never think of bug season as hardship anymore and have no problems spending time in the epi-centre of bug breeding habitat. So get outside and enjoy our natural wonders...bugs and all!

Happy Camping!
2 Comments
<<Previous

    Author

    Canadian gal hooked on pursuing outdoor adventures, testing, outdoor gear, and a passion for outdoor education.

    Archives

    November 2020
    October 2020
    August 2020
    November 2019
    November 2018
    November 2017
    October 2017
    September 2017
    August 2017
    May 2017
    November 2016
    August 2016
    July 2016
    March 2016
    January 2016
    December 2015
    September 2015
    August 2015
    May 2015
    March 2015

    Categories

    All
    Backcountry Living
    Books
    Fitness
    Gear
    Nutrition
    Training
    Trip Planning

    RSS Feed

Instructor/Ambassador for:
Picture
Picture
Picture
​<script type="text/javascript" src="http://classic.avantlink.com/affiliate_app_confirm.php?mode=js&authResponse=d43d81bd3781e1d2abd21e2d070927932a5cd5c0"></script>

​